
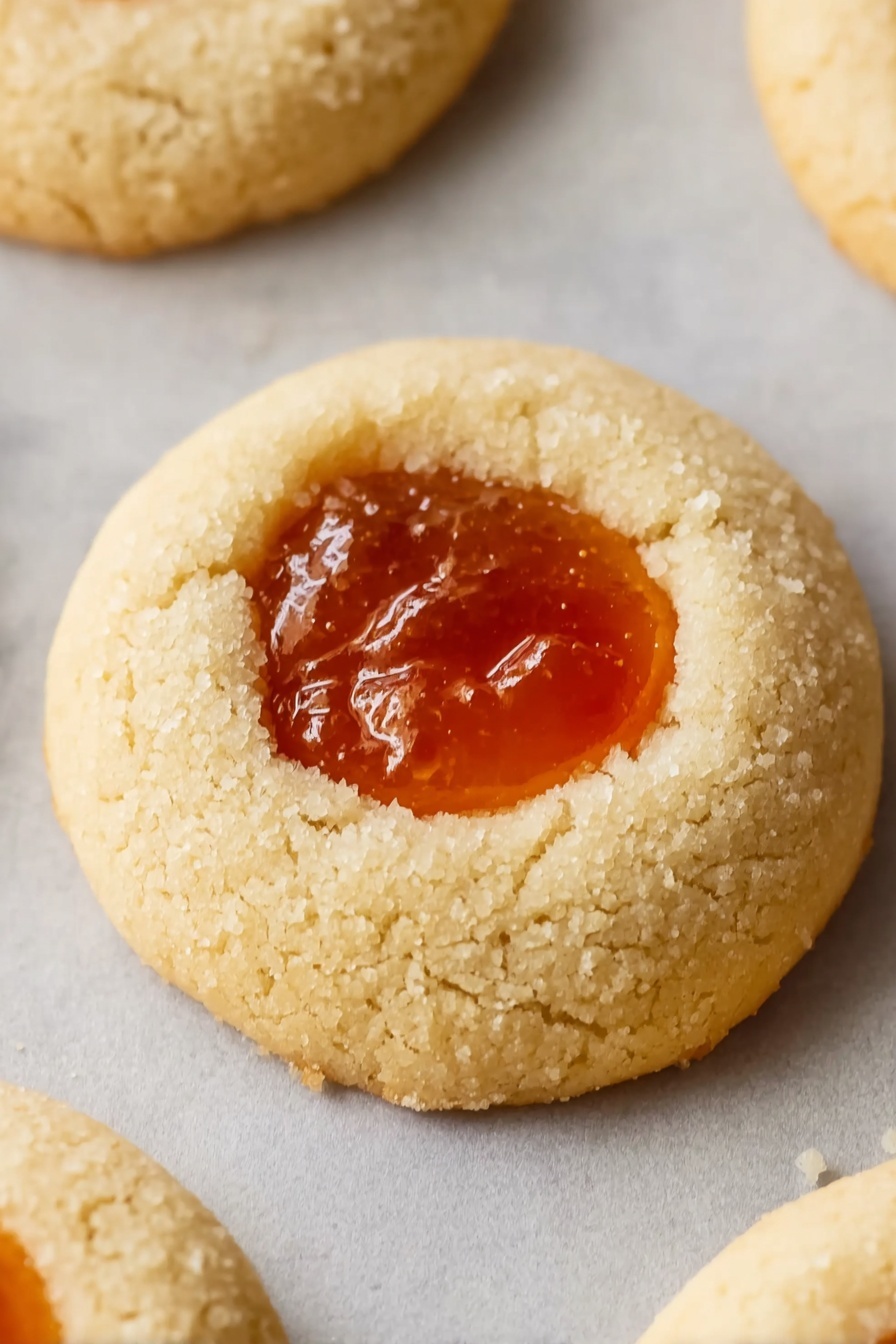
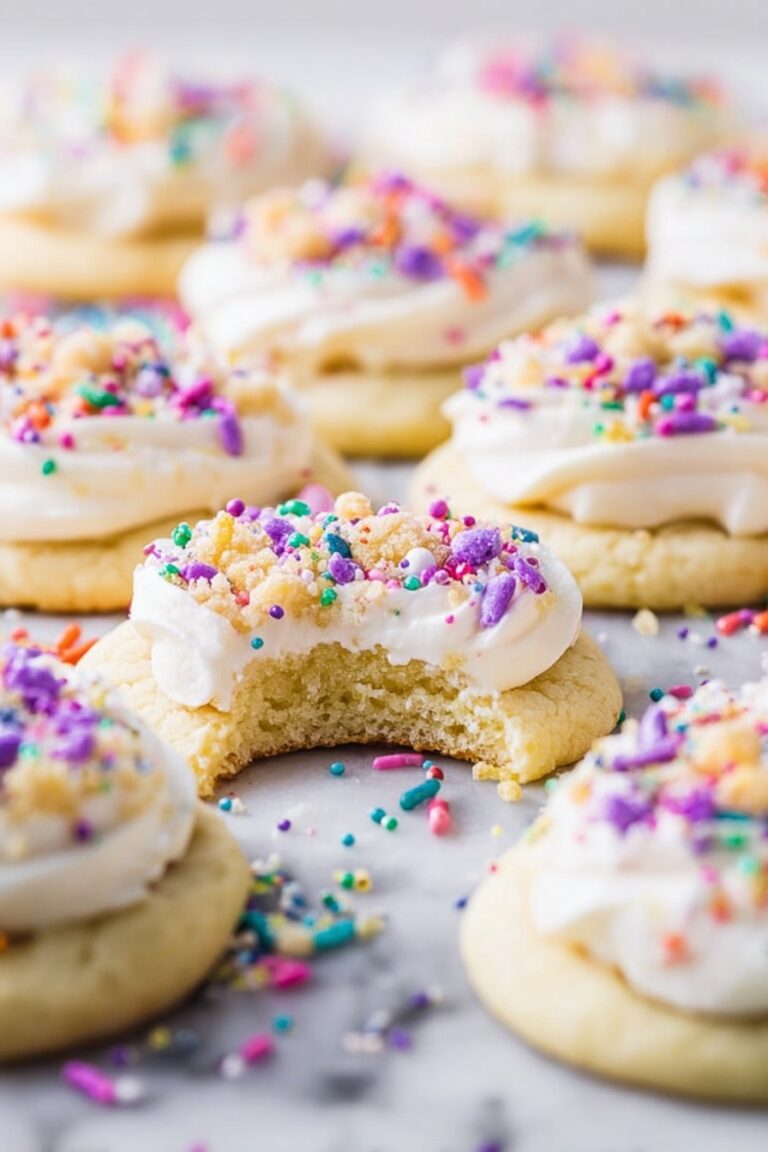
Thumbprint Cookies with Jam Recipe
If you’re on the hunt for a classic sweet treat that’s as charming as it is delicious, you’ve just found the perfect recipe. This Thumbprint Cookies with Jam Recipe is one of those timeless goodies that never fails to bring a smile, whether you’re baking for family, friends, or just because you deserve a little joy today. Trust me, once you try these buttery cookies with their soft centers filled with sweet jam, you’ll want to keep this recipe in your back pocket forever.
Why This Recipe Works
- Simple, Classic Ingredients: This recipe uses everyday pantry staples, making it super accessible and easy to whip up anytime.
- Perfect Texture: The buttery dough creates a tender cookie base that holds the jam beautifully without getting soggy.
- Customizable Jam Filling: You can easily tailor these cookies to your jam-loving heart—strawberry, apricot, raspberry, you name it!
- Great for All Skill Levels: Whether you’re a beginner or a baking whiz, you’ll find this recipe straightforward and rewarding.

Ingredients & Why They Work
Every ingredient plays a key role in making these thumbprint cookies just right. From the soft butter that gives richness to the sugar that helps with a light crunch, here’s a quick look at what I grab for this recipe and why.
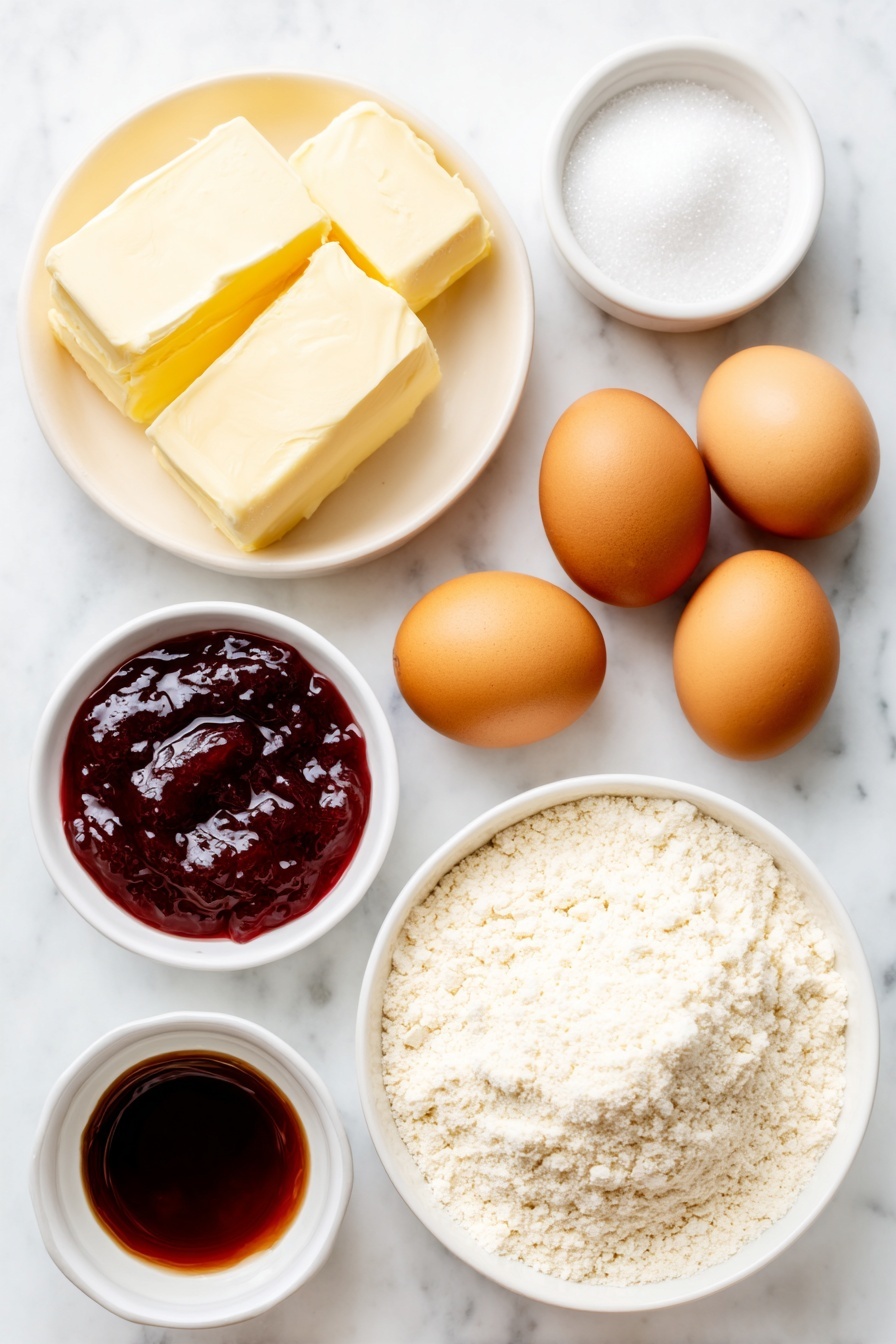
- Unsalted Butter: I always use unsalted to control salt levels myself; plus, softened butter creates the perfect creamy dough texture.
- Granulated Sugar: Gives sweetness and, when rolled on the exterior, a lovely sparkle and slight crunch.
- Egg Yolks: Using only yolks results in richer flavor and tender crumb; just remember to get them to room temperature for better mixing.
- Vanilla Extract: A splash of pure vanilla enhances the cookie’s homemade flavor beautifully.
- Salt: Balances the sweetness and brightens the flavors perfectly.
- All-Purpose Flour: Spoon and level it for accuracy to keep the dough from getting too dense or dry.
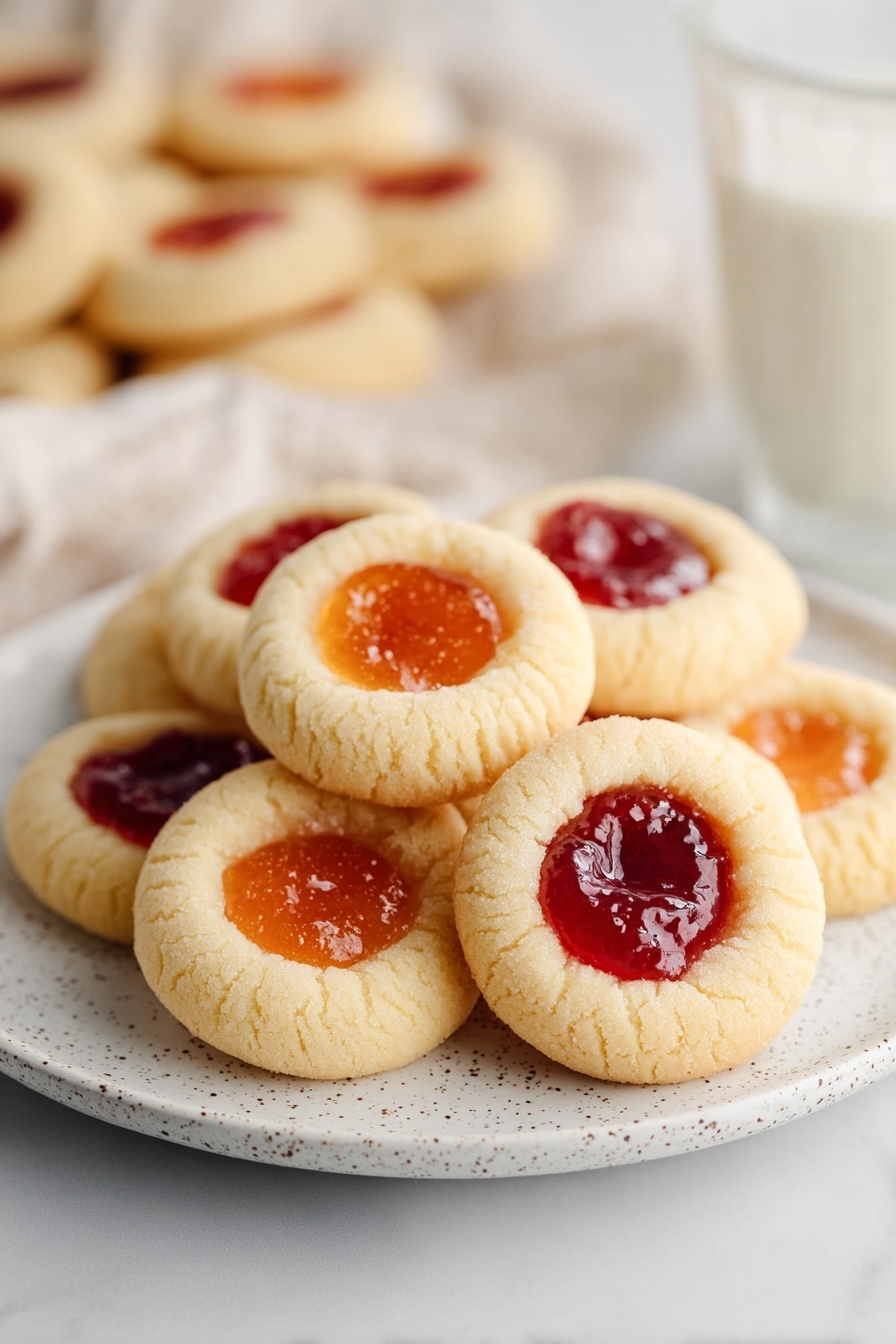
- Jam: Choose your favorite fruity jam—whether strawberry, apricot, or even something bold like raspberry—to fill the little thumbprints with a burst of flavor.
Tweak to Your Taste
I love making this Thumbprint Cookies with Jam Recipe my own by mixing up the jam flavors depending on the season or mood. It’s such a flexible cookie that invites your creativity—so don’t hesitate to swap in whatever jam you love or have on hand!
- Alternative Jams: I once made a batch with raspberry jam and sprinkled some finely chopped pistachios on top of the jam before baking—a total crowd-pleaser!
- Dietary Swap: For a gluten-free option, I’ve used almond flour blends, but just keep in mind the texture might be different—still delicious, though.
- Add Zest: A tiny bit of lemon or orange zest in the dough adds an extra layer of fresh brightness I found delightful.
Step-by-Step: How I Make Thumbprint Cookies with Jam Recipe
Step 1: Soften Your Butter and Prep Your Baking Sheets
First things first: get your butter nice and soft—not melted, just soft enough that your mixer can cream it easily. While you’re waiting, preheat your oven to 350°F (177°C) and line two baking sheets with parchment paper or silicone mats. This helps the cookies bake evenly and makes cleanup a breeze.
Step 2: Cream Butter and Sugar until Light and Fluffy
Using a stand mixer with a paddle attachment or a handheld mixer, beat the softened butter with the granulated sugar for about 1-2 minutes. You’re looking for a creamy, well-combined mixture—this is where the magic starts! The texture won’t be too stiff, but it should be smooth and pale.
Step 3: Add the Egg Yolks, Vanilla, and Salt
Next, mix in the room temperature egg yolks one at a time, then add the vanilla extract and salt. Make sure these are combined well because the yolks add richness and help bind everything.
Step 4: Slowly Incorporate the Flour
Now, gradually add the spooned-and-leveled all-purpose flour. The dough might look crumbly at first, but keep mixing—it will come together as you go. If your dough feels too dry, just give it a minute on the mixer or use your hands to gently bring it together.
Step 5: Shape, Sugar Coat, and Thumbprint
Using a tablespoon measure or cookie scoop, portion out the dough into balls. Roll each ball in sugar if you like that little extra crunch and sparkle. Then, place the balls on your prepared baking sheets—space them out a bit because they’ll spread slightly.
Here’s where the name comes into play: press your thumb (or a wooden spoon handle) gently in the center of each cookie ball to create a little well for the jam. I usually dip my thumb in a little water to keep it from sticking. Aren’t these so much fun already?
Step 6: Fill Each Indentation with Jam
Spoon about half a teaspoon of your chosen jam into each thumbprint. Don’t overfill — you want just a nice dollop sitting perfectly in that little crater.
Step 7: Bake and Cool
Bake the cookies at 350°F (177°C) for 12-14 minutes, or until the edges are set and the bottoms turn lightly golden brown. Timing can vary depending on your oven, so keep an eye after 12 minutes. Let the cookies cool on the baking sheet for about 10 minutes before transferring them to a wire rack to cool completely.
Pro Tips for Making Thumbprint Cookies with Jam Recipe
- Soft Butter is Key: If your butter’s too cold, you’ll get crumbly dough that’s hard to press; too warm and the dough will be greasy. Aim for room temperature, soft but not melty.
- Use a Cookie Scoop: For even-sized cookies (and pretty presentation), I swear by a one-tablespoon scoop—it makes shaping so much faster.
- Don’t Fill Too Full: Too much jam can overflow and make your cookies soggy; just a small dollop is enough to deliver that jammy surprise.
- Cool on Sheet First: Letting cookies cool on the baking sheet before moving helps them set and prevents breakage.
How to Serve Thumbprint Cookies with Jam Recipe
Garnishes
I usually keep it simple and elegant by adding a tiny dusting of powdered sugar just before serving—it adds a snow-dusted look that’s just perfect for cozy afternoons. Sometimes, I stir fresh mint leaves into the jam before baking for a subtle herbal note. If you like a bit of crunch, a sprinkle of finely chopped nuts over the jam works beautifully, too.
Side Dishes
This is a perfect cookie for pairing with a hot cup of tea or coffee. When I’m treating guests, I often serve these alongside a bowl of fresh berries or a light fruit salad. They also pair surprisingly well with a creamy scoop of vanilla ice cream for an indulgent dessert twist.
Creative Ways to Present
For holiday parties, I arrange these thumbprint cookies on a platter in a circle, alternating jam flavors for a colorful pattern. I’ve also made mini gift boxes of them tied with rustic twine and a sprig of rosemary—friends love this homemade touch! Another fun presentation is stacking them as cookie sandwiches with whipped cream in between instead of jam.
Make Ahead and Storage
Storing Leftovers
Leftover thumbprint cookies keep well in an airtight container at room temperature for up to 4 days. I usually layer them between sheets of parchment paper to prevent sticking and keep their shape and texture intact.
Freezing
If you want to bake ahead, you can freeze baked cookies for up to three months—just thaw on the counter before serving, and they taste fresh! Alternatively, the cookie dough freezes wonderfully, too. I portion the dough balls, freeze them on a tray, then stash in a zip-top bag. When you want fresh cookies, just thaw overnight in the fridge, roll in sugar, fill with jam, and bake.
Reheating
To revive refrigerated or leftover cookies, I gently warm them in a low oven (about 300°F) for 5 minutes or so. This refreshes the buttery flavor and softens the jam without drying out the cookie—a simple step that feels almost like baking fresh!
FAQs
-
Can I use whole eggs instead of egg yolks in this Thumbprint Cookies with Jam Recipe?
While this recipe specifically calls for egg yolks to create a richer, tender texture, you can use whole eggs if needed. Just keep in mind that the cookies might be a bit firmer and less delicate in crumb because the egg whites add structure differently. If you’re in a pinch, one whole egg can replace two yolks, but for best results, I recommend sticking with yolks if you can.
-
What are the best types of jam to use for these cookies?
I love using fruity jams with bright flavor and smooth texture like strawberry, apricot, raspberry, or even blackberry. Avoid chunky jams with large fruit pieces as they can make the cookies harder to shape and bake unevenly. Bonne Maman is a personal favorite for its flavor and quality, but any good-quality, smooth jam will do!
-
How can I prevent my cookies from spreading too much?
Make sure your butter is just soft, not melted—too warm butter causes excessive spreading. Also, chilling the dough for 15-30 minutes before baking can help the cookies hold their shape better. Lastly, use parchment paper or silicone mats to help control cookie spread and even browning.
-
Can I make these cookies vegan or dairy-free?
Absolutely! You can swap in vegan butter or coconut oil and use a flax egg (ground flaxseed mixed with water) in place of egg yolks. The texture may be slightly different, but the cookies will still be delicious. Just make sure your jam is also free from animal-based ingredients.
-
What’s the best way to keep these cookies fresh?
Store them in an airtight container at room temperature for several days, layering parchment between to prevent sticking. For longer storage, refrigeration or freezing works well—just thaw properly to keep that perfect soft yet slightly crisp texture.
Final Thoughts
This Thumbprint Cookies with Jam Recipe has been a little gem in my baking repertoire—so easy, so satisfying, and so versatile. I love sharing them because they add a warm homemade touch to any gathering, and they bake up quickly enough for a last-minute treat. You really can’t go wrong, and I hope you’ll give them a try soon. Once you do, I bet you’ll be making these cookies over and over, just like me!
Print
Thumbprint Cookies with Jam Recipe
- Prep Time: 30 minutes
- Cook Time: 14 minutes
- Total Time: 44 minutes
- Yield: 42 cookies
- Category: Dessert
- Method: Baking
- Cuisine: American
Description
Delicious and classic Thumbprint Cookies with a buttery base and a sweet jam center. Perfectly soft with a slight crisp on the edges, these cookies make a delightful treat for any occasion.
Ingredients
Cookie Dough
- 1 cup (230 grams) unsalted butter softened
- 2/3 cup (135 grams) granulated sugar plus 3 tablespoons (40 grams) for rolling the cookies
- 2 large egg yolks room temperature
- 1 teaspoon pure vanilla extract
- 1/4 teaspoon salt
- 2 and 1/3 cups (290 grams) all-purpose flour spooned & leveled
Filling
- 1/2 cup strawberry or apricot jam
Instructions
- Preheat Oven: Preheat your oven to 350°F (177°C). Prepare two large baking sheets by lining them with parchment paper or silicone baking mats and set aside.
- Cream Butter and Sugar: In a stand mixer bowl with paddle attachment or a large mixing bowl using a handheld mixer, cream together the softened butter and 2/3 cup granulated sugar for 1-2 minutes until well combined.
- Add Egg Yolks and Flavorings: Mix in the room temperature egg yolks, vanilla extract, and salt until fully incorporated. Then mix in the flour gradually; the dough may be crumbly at first but will come together as you mix.
- Form Cookie Balls: Using a one-tablespoon cookie scoop or a measuring tablespoon, scoop the dough and roll into balls. Roll each ball in the remaining 3 tablespoons of granulated sugar for extra texture and sweetness.
- Create Indentations and Add Jam: Place the dough balls onto the prepared baking sheets. Use your thumb or the handle of a wooden spoon to press an indentation into the center of each ball. Spoon about 1/2 teaspoon of jam into each indentation.
- Bake Cookies: Bake the cookies at 350°F (177°C) for 14 minutes or until the cookies are set and the bottoms are lightly browned.
- Cool Cookies: Remove from the oven and let the cookies cool on the baking sheet for 10 minutes. Then transfer them carefully to a wire rack to cool completely.
Notes
- Store cookies in an airtight container at room temperature or in the refrigerator for up to 4 days.
- Baked cookies freeze well for up to 3 months; thaw to room temperature before serving.
- Cookie dough can be frozen for up to 3 months; thaw overnight in the refrigerator before rolling, coating in sugar, and filling with jam.
- For best results, use egg yolks at room temperature. If needed, warm eggs in a bowl of warm water for 5-10 minutes before separating.
- Use your favorite brand and flavor of jam. Bonne Maman Strawberry or Apricot jams work great.
Nutrition
- Serving Size: 1 cookie
- Calories: 120 kcal
- Sugar: 7 g
- Sodium: 40 mg
- Fat: 7 g
- Saturated Fat: 4 g
- Unsaturated Fat: 3 g
- Trans Fat: 0 g
- Carbohydrates: 14 g
- Fiber: 0.5 g
- Protein: 1 g
- Cholesterol: 25 mg


