

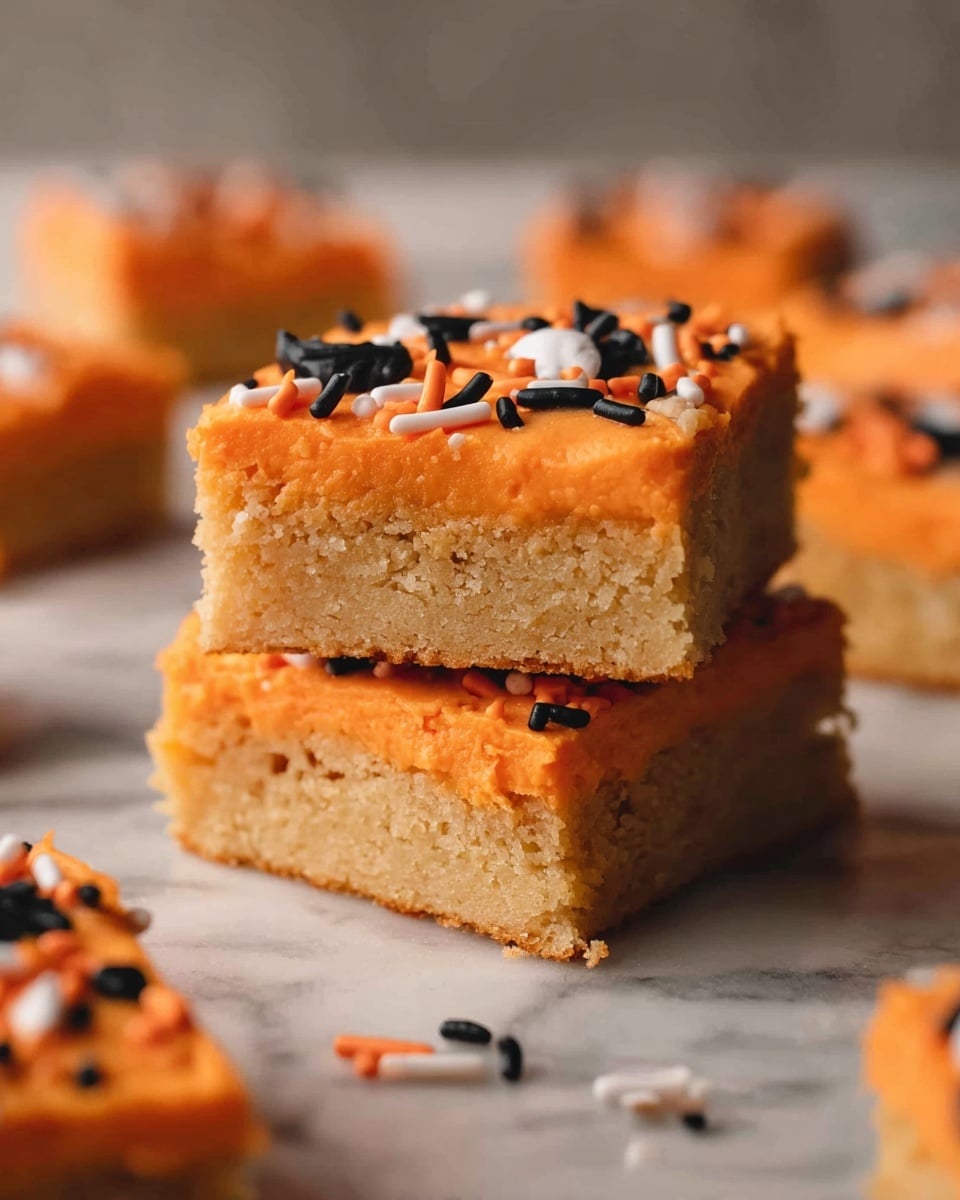
Spooky Halloween Sugar Cookie Bars Recipe
If you’re looking for a treat that captures all the fun and spooky vibes of the season, you’ve got to try this Spooky Halloween Sugar Cookie Bars Recipe. Trust me, these bars are everything you want in a Halloween dessert—soft, buttery, sweet, and decorated with adorable creepy-cute sprinkles. I made these last year for a Halloween potluck, and they totally stole the show. Keep reading, and I’ll walk you through how to make them your new fall favorite!
Why This Recipe Works
- Perfect Texture: The combination of cornstarch and baking powder keeps these bars soft and tender instead of tough like a traditional cookie.
- Simple Ingredients: No complicated or hard-to-find ingredients, so you can whip these up anytime the Halloween craving hits.
- Fun Festive Touch: Adding spooky sprinkles and eyeball candies brings the perfect creepy element without extra effort.
- Quick & Easy: Ready in about 30 minutes, which is a total win for busy days or last-minute plans.

Ingredients & Why They Work
This Spooky Halloween Sugar Cookie Bars Recipe is built around classic sugar cookie ingredients but with a few tricks to get the ideal bar consistency. From the butter to the cornstarch, every ingredient plays a role in flavor, moisture, and texture.

- Butter: Use real butter for richness and flavor; softened but not melted is best to get that creamy texture when creaming with sugars.
- Granulated Sugar: Balances sweetness and helps create a light texture when creamed with butter.
- Brown Sugar: Adds a subtle caramel note that deepens the flavor, making the cookie bars more interesting.
- Egg: Binds the dough together and contributes to tender chewiness.
- Vanilla Extract: Essential for classic sugar cookie flavor — never skip this!
- Almond Extract (Optional): Just a small amount adds an extra warm, nutty hint that I adore but feel free to skip if you’re not a fan.
- Baking Powder: Gives the bars a slight lift without making them cakey.
- All-Purpose Flour: The base of your dough — measure carefully for best results.
- Cornstarch: A little magic here; it tenderizes and keeps the bars soft, which is crucial because you want that melt-in-your-mouth feel.
- Salt: Enhances all the flavors and balances sweetness.
- Powdered Sugar (For Frosting): Makes the frosting silky smooth and sweet, perfect for decorating.
- Heavy Cream: Adds creaminess to the frosting so it spreads easily and stays soft.
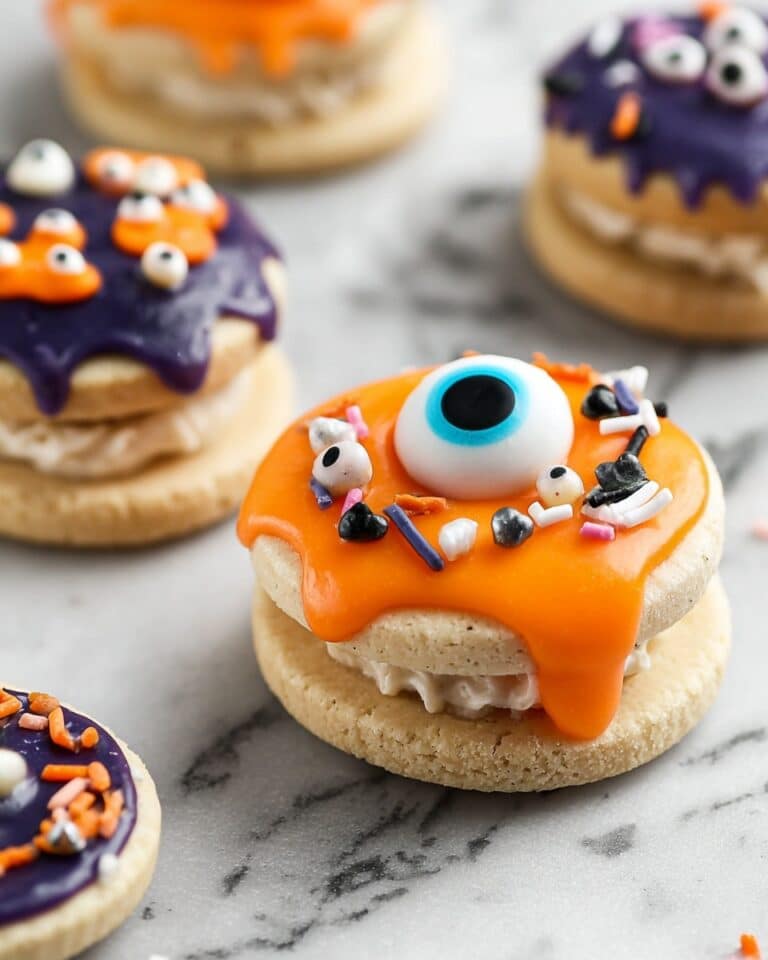
- Spooky Sprinkles and Halloween Eyeball Candies: The fun finishers that bring this recipe into full Halloween party mode!
Tweak to Your Taste
I love how versatile this Spooky Halloween Sugar Cookie Bars Recipe is — you can easily tailor it to your flavor preferences or dietary needs, and it always turns out fantastic. Honestly, I often experiment with the frosting or change up the sprinkles for different Halloween themes.
- Flavor Boost: Adding a pinch of cinnamon or pumpkin pie spice in the dough gives a cozy autumn twist that I swear everyone notices.
- Dairy-Free Option: Swap butter and heavy cream for plant-based margarine and coconut cream for a vegan-friendly version — it still bakes beautifully.
- Frosting Variations: Try cream cheese frosting for a tangy contrast or a simple glaze if you want something lighter.
- Sprinkle Themes: I swap out eyeballs for little ghost or pumpkin sprinkles depending on the party vibe — customize to wow your guests!
Step-by-Step: How I Make Spooky Halloween Sugar Cookie Bars Recipe
Step 1: Prep and Cream Ingredients
First things first: preheat your oven to 350°F and line an 8×8-inch baking pan with parchment paper or foil to prevent sticking and make cleanup a breeze. I find using parchment with a bit hanging over the edges helps lift the bars out easily once baked. Then, in a large bowl, cream together the softened butter with the granulated and brown sugars until the mixture is smooth and creamy. This usually takes about 2-3 minutes with an electric mixer. Next, add in the egg, vanilla extract, and almond extract if you’re using it — mixing just until combined. This step is key for that rich, buttery flavor.
Step 2: Add Dry Ingredients
In a separate bowl, whisk together the all-purpose flour, baking powder, salt, and cornstarch. Then gradually add these dry ingredients to the wet mixture, stirring just until the flour streaks disappear. The dough will be soft but scoopable. Avoid overmixing here to keep the texture tender. Spread the dough evenly in your prepared pan. You can use an offset spatula or the back of a spoon to smooth it out. Pop it into the oven and bake for 15 minutes. Don’t worry if the centers look a tad underdone—that’s exactly what you want because these bars firm up as they cool off.
Step 3: Whip Up That Frosting
While the bars are baking (or cooling if you’re prepping ahead), get your frosting ready. In a clean bowl, beat the softened butter and powdered sugar together until combined. Then mix in the vanilla extract and heavy cream, whipping everything until it turns light and fluffy. The frosting should be easy to spread but still hold some shape. If you find it too stiff, add an extra splash of heavy cream; too loose, add a bit more powdered sugar.
Step 4: Frost and Decorate
Once your cookie bars are fully cooled (patience pays off here), spread the frosting evenly on top. This is where the fun really starts! I like to go all out with spooky sprinkles and those Halloween eyeball candies—they’re an instant hit with kids and adults alike. For a softer, melt-in-your-mouth frosting texture, enjoy immediately, or chill the bars for about 30 minutes to help the frosting set if you prefer cleaner slices.
Pro Tips for Making Spooky Halloween Sugar Cookie Bars Recipe
- Don’t Skip the Cornstarch: It may seem unusual, but cornstarch is the secret to keeping your cookie bars soft and tender instead of hardening up as they cool.
- Cream Butter and Sugar Thoroughly: This step creates tiny air pockets for a lighter texture, so don’t rush it.
- Cool Bars Completely Before Frosting: Patience here helps your frosting stay put and keeps your bars from sliding apart when you slice.
- Use Parchment Paper in Baking Pan: It makes a world of difference in how cleanly you can remove the bars later — I swear by this trick every batch!
How to Serve Spooky Halloween Sugar Cookie Bars Recipe
Garnishes
I always go for fun, themed garnishes—eyeball candies are an all-time favorite of mine because they’re playful and super easy to place. Sometimes, I switch it up with mini ghost or pumpkin sprinkles just to mix the look up for different Halloween parties. Edible glitter is another subtle way to add some sparkle and shine.
Side Dishes
These cookie bars pair wonderfully with a hot cup of spiced cider or a tall glass of cold milk. For parties, I like to have some fresh fruit like sliced apples or orange segments nearby—they add a fresh contrast to something rich and sweet like these bars.
Creative Ways to Present
Last Halloween, I arranged these bars on a serving tray designed like a haunted graveyard, complete with candy tombstones and plastic spiders. For kids, I love wrapping each bar individually in clear cellophane with a little twist tie and matching ribbon—makes them perfect for party favors or trick-or-treat handouts.
Make Ahead and Storage
Storing Leftovers
Once frosted, I store these bars in an airtight container at room temperature if I plan to eat them within 2-3 days. They stay delightfully soft and the frosting keeps from drying out. If your house is warm, keeping them in the fridge works too, just let them come to room temp before serving for best taste.
Freezing
I’ve frozen both the plain cookie bars (without frosting) and frosted bars wrapped tightly in plastic wrap and then in a freezer-safe bag. They freeze beautifully and defrost in the fridge overnight. If you want to freeze the frosted version, I recommend adding sprinkles and candies after thawing to keep them fresh and colorful.
Reheating
If you want that freshly baked warmth, pop an unfrosted bar in the microwave for about 10-15 seconds. For frosted ones, I usually enjoy them cold or at room temp, but if you do reheat, take care not to melt the frosting too much—for best results, remove frosting before warming and add back after.
FAQs
-
Can I use salted butter for the Spooky Halloween Sugar Cookie Bars Recipe?
Yes, you can absolutely use salted butter if that’s what you have on hand. Just skip adding extra salt or reduce it slightly since salted butter already contains some salt. I personally sometimes use salted butter because it gives a nice balanced flavor.
-
Why do the cookie bars look undercooked when I take them out of the oven?
This is totally normal! Since the bars continue to “bake” and set as they cool, they often look slightly soft or gooey in the center right out of the oven. Resist the urge to bake longer, or they may dry out. Letting them cool fully will give you that perfectly tender texture.
-
Can I decorate these bars with other toppings besides sprinkles and eyeballs?
Definitely! Get creative with crushed candy corn, mini chocolate chips, edible glitter, or even piping simple designs with colored frosting. The more festive, the better! Just keep in mind wet toppings can affect frosting texture if added too early.
-
How do I cut cleaner slices with frosted bars?
To get neat slices, use a sharp knife and wipe it clean between cuts. For best results, chill the bars for 30 minutes so the frosting firms up a bit. If the frosting is soft, your slices may smudge or slide apart.
Final Thoughts
This Spooky Halloween Sugar Cookie Bars Recipe is one of my absolute favorites for the season because it combines that nostalgic sugar cookie flavor with a fun, festive presentation that’s guaranteed to bring smiles. Whether you’re baking for a family party, school event, or just because, these bars deliver on taste and cuteness without any stress. I truly hope you enjoy making and sharing them as much as I do—grab your mixing bowl and get spooky in the kitchen!
Print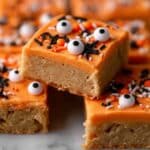
Spooky Halloween Sugar Cookie Bars Recipe
- Prep Time: 15 minutes
- Cook Time: 15 minutes
- Total Time: 30 minutes
- Yield: 16 bars
- Category: Dessert
- Method: Baking
- Cuisine: American
Description
These Spooky Halloween Sugar Cookie Bars are soft, buttery, and perfectly sweet, topped with creamy vanilla frosting and festive Halloween sprinkles and eyeball candies. Easy to make in just 30 minutes, they are a fun and delicious treat for holiday parties or seasonal celebrations.
Ingredients
Cookie Layer
- 1/2 cup butter
- 1/2 cup granulated sugar
- 2 tbsp brown sugar
- 1 large egg
- 2 tsp vanilla extract
- 1/4 tsp almond extract (optional)
- 1/2 tsp baking powder
- 1 cup all purpose flour
- 3 tbsp cornstarch
- 1/4 tsp salt
Frosting
- 4 tbsp butter, softened (salted or unsalted)
- 1 cup powdered sugar
- 1 tsp vanilla extract
- 3 tbsp heavy cream
- Spooky sprinkles
- Halloween eyeball candies
Instructions
- Preheat Oven and Prepare Pan: Preheat the oven to 350 degrees Fahrenheit and line an 8×8 inch baking pan with parchment paper or foil. Set aside.
- Cream Butter and Sugars: In a large bowl, cream together the butter, granulated sugar, and brown sugar until the mixture is smooth and creamy. Add in the egg, vanilla extract, and almond extract if using, mixing well to combine.
- Add Dry Ingredients: Mix in the flour, baking powder, salt, and cornstarch just until the flour mixture is barely combined and no streaks remain. Spread the batter evenly into the prepared pan.
- Bake Cookies: Bake the cookie layer in the oven for 15 minutes. The center will look slightly raw but will finish baking as it cools.
- Prepare Frosting: While the cookie layer bakes, whip together the softened butter and powdered sugar until combined. Add the heavy cream and vanilla extract, then whip until the frosting is light and fluffy.
- Frost and Decorate: Once the bars have cooled, spread the frosting evenly on top. Decorate with spooky sprinkles and Halloween eyeball candies as desired.
- Serve: Slice the bars into 16 pieces. Serve immediately if you prefer softer frosting or chill for a bit to let the frosting set before enjoying.
Notes
- For almond extract, use sparingly as it has a strong flavor; it is optional but adds a nice depth.
- You can substitute cornstarch with arrowroot powder for a similar texture if needed.
- Use parchment paper for easy removal of bars, but foil works well too with a light grease.
- If you prefer thicker frosting, reduce heavy cream to 2 tablespoons.
- Store leftover bars in an airtight container in the refrigerator for up to 5 days.
Nutrition
- Serving Size: 1 bar
- Calories: 180 kcal
- Sugar: 14 g
- Sodium: 90 mg
- Fat: 9 g
- Saturated Fat: 5 g
- Unsaturated Fat: 3 g
- Trans Fat: 0 g
- Carbohydrates: 22 g
- Fiber: 0.5 g
- Protein: 1 g
- Cholesterol: 30 mg

