Spooky Halloween Chocolate Covered Oreos Recipe
If you’re like me and love Halloween treats that are both adorable and delicious, then you’re going to absolutely adore this Spooky Halloween Chocolate Covered Oreos Recipe. These festive cookies are not only super fun to make but also perfect for parties, school events, or just a sweet seasonal treat. Trust me, once you try these, you’ll want to whip up a batch every year!
Why This Recipe Works
- Simple Ingredients: You only need a handful of basic items, making it easy to whip up without a special grocery run.
- Colorful and Customizable: The candy melts come in vibrant Halloween colors that instantly turn Oreos into mini works of art.
- Fun for All Skill Levels: Whether you’re a newbie or a pro, the dipping and decorating steps are easy to follow and very forgiving.
- Great for Parties and Gifts: These spooky treats make perfect party platters or last-minute Halloween gifts your friends and family will rave about.
Ingredients & Why They Work
These ingredients combine to create a simple, festive, and flavorful treat. The Oreos provide the perfect cookie base, and the variety of candy melts let you get creative with spooky Halloween designs. You can grab most of these at any craft store or supermarket during the season, which is a huge plus when you’re in Halloween mode!
- Oreos: Classic, sturdy, and delicious, Oreos are the perfect foundation to hold all that melty, colorful chocolate magic.
- White Candy Melts or White Chocolate: Great for the mummy and ghost designs. They’re easy to melt smoothly and hold decorative details well.
- Orange Candy Melts: The quintessential Halloween color—perfect for jack-o’-lantern themes or just adding some vibrant hues.
- Chocolate Chips or Black Candy Melts: For that spooky, dark touch to complement your orange and white colors, and they melt differently giving texture variety.
- Green Candy Melts: Adds an eerie zombie or monster vibe that just can’t be beat.
- Assorted Halloween Sprinkles (Candy Eyes, Sprinkles): These little eyes and sprinkles bring your Oreos to life with personality and fun.
Tweak to Your Taste
I love making this recipe my own depending on the mood or my guests. Sometimes I add a little extra drizzle of dark chocolate for a contrast or swap out sprinkles for edible glitter to dazzle the little ones. Don’t be afraid to experiment — this recipe is super forgiving and so much fun to personalize.
- Variation: I once tried using colored white chocolate for the drizzle instead of candy melts — it added a lovely smooth texture and rich flavor that was a hit!
- Dietary Option: For a gluten-free twist, grab gluten-free Oreos and gluten-free candy melts, making it suitable for friends with dietary restrictions.
- Seasonal Twists: If you’re making this outside Halloween, swap the candy melts for pastels or traditional holiday colors like red and green for Christmas.
Step-by-Step: How I Make Spooky Halloween Chocolate Covered Oreos Recipe
Step 1: Prep Your Workspace and Ingredients
First things first, line a baking sheet with parchment paper — this makes clean-up so much easier and prevents your Oreos from sticking. Then, have your Oreos, candy melts, and sprinkles all ready to go on your counter. I like to organize the colors I plan to use in the order I’ll melt them. Trust me, having everything prepped saves you hassle when things get melty!
Step 2: Melt the Candy Melts Correctly
Microwave your first color in a microwave-safe bowl using 30-second bursts, stirring well between each interval until the candy melts are silky smooth. This step is key! Overheating can cause the chocolate to seize, so I always stop melting once about 90% melted and stir until completely smooth. You’ll want to do this one color at a time so the melts don’t harden while you work with another batch.
Step 3: Dip Your Oreos Like a Pro
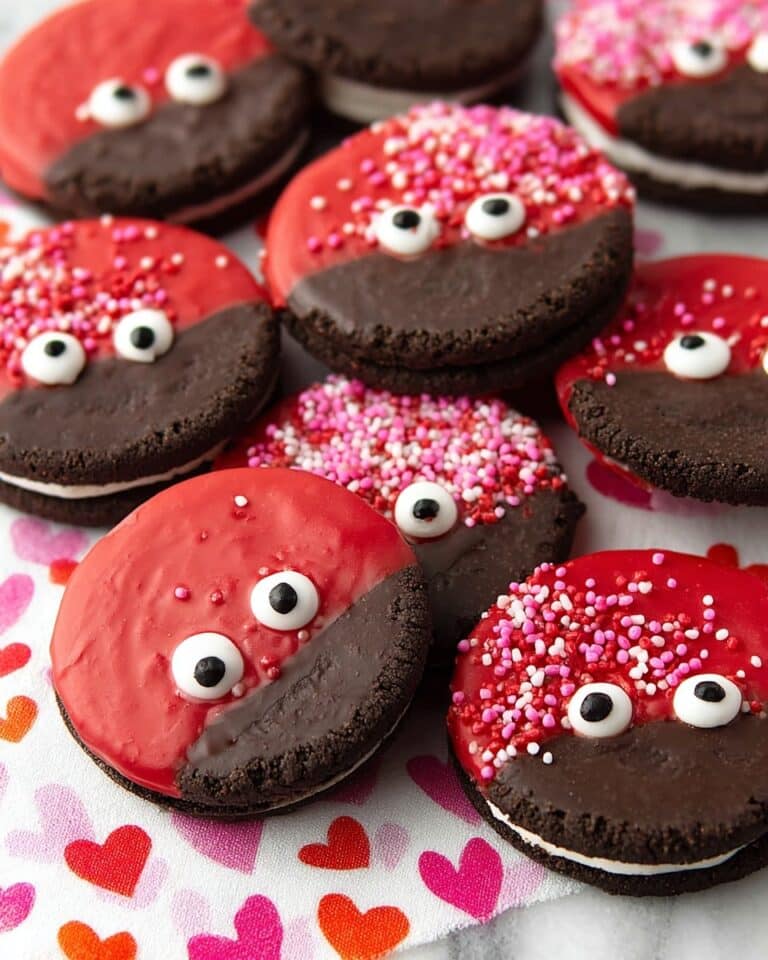
Using a chocolate dipping fork or a regular fork, dip each Oreo into the melted candy, carefully flipping it to coat both sides evenly. Then, gently lift and tap the fork against the bowl edge to shake off the extra chocolate — too much dripping can make a big mess! Place your coated Oreo on the parchment-lined baking sheet. If you want a smooth look, use a toothpick to smooth out any bumps immediately after dipping.
Step 4: Decorate and Chill
Whether you’re adding spooky candy eyes, sprinkles, or drizzling more melted candy for extra designs, decorating is where the magic happens. For the mummy Oreos, I dip them in white candy melts first, press candy eyes on top, then chill for 15 minutes before drizzling more white candy melt to create realistic bandages. Pop your Oreos into the fridge to set, usually about 20-30 minutes.
Step 5: Repeat With Remaining Colors and Designs
Repeat the dipping, decorating, and chilling steps with each color of candy melts until all your Oreo masterpieces are complete. This staggered approach keeps the candy melts fresh and smooth. Don’t rush — the best results come when you let each Oreo set properly before moving on!
Pro Tips for Making Spooky Halloween Chocolate Covered Oreos Recipe
- Cool Quickly in the Fridge: Chilling your Oreos in the fridge instead of at room temp helps the candy melts set faster and reduces smudging.
- Use a Double Boiler for Candy Melts: If you’re a little wary of microwaves, melting your candy over gentle steam keeps the chocolate silky without overheating.
- Avoid Moisture: Make sure no water hits your candy melts or Oreos during dipping—moisture can cause the chocolate to seize up.
- Work Efficiently: Dip, decorate, and chill in batches to keep the melts workable and your decorating smooth.
How to Serve Spooky Halloween Chocolate Covered Oreos Recipe

Garnishes
I usually finish my Oreos off with fun garnishes like candy eyeballs—they add an instant spooky vibe—and a sprinkle of orange or black sanding sugar. Sometimes I toss on edible glitter or tiny bat-shaped sprinkles for extra pizzazz. These little touches make the treats pop and delight both kids and adults alike.
Side Dishes
They’re sweet enough to be a star on their own, but I like to serve my chocolate-covered Oreos alongside a batch of pumpkin spice cookies or a warm mug of cinnamon apple cider. It makes a cozy and festive combo perfect for chilly October evenings.
Creative Ways to Present
For my last Halloween party, I set these Oreos on a platter surrounded by dry ice to create spooky mist—it was a big hit! You could also individually wrap each cookie with Halloween-themed cellophane and tie with orange ribbon for party favors or Halloween treat bags. The colorful designs really stand out in clear packaging.
Make Ahead and Storage
Storing Leftovers
Once your Spooky Halloween Chocolate Covered Oreos are fully set, store them in an airtight container at room temperature or in the fridge if your house is warm. I’ve found they keep their crisp texture and vibrant colors for up to a week when stored properly.
Freezing
Want to prep these ahead of time? No problem! Freeze your decorated Oreos in a single layer on a baking sheet first, then transfer them to a freezer-safe container. They freeze beautifully for up to a month—just thaw at room temp before serving.
Reheating
Since there’s no baking involved, “reheating” just means letting frozen Oreos come back to room temp. Don’t try microwaving them; the candy coating may melt unevenly. Just remove from freezer, unwrap, and give them about 15-20 minutes to thaw—they’ll taste just as good as fresh.
FAQs
-
Can I use regular chocolate instead of candy melts for this Spooky Halloween Chocolate Covered Oreos Recipe?
Absolutely! You can use regular white or dark chocolate in place of candy melts. Just keep in mind that candy melts are specially formulated to melt smoothly and harden with a nice sheen at room temperature, while regular chocolate may require tempering to get the same hard finish. For easier results, use good quality chocolate chips and melt gently.
-
How long does it take to make these Spooky Halloween Chocolate Covered Oreos?
While the hands-on prep and dipping take about 20-30 minutes, setting and chilling each batch can add an extra 20-30 minutes depending on your fridge. So plan to spend about an hour total if you want the perfect set and decorated look.
-
Why did my candy melts seize or get clumpy?
This usually happens if moisture gets into the chocolate or you overheat it. When melting, make sure all utensils and bowls are completely dry, and microwave in short bursts stirring frequently. If your candy melts seize, gently stirring in a teaspoon of vegetable oil can help loosen them up.
-
Can I use a regular fork instead of a dipping fork?
Yes! A regular fork works just fine if you don’t have a chocolate dipping fork. Just be careful when lifting the Oreo out to avoid breaking the cookie or making a mess. I find using two forks back-to-back can support the Oreo better if you want more stability.
-
Are these Spooky Halloween Chocolate Covered Oreos kid-friendly to make?
Definitely! Kids love the dipping and decorating part, especially adding candy eyes. Just be sure to supervise when handling hot melted chocolate, and help with the microwave step. It’s a fun and safe activity with some adult guidance.
Final Thoughts
Making these Spooky Halloween Chocolate Covered Oreos has become one of my favorite October rituals. They bring the perfect mix of creepy-cute Halloween charm and sweet indulgence with minimal fuss. Whether you’re baking with family, entertaining friends, or just want to treat yourself, these Oreos deliver smiles all around. Give them a try—you just might find your new go-to Halloween treat!
Print
Spooky Halloween Chocolate Covered Oreos Recipe
- Prep Time: 20 minutes
- Cook Time: 0 minutes
- Total Time: 20 minutes
- Yield: 36 servings
- Category: Dessert
- Method: No-Cook
- Cuisine: American
Description
Delight in this spooky Halloween treat featuring chocolate-covered Oreos dipped in vibrant candy melts and decorated with festive sprinkles. Perfect for parties or Halloween celebrations, these colorful and fun cookies are easy to make with a no-bake dipping method.
Ingredients
Oreos and Candy Melts
- 1 package Oreos (36 Oreos)
- 6 oz white candy melts or white chocolate
- 6 oz orange candy melts
- 6 oz chocolate chips or black candy melts
- 6 oz green candy melts
Decorations
- Assorted Halloween sprinkles like candy eyes
Instructions
- Prepare Baking Sheet: Line a baking sheet with parchment paper and set it aside to cool the dipped Oreos.
- Melt Candy Melts: Using a microwave-safe bowl, melt the first color of candy melts or chocolate in 30-second increments, stirring in between until smooth. Melt one color at a time for best results.
- Dip Oreos: Using a chocolate dipping fork, dip each Oreo into the melted candy until fully coated on both sides. Lift the Oreo out and gently tap the fork on the bowl to remove excess chocolate.
- Decorate: Place dipped Oreos onto the prepared baking sheet. Decorate with spooky candy eyes or Halloween-themed sprinkles as desired.
- Chill and Layer: For mummy designs, dip Oreos in white candy melts first, add candy eyes, chill to set, then drizzle additional melted white candy melts over the top and chill again to create a layered effect.
- Repeat: Repeat dipping and decorating with remaining Oreos and candy melt colors.
Notes
- Use a chocolate dipping fork or toothpick for easier handling of Oreos when dipping.
- Melt candy melts in short increments and stir well to avoid burning or uneven melting.
- Chill Oreos after decorating to speed up setting of the candy coating.
- You can substitute candy melts with colored chocolate melts of your choice.
- Store decorated Oreos in an airtight container at room temperature for up to 3 days.
Nutrition
- Serving Size: 1 Oreo
- Calories: 150 kcal
- Sugar: 15 g
- Sodium: 90 mg
- Fat: 8 g
- Saturated Fat: 4 g
- Unsaturated Fat: 3 g
- Trans Fat: 0 g
- Carbohydrates: 20 g
- Fiber: 1 g
- Protein: 1 g
- Cholesterol: 0 mg


