
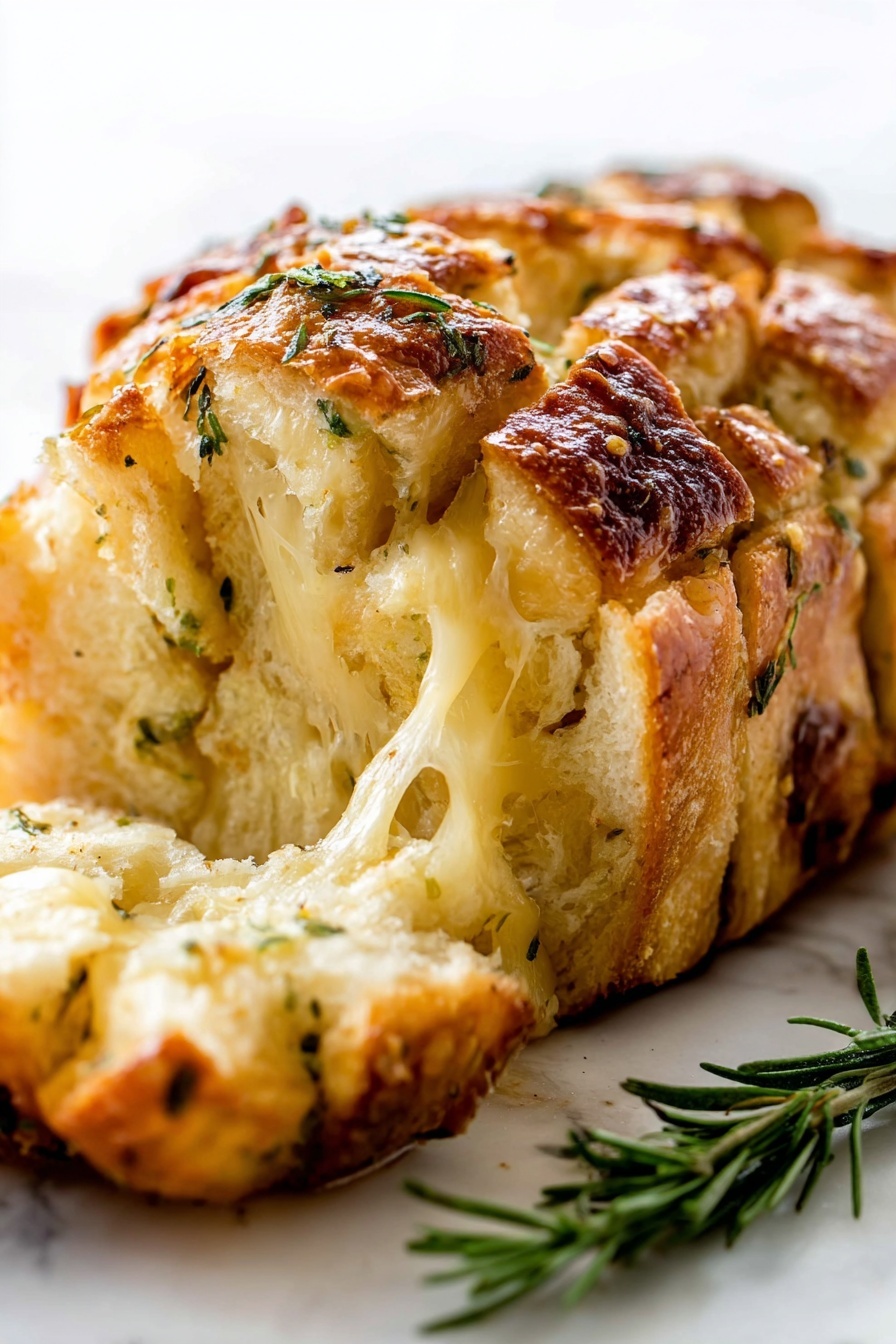
Rosemary Garlic Pull Apart Bread Recipe
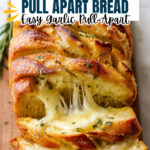
If you’re craving warm, savory, and irresistibly cheesy bread to pull apart and share, you’re going to love this Rosemary Garlic Pull Apart Bread Recipe. It’s packed with fresh herbs, garlic butter, and melty cheese nestled between fluffy, soft layers of homemade dough — perfect for breakfast, snack time, or as a crowd-pleaser at dinner. Trust me, once you try this, you’ll want to keep this recipe in your regular rotation.
Why This Recipe Works
- Perfect Herb & Garlic Balance: The fresh rosemary and garlic bring a bright, fragrant flavor that isn’t overpowering but truly elevates the bread.
- Soft, Pull-Apart Texture: The dough is tender yet structured enough to pull apart easily, making it fun and satisfying to eat.
- Cheesy Goodness Inside: Melty cheese in every pocket adds richness and makes it feel like a special treat.
- Beginner-Friendly Techniques: Step-by-step instructions and tips simplify bread baking for even first-timers.

Ingredients & Why They Work
All the ingredients in this rosemary garlic pull apart bread come together to create that perfect balance of soft, savory, and just a hint of herbal freshness. The key is using quality butter and fresh herbs whenever possible to really bring out the flavor.
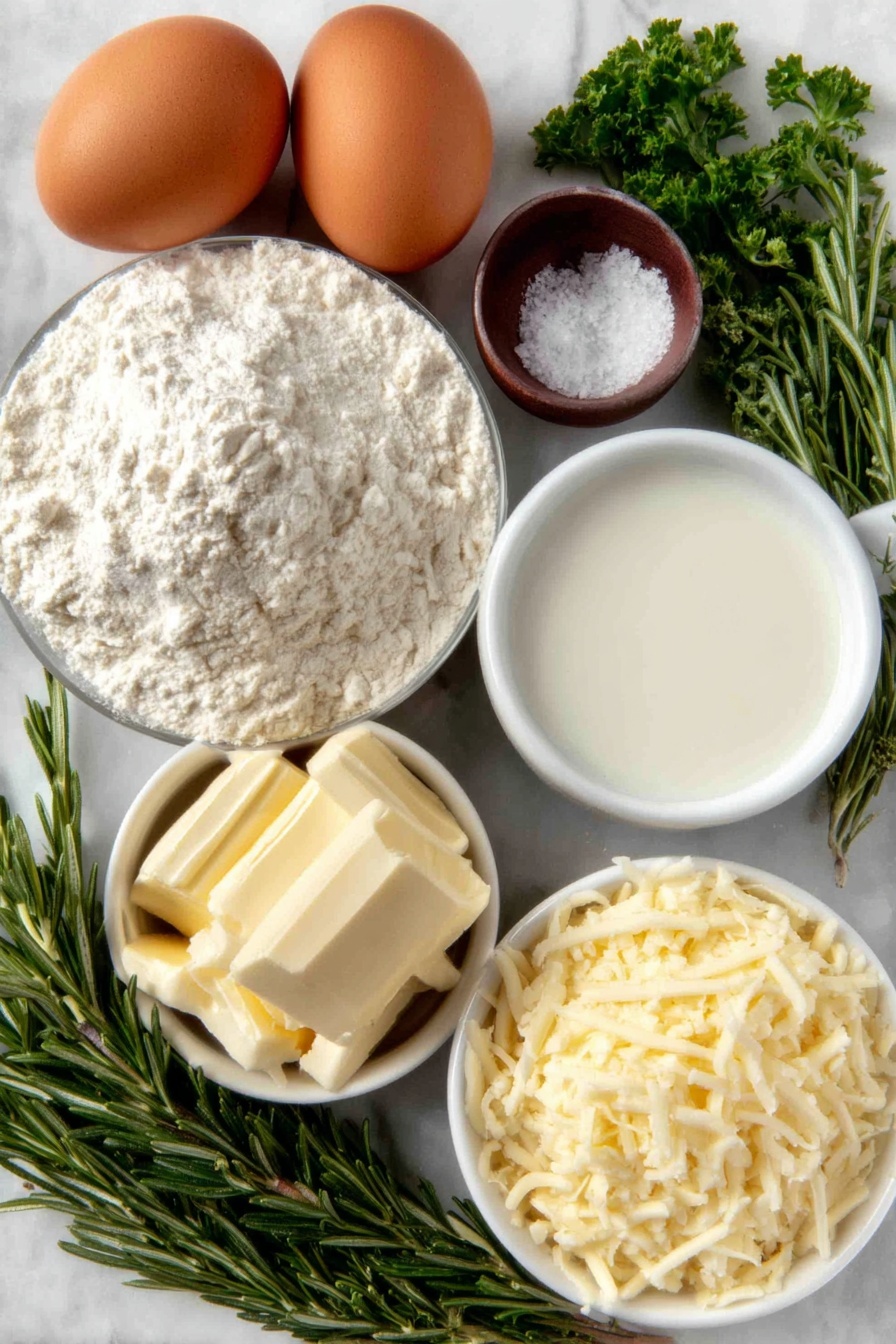
- Yeast: I use Platinum Yeast from Red Star because it’s reliable and gives consistent rising results. If you’re new, it’s more forgiving than active dry yeast.
- Sugar: Just a touch of sugar helps wake up the yeast and kick starts that perfect rise.
- Whole Milk: Adds moisture and richness to the dough, making it softer than water-based breads.
- Unsalted Butter: You want softened butter for the dough to blend easily, but extra soft butter for the filling so it spreads like a dream.
- All-Purpose Flour: Spoon and level for accuracy—this helps get the dough just right. You can swap with bread flour for a slightly chewier texture.
- Salt and Garlic Powder: Salt balances flavors, and garlic powder deepens the taste without overpowering.
- Fresh Rosemary and Parsley: Fresh herbs make a huge difference here. They infuse the bread with a bright, woodsy aroma you’ll crave.
- Cheese: Use your favorite shredded cheese—parmesan, mozzarella, or white cheddar all work beautifully for melty pockets of flavor.
Tweak to Your Taste
One of my favorite things about this Rosemary Garlic Pull Apart Bread Recipe is how easy it is to make it your own. I love swapping cheeses or adding extra herbs depending on the season, and you can definitely make tweaks to suit your taste buds.
- Variation: I sometimes add a little crushed red pepper flakes into the filling for a subtle kick—my family loves the extra warmth it adds.
- Dairy-Free: Swap the butter for your favorite plant-based spread and use a vegan cheese blend. It still comes out soft and flavorful.
- Herb Mix: Try rosemary with thyme or oregano if you want a different herbal twist. Fresh herbs always make a noticeable difference.
- Garlic Intensity: For stronger garlic flavor, use roasted garlic or garlic paste in the filling instead of garlic powder.
Step-by-Step: How I Make Rosemary Garlic Pull Apart Bread Recipe
Step 1: Bloom the Yeast and Start the Dough
Begin by mixing the yeast and sugar in a bowl or your stand mixer’s bowl. Warm the milk until it’s just warm to the touch—about 110°F (43°C)—then pour it over the yeast. Let it sit, loosely covered, for 5-10 minutes until it’s frothy and alive. This step is key to activating the yeast, and watching those bubbles form never gets old for me—it’s like magic!
Step 2: Combine Dough Ingredients and Knead
Once the yeast is frothy, add the softened butter, egg, flour, salt, garlic powder, and rosemary. Mix on low speed until the dough starts to pull away from the sides of the bowl. If it feels too sticky, add a tablespoon of flour at a time but resist adding too much—you want your dough on the soft side.
Next, knead the dough for 5 full minutes. If using a mixer, switch to the dough hook. I like kneading by hand sometimes—it gives you a great feel for the dough. You’re aiming for a soft, slightly tacky dough that passes the windowpane test (stretch a small piece—if light passes through without tearing, you’re golden!).
Step 3: First Rise
Shape the dough into a ball, place it in a greased bowl, cover tightly, and let it rise in a draft-free warm spot for about 60-90 minutes, until doubled in size. I love using the “warm oven” trick when my kitchen is chilly — just turn on your oven to 200°F for 2 minutes, then turn it off and pop in the dough bowl. That gentle warmth works like a charm.
Step 4: Prep the Filling
While the dough rises, mix the extra soft butter with rosemary, parsley, garlic, and salt. I usually just stir it with a spoon, but if your butter needs help blending, a hand mixer works perfectly. Keep this mixture at room temperature—spreadable butter makes assembling way easier without tearing your dough circles.
Step 5: Shape, Fill & Assemble
After the dough has risen, punch it down gently and place it on a floured surface. Divide into 12 equal pieces — about the size of a golf ball. Flatten each piece into a 4-inch circle with your hands (no rolling pin needed!). Spread 1-2 teaspoons of filling onto each, then sprinkle cheese on top. Fold in half and arrange them rounded side up in your greased loaf pan. Watching the little dough balls rise together in the pan always feels so satisfying.
Step 6: Second Rise
Cover the assembled bread and let it rise again in a warm spot for about 45 minutes until puffy. This step helps create that beautiful pull-apart texture.
Step 7: Bake the Bread
Preheat your oven to 350°F (177°C) and position your rack in the lower third. Bake the bread for around 50 minutes, tenting with foil if the top browns too quickly. Don’t worry if you see butter pooling around the edges — that’s flavor seeping in and will soak back into the bread as it cools.
Step 8: Finish and Serve
Once out of the oven, brush the top with melted butter and sprinkle flaky sea salt if you like an extra savory touch. Let it cool for 10 minutes in the pan before removing to a wire rack and serving warm. I find it nearly impossible to wait past this point!
Pro Tips for Making Rosemary Garlic Pull Apart Bread Recipe
- Room Temperature Butter: Don’t rush the butter—make sure the butter for the filling is soft enough to spread without tearing the dough, either by leaving it out longer or microwaving in quick bursts.
- Don’t Over-Flour: You want soft, slightly tacky dough. Adding too much flour will make the bread dense instead of fluffy and tender.
- Watch Your Oven Temperature: Every oven’s a bit different, so check the bread a few minutes before time’s up if it looks like it’s browning too fast.
- Use Fresh Herbs: Fresh rosemary and parsley really elevate the bread’s flavor and aroma compared to dried, but both work if fresh aren’t available.
How to Serve Rosemary Garlic Pull Apart Bread Recipe
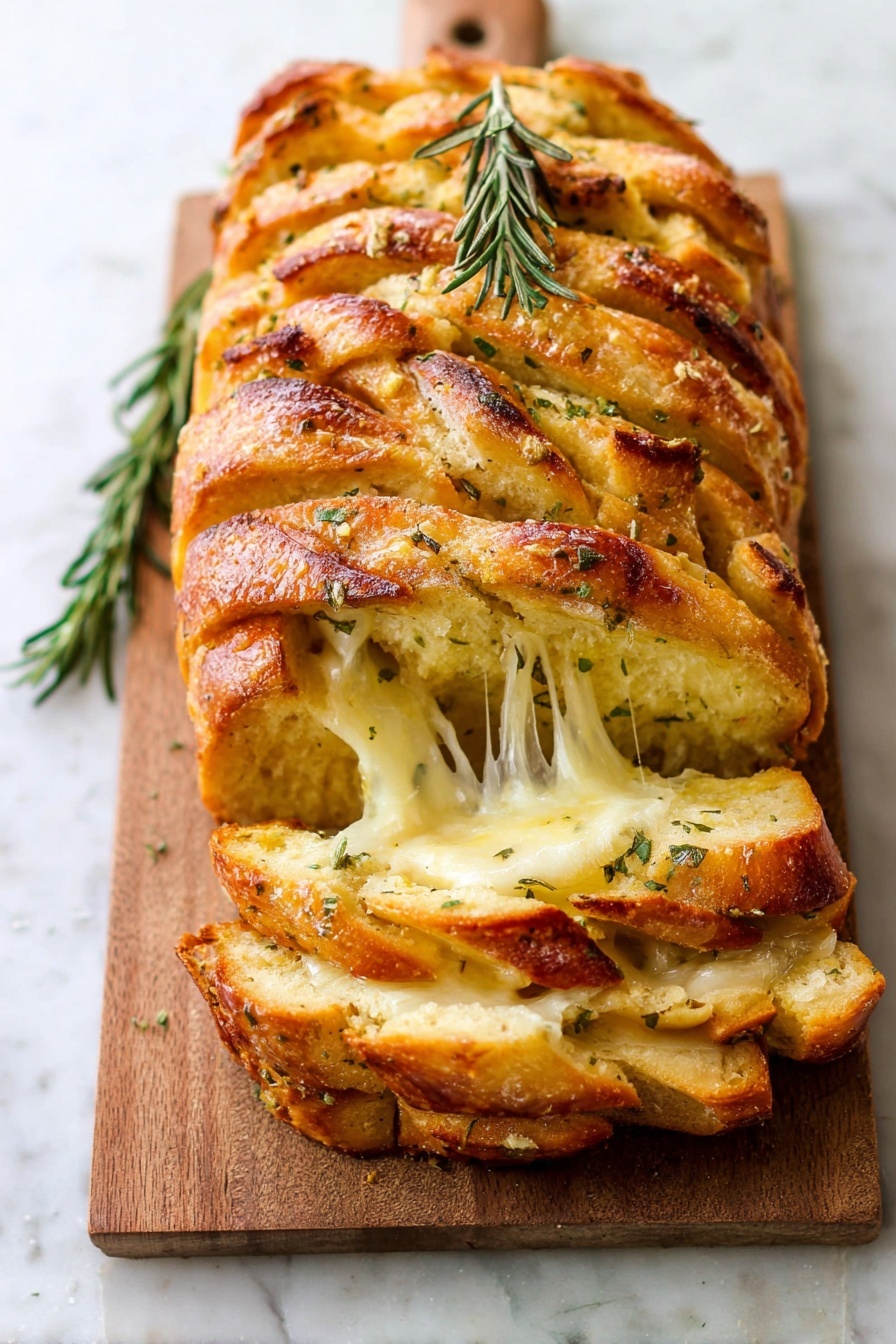
Garnishes
I usually finish with a sprinkle of flaky sea salt and a light brush of melted butter—that touch of saltiness and shine always gets compliments. Sometimes I add a little fresh chopped parsley or extra rosemary on top for color and aroma, especially if serving for guests.
Side Dishes
This bread pairs wonderfully with hearty soups like tomato basil or creamy mushroom soup. It’s also perfect alongside a fresh green salad or a simple charcuterie board with olives and meats for a casual get-together.
Creative Ways to Present
For holidays or parties, I love serving this bread in a round bundt pan instead of a loaf pan—then you get beautiful pull-apart petals that are extra fun. Also, try stuffing the pockets with different cheese blends or mix in sun-dried tomatoes or olives in the filling for a Mediterranean twist.
Make Ahead and Storage
Storing Leftovers
I store leftover bread wrapped loosely in foil or in an airtight container at room temperature for up to 2 days. Because of the crispy crust, it tends to harden a bit after the first day, but it’s still delicious when reheated.
Freezing
I’ve frozen this bread baked and cooled, wrapped tightly in plastic and foil. Just pop it in the freezer for up to 3 months. When you want to enjoy it, thaw at room temperature or overnight in the fridge, then warm in the oven for that freshly-baked taste.
Reheating
I reheat slices in a 300°F (149°C) oven for about 10-15 minutes, which softens the inside and crisps the crust back up. Microwaving works in a pinch, but it can make the crust a bit soggy.
FAQs
-
Can I use dried rosemary instead of fresh?
Absolutely! Use about half the amount of dried rosemary compared to fresh because dried herbs are more concentrated. So, if your recipe calls for 1 tablespoon fresh, use 2 teaspoons dried. The flavor won’t be quite as vibrant as fresh, but still delicious.
-
How long does it take to make Rosemary Garlic Pull Apart Bread?
The total time is around 4 hours, including dough rising time and baking. Most of that is hands-off rising, so the active prep and bake time is closer to 1 hour 15 minutes.
-
Can I make this bread without a stand mixer?
Yes! You can mix the dough by hand using a large bowl and wooden spoon, then knead on a floured surface. It takes a bit more elbow grease but works great. Just make sure to knead for a good 5 minutes until the dough is smooth and elastic.
-
What cheese works best in this recipe?
I often use parmesan for a nutty flavor or mozzarella for melty, gooey pockets. White cheddar is excellent for a sharper taste. Feel free to experiment with your favorites.
-
Can I freeze the dough before baking?
Yes, you can freeze the dough after the first rise. Punch it down, wrap tightly in plastic, and freeze for up to 3 months. When ready, thaw overnight in the fridge, then let it sit at room temp before shaping and baking as usual.
Final Thoughts
This Rosemary Garlic Pull Apart Bread Recipe is close to my heart because it’s so versatile and always a crowd-pleaser. Every time I make it, I’m reminded that baking bread doesn’t have to be intimidating—it can be relaxing and rewarding. Plus, the smell of fresh rosemary and garlic baking fills the kitchen with the coziest vibes. I can’t wait for you to try it and make it a family favorite too!
Print
Rosemary Garlic Pull Apart Bread Recipe
- Prep Time: 3 hours
- Cook Time: 50 minutes
- Total Time: 4 hours
- Yield: 1 loaf
- Category: Bread
- Method: Baking
- Cuisine: American
Description
A flavorful and aromatic rosemary garlic pull apart bread featuring a soft, fluffy dough layered with herb butter and cheese, perfect for sharing as a savory side or snack.
Ingredients
Dough
- 2 teaspoons Platinum Yeast from Red Star
- 1 Tablespoon granulated sugar
- 3/4 cup whole milk (180ml)
- 3 Tablespoons unsalted butter, softened (43g)
- 1 large egg
- 2 and 1/3 cups all-purpose flour (291g), plus more as needed
- 1 teaspoon salt
- 1 teaspoon garlic powder
- 1 Tablespoon finely chopped fresh rosemary (or 2 teaspoons dried)
Filling
- 5 Tablespoons unsalted butter, extra soft (71g)
- 1 Tablespoon finely chopped fresh rosemary (or 2 teaspoons dried)
- 1 Tablespoon finely chopped fresh parsley (or 2 teaspoons dried)
- 2 garlic cloves, minced or 1/2 teaspoon garlic powder
- 1/4 teaspoon salt
- 3/4 cup shredded parmesan, mozzarella, or white cheddar cheese (95g)
Optional Topping
- 1 Tablespoon unsalted butter, melted (14g)
- Coarse or flaky sea salt for sprinkling
Instructions
- Make the dough: Place yeast and sugar in a mixing bowl or stand mixer bowl. Warm the milk to about 110°F (43°C) and pour over the yeast mixture. Whisk gently and cover with a kitchen towel. Let stand for 5-10 minutes until frothy. Add softened butter, egg, flour, salt, garlic powder, and rosemary. Beat on low speed until dough forms and pulls from sides, about 3 minutes, adding flour if needed.
- Knead the dough: Using a dough hook in the mixer or by hand on a floured surface, knead the dough for 5 minutes until soft and slightly tacky, adding a tablespoon of flour at a time if too sticky. Perform the windowpane test to confirm readiness.
- First rise: Shape dough into a ball, place in a greased bowl, cover with plastic wrap or foil, and let it rise in a warm place until doubled in size, about 90 minutes.
- Prepare the filling: In a medium bowl, mix softened butter, rosemary, parsley, minced garlic, and salt until well combined. Cover and set aside at room temperature until needed.
- Assemble the bread: Punch down the risen dough and divide into 12 equal pieces. Flatten each piece into a 4-inch circle. Spread 1-2 teaspoons of herb butter filling on each circle, sprinkle with 1 tablespoon of shredded cheese, fold in half, and arrange folded side down in a greased 9×5-inch loaf pan.
- Second rise: Cover the loaf pan with plastic wrap or foil and let the dough rise again in a warm place until puffy, about 45 minutes.
- Bake: Preheat oven to 350°F (177°C) with rack in the lower third position. Bake the bread for about 50 minutes until golden brown, tenting with foil if browning too quickly. Remove from oven and place pan on a wire rack.
- Optional topping: Brush the top with melted butter and sprinkle with flaky sea salt while warm.
- Cool and serve: Let the bread cool for 10 minutes in the pan, then remove and serve warm.
- Storage: Store leftovers at room temperature for up to 2 days or refrigerate for up to 1 week. Reheat in a 300°F oven for 10-15 minutes or microwave briefly to soften.
Notes
- Make Ahead: Freeze baked bread up to 3 months; thaw at room temperature or overnight and reheat before serving.
- Dough can be refrigerated after first rise for up to 2 days before proceeding with assembly.
- To freeze dough, punch down after first rise, wrap tightly and freeze up to 3 months; thaw overnight and let rest 30 minutes before shaping.
- Use bread flour for a chewier texture or substitute 1 cup of flour with whole wheat for a nuttier flavor but avoid replacing all flour with whole wheat to maintain softness.
- Use extra soft butter for filling to prevent tearing the dough; microwave for 10-15 seconds if needed.
- If active dry yeast is used instead of instant yeast, increase rise times slightly.
- If the top browns too fast when baking, tent with aluminum foil to avoid burning.
Nutrition
- Serving Size: 1 slice
- Calories: 200 kcal
- Sugar: 2 g
- Sodium: 250 mg
- Fat: 10 g
- Saturated Fat: 6 g
- Unsaturated Fat: 3 g
- Trans Fat: 0 g
- Carbohydrates: 22 g
- Fiber: 1 g
- Protein: 6 g
- Cholesterol: 40 mg

