

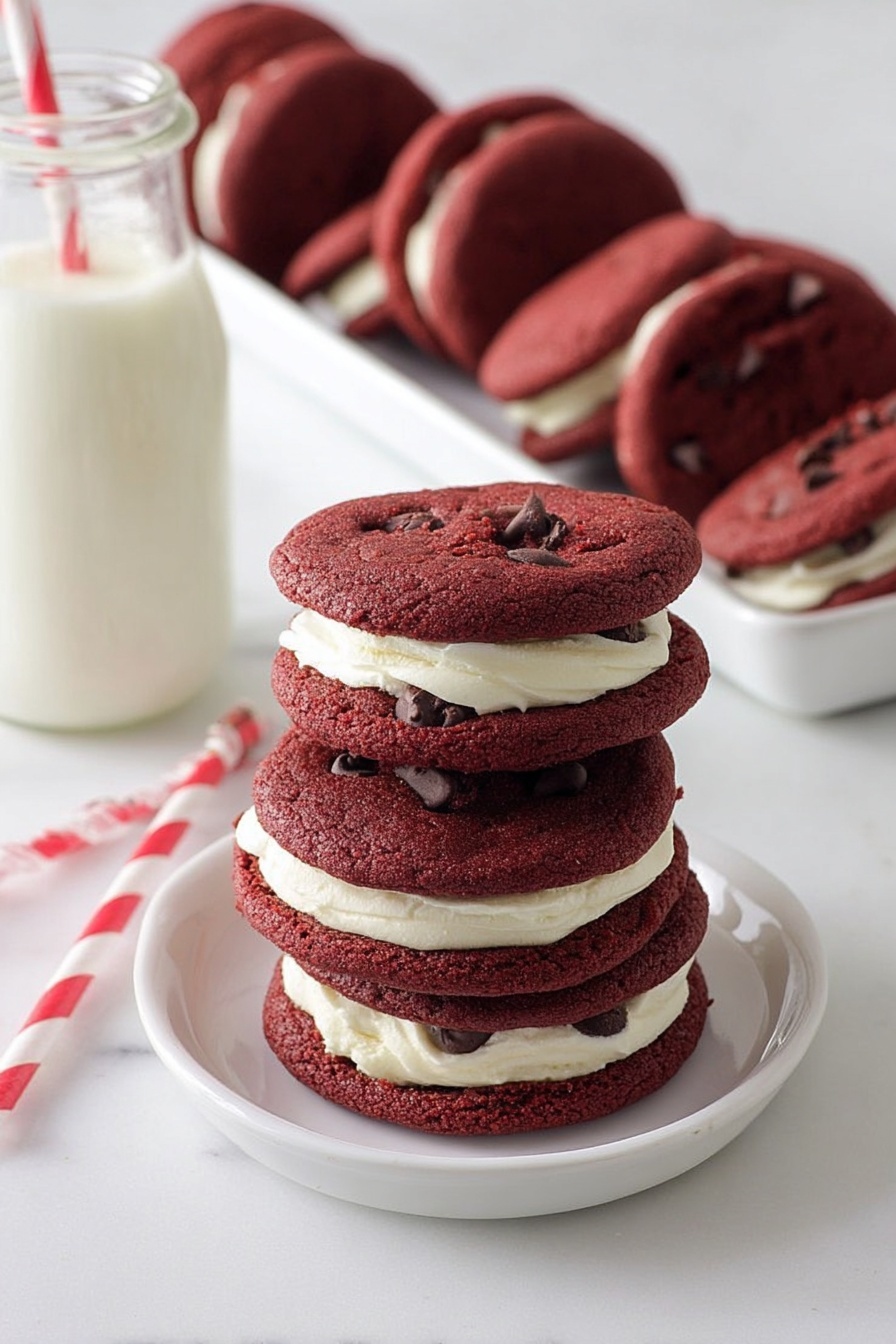
Red Velvet Cookie Sandwiches Recipe
If you’ve ever dreamed of biting into a treat that’s both rich and delightfully dreamy, then you’re in for a serious treat today. I’m excited to share my absolutely fan-freaking-tastic Red Velvet Cookie Sandwiches Recipe with you—imagine soft, chewy red velvet cookies hugging a luscious cream cheese frosting. It’s the kind of recipe that feels special but is surprisingly easy to pull off. Ready to wow your taste buds and impress anyone lucky enough to get one? Let’s dive in!
Why This Recipe Works
- Perfect Texture Balance: The cookies are chewy but hold their shape, making them ideal for sandwiching.
- Classic Cream Cheese Frosting: Smooth, tangy, and sweet, it complements the cocoa undertones beautifully.
- Visual Appeal: The vibrant red color gives these sandwiches a festive, eye-catching pop.
- Simple Ingredients: No fancy or hard-to-find items—just pantry staples and a couple of special touches.

Ingredients & Why They Work
Every ingredient in this Red Velvet Cookie Sandwiches Recipe plays a role, from the buttery richness to the gentle cocoa kick. Knowing why each is here helps you feel more confident mixing your batter and frosting.

- Unsalted butter: Using room-temperature butter ensures smooth creaming with the sugars, which gives cookies their soft, tender crumb.
- Light brown sugar: Adds moisture with its molasses content and deepens the flavor for that classic chewy cookie texture.
- Granulated sugar: Balances sweetness and helps cookies spread just the right amount.
- Egg: Acts as a binder and adds richness for that melt-in-your-mouth feel.
- Vanilla extract: A must for flavor depth beyond the red velvet’s cocoa and color.
- Red velvet bakery emulsion or red gel food color: This gives those cookies their iconic red hue; emulsion adds more flavor than just color alone.
- Baking soda: Leavens the cookies lightly, keeping them from being dense.
- Salt: Enhances all the sweet flavors, balancing the cookie perfectly.
- Cocoa powder: The subtle cocoa taste is a hallmark of red velvet and brings warmth without overpowering.
- All-purpose flour: Forms the base—makes the cookie tender yet sturdy enough to sandwich.
- Milk chocolate chips: Stirred in and pressed on top, these add little bursts of melty chocolate deliciousness.
- Cream cheese: For the frosting, it lends the tang that cuts through the sweetness beautifully.
- Powdered sugar: Sweetens and thickens the frosting to the perfect pipe-able consistency.
- Milk (for frosting): Adjusts frosting texture for that light and fluffy finish.
Tweak to Your Taste
I love how this Red Velvet Cookie Sandwiches Recipe lends itself to easy customization. Whether you want to dial back the sweetness or sneak in a nutty crunch, it’s yours to make your own!
- Variation: Once, I added finely chopped pecans into the dough—totally transformed the texture and added a lovely nutty twist.
- Make it Vegan: Try swapping butter for coconut oil and use a flax egg instead of a regular egg to keep these treats dairy-free.
- Less Sweet: If you’re watching sugar, reduce the powdered sugar slightly in the frosting and try dark chocolate chips instead of milk.
- Color Options: If you prefer a more natural approach, you can substitute beet juice concentrate for artificial food coloring for that beautiful red shade.
Step-by-Step: How I Make Red Velvet Cookie Sandwiches Recipe
Step 1: Creaming the Butter and Sugars to Fluffy Perfection
Start by preheating your oven to 350°F and lining a baking sheet with parchment paper. Then, in a large bowl, add your softened unsalted butter, light brown sugar, and granulated sugar. Use a hand mixer on medium speed and beat these together until the mixture is light and fluffy—this usually takes about two minutes. It’s tempting to rush this step, but trust me, taking your time here means soft, pillowy cookies later.
Step 2: Adding Egg, Vanilla, and That Gorgeous Red Color
Next, crack in your egg along with vanilla extract and your red velvet bakery emulsion (or gel food coloring if you prefer). Mix again until everything blends into a smooth, deep red batter. The emulsion adds that yummy bakery vibe, so if you can get your hands on it, your cookies will taste extra special.
Step 3: Folding in the Dry Ingredients and Cocoa
Now, add the baking soda, salt, cocoa powder, and flour. Mix on low speed just until most of the flour has vanished into the dough. Then crank your mixer to high for about 20 seconds. This little trick helps the dough come together into a cohesive ball, perfect for scooping.
Step 4: Chocolate Chips and Shaping
Fold in 1 cup of the milk chocolate chips after the dough forms. I usually save about a quarter cup to gently press on top of each cookie scoop before baking—that extra chocolate on top gets all melty and gorgeous. Using a medium cookie scoop, drop your dough onto the sheet in batches (I like 6 at a time), giving them plenty of room to spread out.
Step 5: Baking and Cooling
Bake for 12 minutes until they look set around the edges but still slightly soft in the center—that’s when they are perfectly chewy once cooled. Let them cool on the baking sheet for 10 to 15 minutes before transferring to a wire rack to cool completely. This step is key; rushing it means your frosting might melt!
Step 6: Making that Luscious Cream Cheese Frosting
While the cookies cool, whip up your frosting. Beat softened cream cheese and butter together until light and fluffy—about two minutes. Add vanilla extract, powdered sugar, and milk, mixing until smooth. To get that beautiful fluffy texture, turn the mixer to high again and beat for another two minutes. Your frosting is now pipe-ready!
Step 7: Assembling the Cookie Sandwiches
Fill a piping bag fitted with a 1M tip with your cream cheese frosting and pipe a generous swirl onto the bottom side of a cooled cookie. Top it with another cookie and press gently—just enough to stick. This is the part where you realize you’ve made something seriously delicious.
Pro Tips for Making Red Velvet Cookie Sandwiches Recipe
- Don’t Skip the Cooling: Make sure the cookies are completely cool before frosting to keep your filling from melting into a mess.
- Use Emulsion for Flavor: The red velvet emulsion adds subtle richness that gel colors just can’t match.
- Gentle Pressing: When sandwiching, press gently to avoid squishing your frosting out the sides.
- Scoop Size Matters: Stick with a medium scoop for consistent cookie size—this helps make uniform sandwiches and even baking.
How to Serve Red Velvet Cookie Sandwiches Recipe
Garnishes
I love dusting my finished cookie sandwiches lightly with powdered sugar for a delicate snowy touch. Sometimes, I sprinkle a few finely chopped pistachios or red sanding sugar on top of the frosting swirl for an elegant and festive pop, especially around the holidays.
Side Dishes
These sandwiches pair beautifully with a cold glass of milk, a hot cup of coffee, or even a creamy chai latte. For parties, I like to serve them alongside fresh berries or a light fruit salad to offset the indulgence with a refreshing bite.
Creative Ways to Present
For special occasions, I place each cookie sandwich in a mini cupcake liner or wrap with a festive ribbon for gifting. I’ve also arranged them in pretty tiered trays for bridal showers and birthday parties—they make a stunning presentation and invite guests to dig in!
Make Ahead and Storage
Storing Leftovers
Once assembled, store your Red Velvet Cookie Sandwiches in an airtight container in the refrigerator. I find they keep beautifully for up to 4 days. The cool environment actually helps the frosting set just right and keeps the cookies from drying out.
Freezing
Want to stash these for later? Freeze the assembled cookie sandwiches on a baking sheet first, then transfer to a freezer-safe bag or container. They keep well for up to 2 months. When you’re ready to enjoy, just thaw in the fridge overnight.
Reheating
I usually don’t warm these up because cream cheese frosting is best chilled, but if you do want to soften them a bit, leave at room temperature for about 20 minutes before serving. That way, the cookie is soft without the frosting turning runny.
FAQs
-
Can I use regular red food coloring instead of red velvet bakery emulsion?
Absolutely! Regular red gel or liquid food coloring works fine and will give you that vibrant red color. However, the red velvet bakery emulsion also adds a subtle, rich flavor that enhances the cookie beyond just color. So if you want extra depth, I’d recommend the emulsion—but your cookies will still be delicious with basic coloring.
-
Why do the cookies need baking soda?
Baking soda helps the cookies rise slightly and creates that soft, tender texture we love in red velvet treats. It also reacts with the acidic ingredients (like the cream cheese in frosting) to give that classic red velvet crumb and flavor profile.
-
Can I make the frosting without cream cheese?
You can, though cream cheese is traditional in red velvet recipes because it offers that nice tangy contrast. If you want a dairy-free version, you could try a plant-based cream cheese or simply use a vanilla buttercream, but keep in mind this will alter the flavor and richness.
-
How do I prevent the frosting from melting on the cookies?
Make sure your cookies are fully cooled before frosting. Warm cookies will make the cream cheese frosting melt and slide off. Patience here really pays off for neat, beautiful sandwiches.
-
Can I use this recipe to make regular cookies without sandwiches?
Yes! These red velvet cookies are delicious on their own. Just bake them as directed and enjoy with or without frosting. You can even sprinkle some powdered sugar on top for a simple finish.
Final Thoughts
This Red Velvet Cookie Sandwiches Recipe has become one of my go-tos when I want to impress guests but keep things fuss-free. There’s something so comforting and celebratory about biting into these chewy, chocolatey red velvet cookies paired with smooth, tangy cream cheese frosting. Whether you’re making them for a special occasion or just because, I promise these treats will make you smile—and might even have your friends asking for the recipe. So grab your mixing bowl and get baking; I can’t wait for you to taste the magic!
Print
Red Velvet Cookie Sandwiches Recipe
- Prep Time: 20 minutes
- Cook Time: 15 minutes
- Total Time: 35 minutes
- Yield: 9 sandwiches
- Category: Dessert
- Method: Baking
- Cuisine: American
- Diet: Vegetarian
Description
Delight in these homemade Red Velvet Sandwich Cookies featuring soft, cocoa-infused cookies filled with a creamy, fluffy cream cheese frosting. Perfect for a sweet treat or special occasion, these cookies combine a classic red velvet flavor with a luscious sandwich-style presentation.
Ingredients
Cookies
- 1 cup unsalted butter room temperature
- 3/4 cup light brown sugar packed
- 3/4 cup granulated sugar
- 1 egg
- 1 teaspoon vanilla extract
- 1 tablespoon red velvet bakery emulsion or red gel food color
- 1 teaspoon baking soda
- 1/4 teaspoon salt
- 1/4 cup cocoa powder
- 2 cups all-purpose flour
- 1 1/4 cups milk chocolate chips divided
Frosting
- 4 oz cream cheese room temperature
- 1/2 cup butter room temperature
- 2 teaspoons vanilla extract
- 2 1/2 cups powdered sugar
- 2 tablespoons milk
Instructions
- Preheat Oven: Preheat the oven to 350 degrees Fahrenheit and line a baking sheet with parchment paper to prepare for baking the cookies.
- Mix Butter and Sugars: In a large mixing bowl, combine the room temperature butter, light brown sugar, and granulated sugar. Beat on medium speed with a hand mixer for about two minutes until the mixture is light and fluffy.
- Add Wet Ingredients: Incorporate the egg, vanilla extract, and red velvet bakery emulsion or red gel food coloring into the sugar and butter mixture. Mix until fully combined.
- Add Dry Ingredients: Add the baking soda, salt, cocoa powder, and all-purpose flour to the bowl. Mix on low speed until the flour is nearly incorporated, then increase to high speed and beat for 20 seconds until the dough forms a ball.
- Incorporate Chocolate Chips: Fold in 1 cup of the milk chocolate chips into the dough, reserving 1/4 cup to press onto the cookie tops before baking.
- Scoop Dough: Use a medium cookie scoop to portion out the dough onto the prepared baking sheet, spacing about 6 cookies at a time to allow for spreading. Press 3-4 reserved chocolate chips onto the tops of each cookie dough ball.
- Bake Cookies: Bake the cookies in the preheated oven for 12 minutes. After baking, remove from the oven and allow them to cool on the baking sheet for about 10 to 15 minutes to set further.
- Cool Completely: Transfer the cookies to a cooling rack and let them cool completely before frosting.
- Prepare Frosting: In a mixing bowl, beat the cream cheese and butter together until light and fluffy, about two minutes. Add vanilla extract, powdered sugar, and milk, mixing until combined. Increase mixer speed to high and beat for another two minutes to achieve a fluffy frosting.
- Assemble Sandwich Cookies: Fill a piping bag fitted with a 1M tip with the frosting. Pipe swirls onto the bottom of half of the cooled cookies, then gently place the remaining cookies on top to form sandwiches, pressing lightly to secure.
Notes
- If you omit the red velvet coloring or emulsion, the cookies will be delicious chocolate sandwich cookies instead.
- Ensure the butter and cream cheese are at room temperature for the smoothest frosting texture.
- Pressing chocolate chips on top adds extra flavor and visual appeal but can be omitted if desired.
- For best results, allow cookies to cool completely before frosting to prevent melting the cream cheese mixture.
- Store assembled sandwich cookies in an airtight container in the refrigerator for up to 3 days.
Nutrition
- Serving Size: 1 sandwich cookie
- Calories: 250 kcal
- Sugar: 20 g
- Sodium: 120 mg
- Fat: 14 g
- Saturated Fat: 8 g
- Unsaturated Fat: 5 g
- Trans Fat: 0 g
- Carbohydrates: 28 g
- Fiber: 1 g
- Protein: 3 g
- Cholesterol: 35 mg


