

Peppermint Cheesecake Cookies Recipe
If you’re searching for a festive treat that blends creamy cheesecake goodness with a refreshing peppermint twist, then you’re going to adore this Peppermint Cheesecake Cookies Recipe. Trust me, these cookies are a total game-changer during the holiday season, and once you try them, you’ll wonder how you ever did without them. They’re soft, a little chewy, and packed with that perfect hint of peppermint – just right to brighten up any cookie platter or afternoon coffee break. I can’t wait to walk you through each step to make sure your batch comes out just as delightful as mine!
Why This Recipe Works
- Creamy Texture: The cream cheese and butter blend creates a soft, tender cookie that melts in your mouth.
- Perfect Peppermint Balance: Peppermint extract is added thoughtfully to create a refreshing but not overpowering flavor.
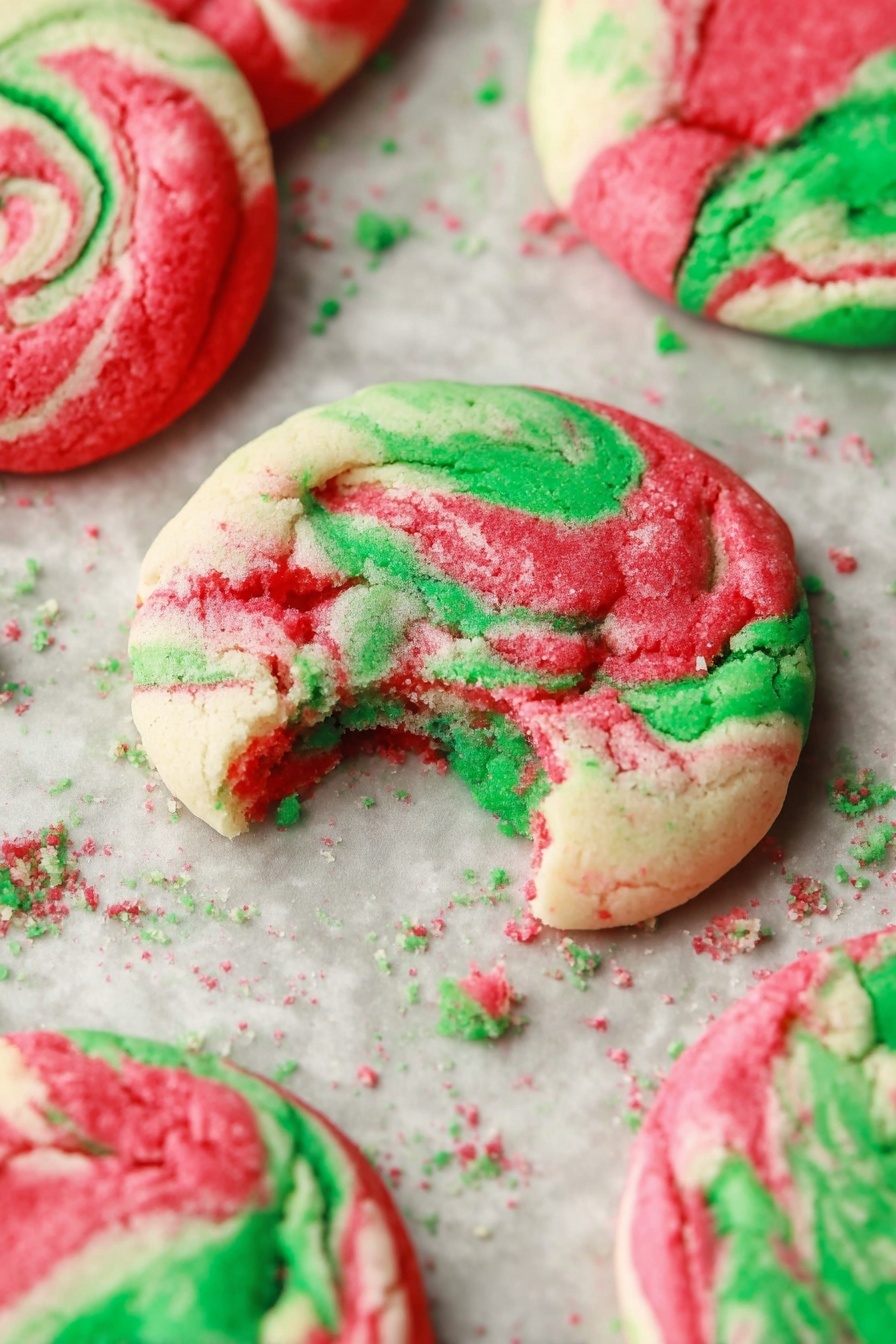
- Fun Festive Colors: Red and green doughs swirl together, making the cookies both tasty and visually festive.
- Simple Ingredients: Pantry staples come together easily so you can whip these up last minute without stress.

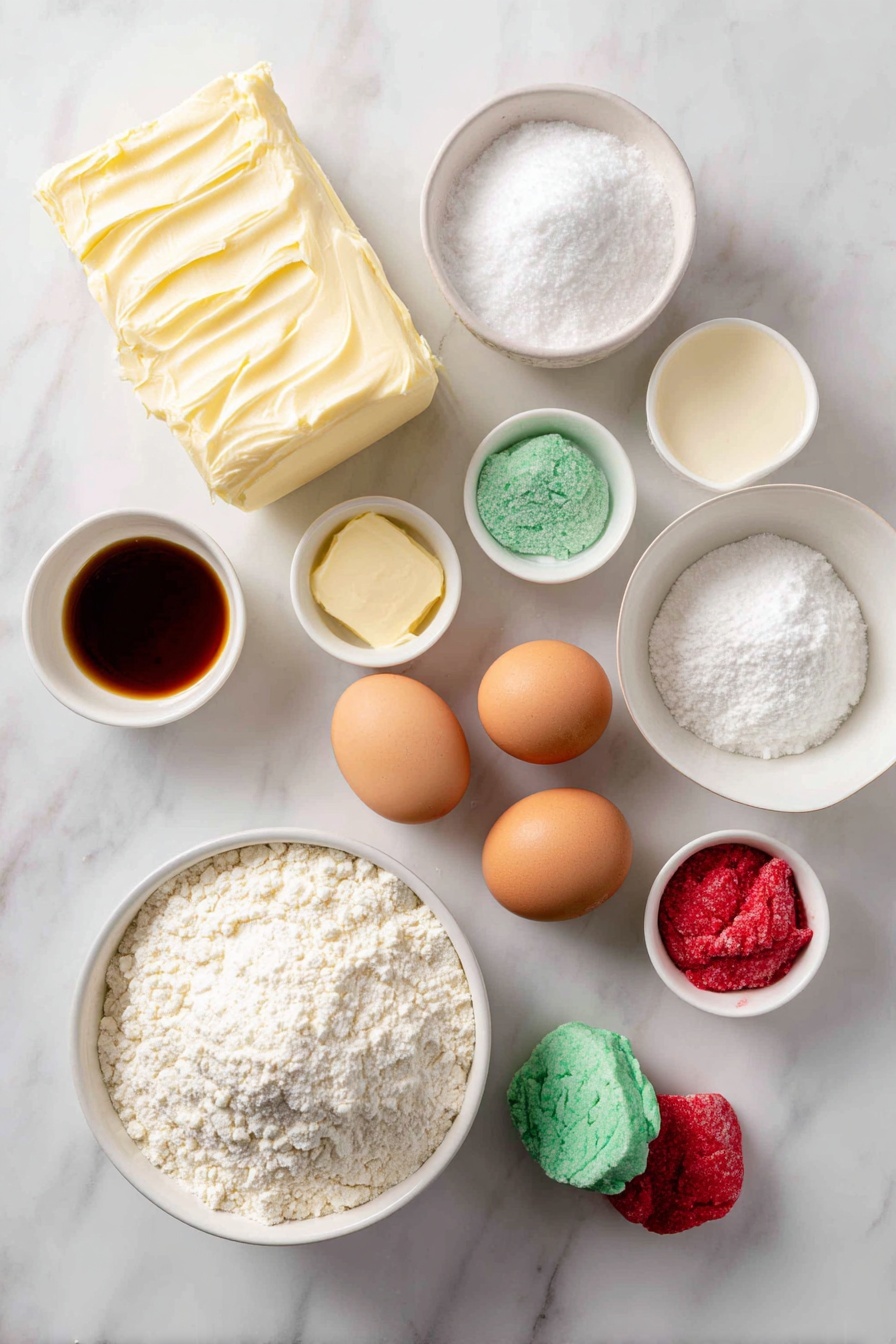
Ingredients & Why They Work
The magic of this Peppermint Cheesecake Cookies Recipe is all in how the ingredients play off one another. Cream cheese makes the cookies intensely soft, while fresh eggs and butter add richness. Peppermint extract brings that holiday spirit with a gentle zing. Don’t forget the flour and baking powder — they keep the texture just right, and the red and green food coloring turns these cookies into little festive works of art!
- Cream Cheese: Make sure it’s softened to room temperature so it blends smoothly and gives a velvety texture without lumps.
- Butter: Also at room temp for that perfect creamy consistency and to help the dough come together nicely.
- Granulated Sugar: Adds sweetness and helps with that slight crispy edge.
- Eggs: Provide structure and moisture, ensuring your cookies don’t dry out.
- Vanilla Extract: Smooths out flavors and adds warmth — totally optional but I find it makes the cookie taste friendlier.
- Flour: Use all-purpose for the best texture; too much flour can make cookies dense, so measure carefully.
- Baking Powder: Gives the dough a subtle lift for a softer crumb.
- Salt: Balances the sweetness and enhances all the flavors.
- Red and Green Food Coloring: Adds visual holiday cheer — gel colors give vibrant hues without thinning the dough.
- Peppermint Extract: The star flavor! Use sparingly to avoid overpowering the delicate cheesecake notes.
- Powdered Sugar (Optional): Dust on top after baking for a snowy finish that looks as good as it tastes.
Tweak to Your Taste
One of my favorite things about this Peppermint Cheesecake Cookies Recipe is how easy it is to tweak. I’ve played around with the peppermint level myself — sometimes dialing it back for little ones or amping it up to impress friends who love a sharp mint kick. Swapping out the peppermint extract for orange or almond extracts is also a nice twist if you want to switch things up but keep the creamy cheesecake vibe.
- Less Peppermint: I dial it back to half a teaspoon when baking for my kids who aren’t crazy about strong mint flavors.
- More Cheesecake Tang: Add a teaspoon of lemon juice instead of vanilla for a more pronounced tangy flavor — it feels fancy but is so simple.
- Food Color Swap: Try pastel colors for a winter wonderland theme instead of classic red and green.
- Gluten-Free: Substitute with a gluten-free flour blend to suit dietary needs — just watch for texture changes.
Step-by-Step: How I Make Peppermint Cheesecake Cookies Recipe
Step 1: Cream Together the Cream Cheese and Butter
Start by beating the cream cheese and butter together on high speed until the mixture is fluffy and super smooth—usually around 1-2 minutes. This step is key to avoiding lumps and getting that velvety texture in your dough. I like to scrape down the bowl a couple times to make sure everything blends evenly, especially the cream cheese which can be a little stubborn.
Step 2: Add Sugar, Eggs, and Vanilla
Next, add in the sugar and keep beating until you have a fluffy, fully incorporated mixture — another 1-2 minutes. Then, beat in the eggs one at a time followed by vanilla extract. This ensures the eggs emulsify well without curdling the batter. The vanilla tames the tang of the cream cheese nicely, but if you want more tang, you could easily swap it for lemon juice.
Step 3: Mix Dry Ingredients and Combine
In a separate bowl, whisk together your flour, baking powder, and salt. Gradually add this to the wet ingredients and stir just until combined. Don’t overmix here — you want the dough to hold together but still be tender, or your cookies will end up tough. Once combined, separate the dough into three smaller bowls for coloring.
Step 4: Chill the Dough and Add Color
Pop those dough portions in the fridge for about 15 minutes to firm up — this helps with shaping later on. Then, add red food coloring to one bowl, green to another, and leave one plain (or add a bit of peppermint extract to the green dough as I do). Mix until you reach your desired colors. The dough stays a bit sticky which is totally normal; if it’s too soft to work with, just chill a bit longer.
Step 5: Shape Your Marbled Cookies
To get that beautiful peppermint marbling, take about half a tablespoon from each colored dough and gently roll them together between your palms. The trick is to roll just enough to stick the doughs together without losing the distinct red and green swirls — if you mash too much, it turns into a boring color blend. Place the finished balls on baking sheets lined with parchment or silicone mats.
Step 6: Bake and Cool
Bake at 350°F (175°C) for 10-11 minutes. You want your cookies light in color and only just beginning to brown at the edges and bottoms. Overbaking dries them out — so keep a close eye, especially the first time you try this recipe. Let the cookies cool on the baking sheet for a few minutes before moving them to a wire rack to finish cooling.
Step 7: Optional Finishing Touch
Once cooled, I love dusting the cookies lightly with powdered sugar for a whimsical snowy look. It’s not just decorative — the powdered sugar adds a final touch of sweetness that’s just magical.
Pro Tips for Making Peppermint Cheesecake Cookies Recipe
- Room Temperature Ingredients: Always bring cream cheese and butter to room temp for the smoothest dough.
- Don’t Overmix Flour: Overworking the dough with flour tightens gluten and leads to dryer cookies — mix just till combined.
- Chill Dough for Easier Handling: If the dough feels sticky, a quick chill helps tremendously when shaping the marbled balls.
- Watch Baking Time Closely: Ovens vary, so start checking a minute or two before the timer to avoid overbakes.
How to Serve Peppermint Cheesecake Cookies Recipe
Garnishes
I often sprinkle a tiny pinch of crushed candy canes on top of the cookies right after baking to add crunch and an extra burst of peppermint. Sometimes I dust with powdered sugar for that soft snow-like effect which also feels festive and cozy.
Side Dishes
These cookies are perfect with a steaming mug of hot cocoa or peppermint tea during those chilly winter evenings. They’re also a delightful pairing with a simple glass of milk — honestly, I like them just as they are for an afternoon treat!
Creative Ways to Present
For holiday parties, I like arranging these cookies on a festive platter surrounded by fresh pine sprigs and twinkling fairy lights. Another fun idea is to package a few in little clear bags with a ribbon and peppermint stick, making them perfect for gifting neighbors or coworkers.
Make Ahead and Storage
Storing Leftovers
I store these cookies in an airtight container at room temperature, and they stay wonderfully soft and fresh for up to a week. If your kitchen is particularly warm, pop them in the fridge to keep the texture intact.
Freezing
I’ve had great success freezing the baked cookies. Just lay them out on a baking sheet to freeze individually, then transfer them to a freezer-safe container or bag. They freeze well for up to three months and thaw in minutes at room temperature.
Reheating
If you want that freshly baked warmth, pop the cookie in the microwave for about 8-10 seconds or warm in a low oven for 3-4 minutes. This revives that soft, gooey texture magically.
FAQs
-
Can I make these Peppermint Cheesecake Cookies Recipe dairy-free?
While I haven’t tested a dairy-free version myself, you could try swapping cream cheese and butter with vegan or dairy-free alternatives. Just keep in mind the texture and flavor might vary slightly from the classic cheesecake richness.
-
Why are my peppermint cheesecake cookies dense?
Dense cookies often result from overmixing the flour or using too much flour in the dough. Remember to mix just until combined and measure flour carefully by spooning it into your cup and leveling off without packing.
-
What’s the best way to avoid colors melding together when rolling the dough?
Roll gently — just enough to combine without squashing the dough completely. If you feel it’s sticking or getting too soft, chill it for a few extra minutes before shaping.
-
Can I make these ahead of time for holiday parties?
Absolutely! You can prepare the dough up to 24 hours in advance and keep it chilled or frozen. Alternatively, bake the cookies a few days early and store in an airtight container — they’ll still taste fresh and festive.
Final Thoughts
I have to say, this Peppermint Cheesecake Cookies Recipe holds a special place in my heart because it always brings a little extra joy to our holiday celebrations. From the marbled colors to that creamy, minty bite — it’s a cookie that makes everyone smile. I hope you give it a try and find it as rewarding (and delicious) as I do. Don’t be shy to experiment a bit and make it yours, because the best recipes are the ones we share and adapt with love in our kitchens. Happy baking!
Print
Peppermint Cheesecake Cookies Recipe
- Prep Time: 25 minutes
- Cook Time: 11 minutes
- Total Time: 36 minutes
- Yield: 44 cookies
- Category: Dessert
- Method: Baking
- Cuisine: American
- Diet: Vegetarian
Description
Celebrate the holidays with these festive Christmas Cheesecake Cookies, featuring a creamy cheesecake base, colorful marbled dough in red and green, and a refreshing hint of peppermint. These soft, fluffy cookies are perfect for holiday parties and gift-giving, with an easy make-ahead option and optional powdered sugar dusting for extra sweetness.
Ingredients
Main Ingredients
- 8 oz cream cheese room temperature
- 1/2 cup butter room temperature
- 1 1/4 cup granulated sugar
- 2 eggs
- 1 teaspoon vanilla extract
- 2 1/2 cups flour
- 2 teaspoons baking powder
- 1/2 teaspoon salt
- Red food coloring
- Green food coloring
- 1/2 teaspoon peppermint extract
- Optional: powdered sugar for dusting
Instructions
- Preheat Oven: Preheat your oven to 350 degrees F and line two baking sheets with parchment paper or silicone baking mats to prepare for baking.
- Cream Butter and Cheese: In a large mixing bowl, beat the cream cheese and butter together at high speed for 1-2 minutes until the mixture is fluffy and smooth.
- Add Sugar and Eggs: Add the granulated sugar to the butter and cream cheese mixture and beat until fully incorporated and fluffy, about 1-2 minutes. Then, beat in the eggs and vanilla extract for 1 minute until combined.
- Combine Dry Ingredients: In a separate medium bowl, whisk together the flour, baking powder, and salt to blend the dry ingredients evenly.
- Mix Dry with Wet: Gradually add the dry ingredients to the butter mixture, stirring just until the dough is incorporated. Avoid over-mixing to keep the cookies tender.
- Divide and Chill Dough: Separate the dough evenly into three small bowls and refrigerate for 15 minutes to firm up the dough for easier handling.
- Color the Dough: After chilling, add red food coloring to one bowl, green food coloring and peppermint extract to another, and leave the third plain. Mix each dough to your desired color. If the dough feels too sticky, chill it a few more minutes.
- Form Cookies: Take ½ tablespoon from each color dough and roll together between your palms just enough to create a marbled effect—avoid over mixing the colors. Repeat with the remaining dough and place the formed balls on the prepared baking sheets.
- Bake: Bake the cookies in the preheated oven for 11 minutes. The cookies should remain light in color with just slight browning on the bottoms.
- Cool and Finish: Let the cookies cool on the baking sheets for a few minutes to firm up before transferring to a wire rack to cool completely. Optionally, dust with powdered sugar before serving.
Notes
- Store the cookies in a tightly sealed container at room temperature for up to one week or freeze for up to 3 months for longer freshness.
- For a tangier cheesecake flavor, you can add a teaspoon of lemon juice or omit extracts altogether. Peppermint extract is optional and can be replaced with other flavors if preferred.
- Be careful not to overbake the cookies as this will create a drier, biscuit-like texture instead of soft and chewy.
Nutrition
- Serving Size: 1 cookie
- Calories: 150 kcal
- Sugar: 10 g
- Sodium: 90 mg
- Fat: 7 g
- Saturated Fat: 4 g
- Unsaturated Fat: 3 g
- Trans Fat: 0 g
- Carbohydrates: 18 g
- Fiber: 0.5 g
- Protein: 2 g
- Cholesterol: 30 mg

