
No Bake Peanut Butter Oat Cups Recipe
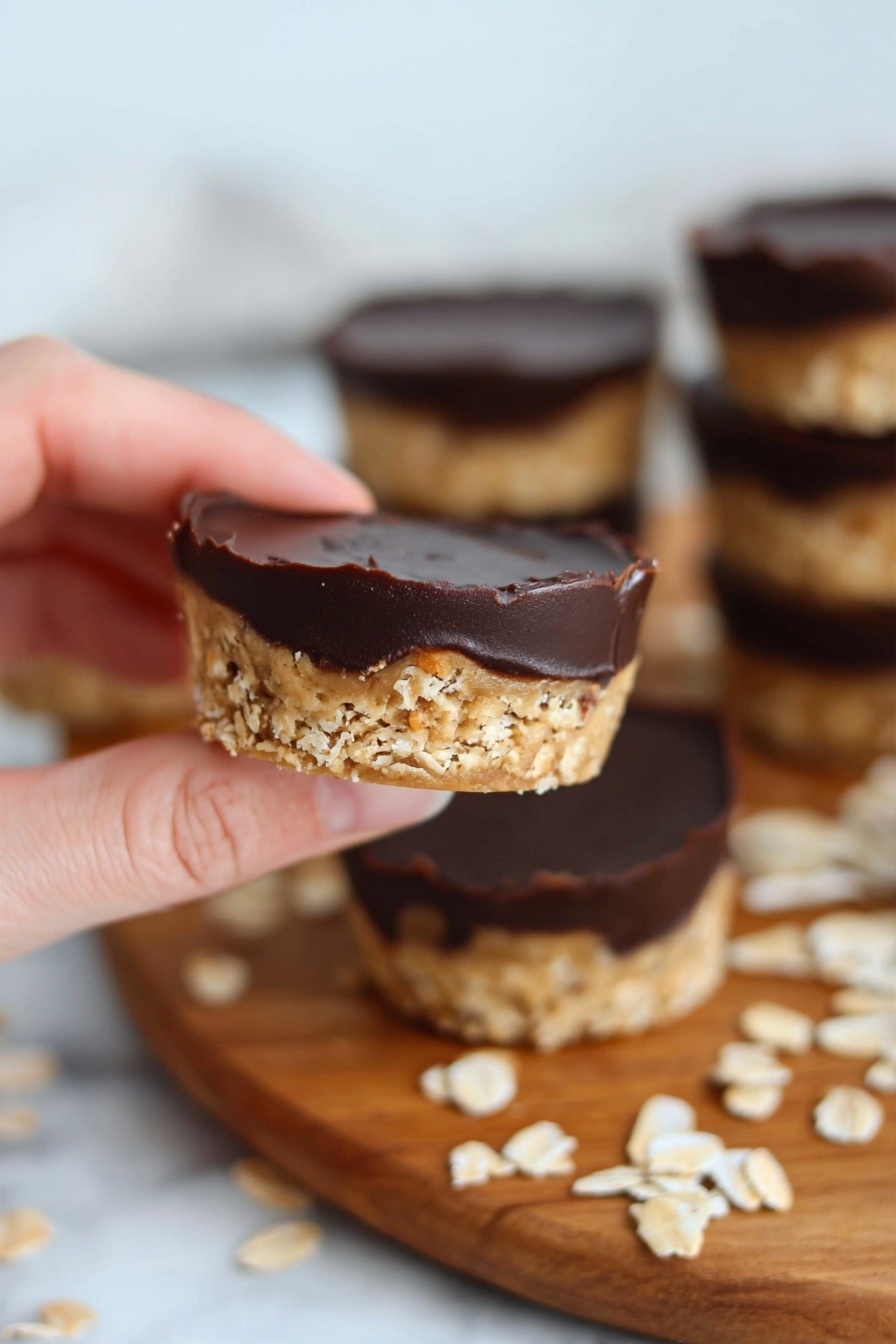
If you’re craving a quick, no-fuss treat that tastes like a peanut butter dream but doesn’t require an oven, you’re going to adore this No Bake Peanut Butter Oat Cups Recipe. It’s the perfect combination of creamy peanut butter, wholesome oats, and a rich chocolate topping—all ready in just a few simple steps. I first stumbled upon this recipe on a busy weeknight when I needed something satisfying and fast, and now it’s my go-to snack for when I want a little indulgence without the oven hassle. Keep reading, because these cups might just turn into your new favorite!
Why This Recipe Works
- Simplicity Meets Flavor: Just a handful of ingredients come together quickly without baking but never skimp on taste.
- No Oven Needed: Perfect for when the weather’s hot or you just want a fast treat without heating up the kitchen.
- Customizable Texture: Making oat flour from rolled oats adds a subtle chew without being gritty.
- Perfect Balance: The chocolate layer on top adds richness and a beautiful finish that makes these cups irresistible.

Ingredients & Why They Work
This No Bake Peanut Butter Oat Cups Recipe is all about layering simple, wholesome ingredients that work beautifully together. Each one plays its part—from the creamy peanut butter providing protein and richness to the oat flour adding just the right texture. Here are some thoughts to keep in mind when picking your ingredients:
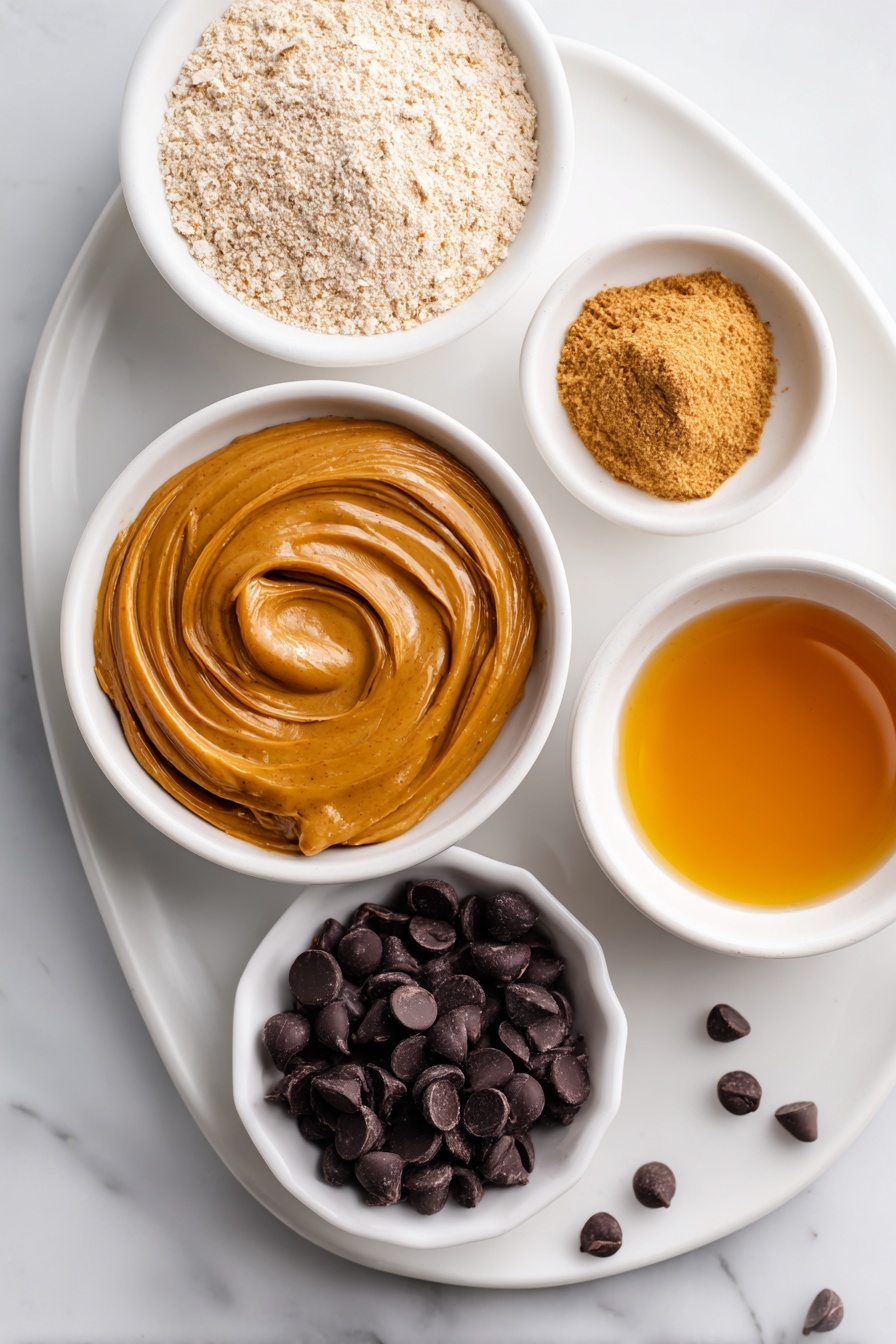
- Peanut Butter: Choose a natural variety with minimal added sugar or oil for a clean peanut flavor.
- Rolled Oats: Processing oats into oat flour gives that perfect dense base instead of a grainy feel.
- Maple Syrup: Brings natural sweetness and helps bind the mixture; you can swap for honey if preferred.
- Chocolate Chips: I like semi-sweet or bittersweet to balance the sweetness, but milk chocolate works fine too.
- Coconut Oil (optional): Adds shine and helps the chocolate set smoothly, but you can skip it if needed.
Tweak to Your Taste
This recipe is a total playground for your personal tastes! I love mixing things up a bit each time I make these cups, so don’t hesitate to experiment with flavors or textures that you enjoy.
- Variation: One of my favorites is stirring in pumpkin puree and pumpkin spice for a seasonal twist—it makes the mixture a bit moister and adds cozy fall vibes.
- Dietary Adjustments: If you’re nut-free, try sunflower seed butter instead of peanut butter—it works surprisingly well and keeps that creamy texture.
- Sweetness Level: You can dial up or down the maple syrup depending on your sweet tooth, and adding a pinch of salt brings out all the flavors.
Step-by-Step: How I Make No Bake Peanut Butter Oat Cups Recipe
Step 1: Transform Oats into Oat Flour
Start by blending your rolled oats in a high-speed blender or food processor until they become a fine oat flour. This step might seem simple, but it’s key to getting the right texture in your cups—no chunky bits here! I usually pulse in quick bursts to avoid turning it into oat butter. Aim for a smooth, powdery consistency.
Step 2: Warm and Mix the Peanut Butter and Maple Syrup
Pop your peanut butter and maple syrup together in a medium microwave-safe bowl and heat for about 40-60 seconds. This warming step makes the mixture sooo much easier to combine. When it’s hot and glossy, stir really well until everything’s completely blended. This little trick helps prevent clumping when you add the oat flour.
Step 3: Combine the Oat Flour
Slowly add your oat flour into the peanut butter mixture and start mixing—brace yourself because it’s thick! I usually use a sturdy spoon or even my hands for this part. The goal is a moldable dough that’s firm but not crumbly. If it feels dry, a teaspoon or two of extra maple syrup or peanut butter will fix it right up. And if you want creamier cups, try adding a little pumpkin puree.
Step 4: Prepare Your Muffin Pan
Line a muffin pan with cupcake liners or use a silicone muffin mold for easy removal later. Trust me, the liners are lifesavers if you don’t want to struggle peeling these cups out. You can also make mini versions with a mini muffin pan for bite-sized treats!
Step 5: Press the Mixture into the Molds
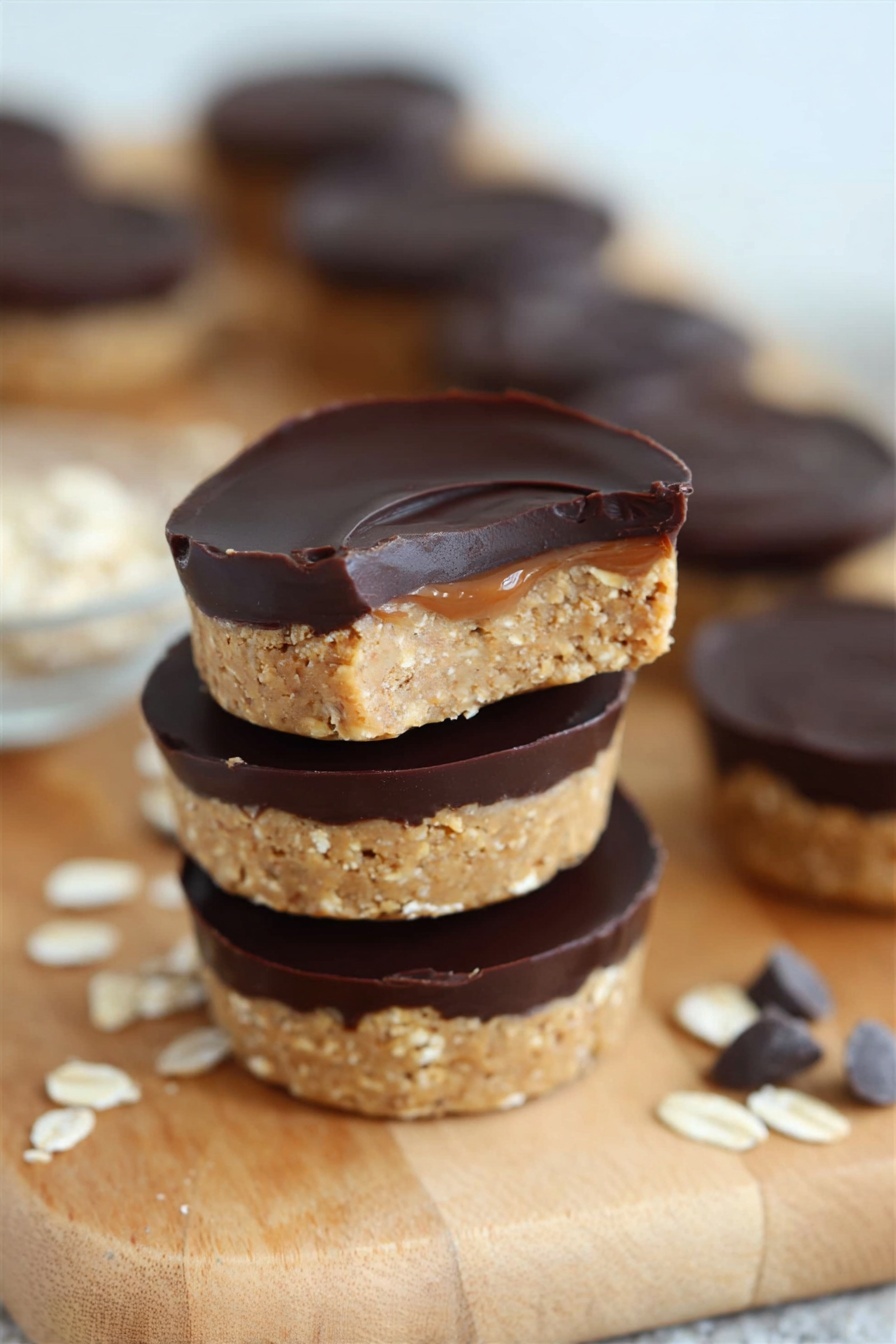
Scoop your peanut butter oat mixture evenly into the prepared muffin cups and press down firmly with your fingers or the back of a spoon. Compressing the mixture well helps it hold together after chilling, so don’t be shy about getting them nice and compact.
Step 6: Melt and Pour the Chocolate Topping
In a small microwave-safe bowl, combine chocolate chips and the optional coconut oil (this adds glossy smoothness). Heat in 30-second bursts, stirring in between, until the chocolate is totally melted and silky. Pour a thin layer of chocolate over each cup and smooth it out. If you’re feeling fancy, sprinkle a little flaky sea salt or mini chocolate chips on top before it sets—it really elevates the taste!
Step 7: Chill and Set
Refrigerate the cups for 2-3 hours or until the chocolate topping is firm and the base feels set. Once chilled, carefully peel them out of the liners or pop them out of the silicone molds. Store in an airtight container in the fridge to keep them fresh—these taste best cold to enjoy that creamy, chewy texture.
Pro Tips for Making No Bake Peanut Butter Oat Cups Recipe
- Use Natural Peanut Butter: It makes a huge difference in flavor and texture—avoid overly processed brands with a lot of oils.
- Don’t Skip the Oat Flour: Blending the oats finely is key—it creates a smooth base rather than grainy lumps.
- Adjust Sweetness Gradually: Add maple syrup in small increments when needed to avoid overly sticky dough.
- Press Firmly: Compacting the mixture well in the mold ensures the cups hold together without crumbling after chilling.
How to Serve No Bake Peanut Butter Oat Cups Recipe
Garnishes
I often top the chocolate layer with a sprinkle of flaky sea salt because it really brightens the peanut butter and chocolate flavors, creating that perfect sweet-salty combo. Sometimes mini chocolate chips or crushed peanuts add a nice crunch and look adorable too!
Side Dishes
These cups pair wonderfully with a hot cup of coffee or tea for a mid-afternoon pick-me-up. I also love serving them alongside fresh fruit like apple slices or banana for a balanced snack.
Creative Ways to Present
For parties or gifts, I like to arrange the cups in a pretty box lined with parchment paper and tied with twine. They make delightful homemade gifts! You can also drizzle a little extra melted chocolate over the set cups for a fancy finish when serving guests.
Make Ahead and Storage
Storing Leftovers
I store the peanut butter oat cups in an airtight container in the refrigerator to keep them firm and fresh for up to 5 days. Leaving them at room temperature tends to soften them too much because of the maple syrup and peanut butter.
Freezing
If I want to keep some longer, freezing works beautifully for these cups. I wrap each one individually in plastic wrap and place them in a freezer-safe container. They thaw quickly on the counter or in the fridge when I’m ready to snack.
Reheating
Since these no-bake treats are best enjoyed cold or at room temperature, I typically just let frozen ones thaw gently. If you prefer them a little softer, a quick 10-second zap in the microwave usually does the trick without losing their texture.
FAQs
-
Can I use other nut butters instead of peanut butter?
Yes! Almond butter, cashew butter, or even sunflower seed butter can work well as a substitute. Just keep in mind that the flavor and texture will change slightly depending on the butter you choose, but all provide a creamy base for the cups.
-
Do I have to use maple syrup, or can I swap it?
You can substitute maple syrup with honey, agave, or even a mild liquid sweetener you prefer. The key is using a sticky sweetener that helps bind the oat and peanut butter mixture together.
-
How do I store these cups if I don’t have a refrigerator?
Because of the peanut butter and maple syrup, these cups are best stored in the fridge to prevent them from getting too soft or spoiling. If refrigeration isn’t available, try to keep them in a cool, dry place and eat within a day or two, but refrigeration is highly recommended.
-
Can I make these cups gluten-free?
Absolutely! Make sure to use certified gluten-free rolled oats to ensure the recipe stays gluten-free. This makes the recipe friendly for those with gluten sensitivities or celiac disease.
Final Thoughts
This No Bake Peanut Butter Oat Cups Recipe is one of those simple pleasures I genuinely love sharing with friends because it’s quick, wholesome, and downright delicious. Whether you’re chasing a midday snack, a post-workout bite, or a sweet little dessert, these cups hit all the right notes. Plus, the fact you never have to fire up the oven just makes them a little more special in my book. Give them a try—I promise you’ll be glad you did, and they’ll become a staple in your snack rotation before you know it!
Print
No Bake Peanut Butter Oat Cups Recipe
- Prep Time: 15 minutes
- Cook Time: 0 minutes
- Total Time: 2 hours 15 minutes
- Yield: 12 servings
- Category: Snack
- Method: No-Cook
- Cuisine: American
- Diet: Vegetarian
Description
No Bake Peanut Butter Oat Cups are a quick and easy snack made with creamy peanut butter, finely processed oat flour, sweet maple syrup, and a rich chocolate topping. These moldable, no-bake cups are perfect for a healthy treat or snack and can be customized with pumpkin puree for a seasonal twist.
Ingredients
Base Ingredients
- 1.5 cups peanut butter
- 1.5 cups rolled oats, processed finely in a food processor to make oat flour
- 1/4 cup maple syrup
Chocolate Topping
- 1 cup chocolate chips
- 1 tsp coconut oil, optional
Instructions
- Prepare Oat Flour: Blend the rolled oats in a high-speed blender or food processor until you achieve a fine oat flour consistency.
- Combine Wet Ingredients: In a medium microwave-safe bowl, add peanut butter and maple syrup. Microwave for 40-60 seconds, then stir thoroughly until well combined.
- Mix Dry and Wet Ingredients: Gradually add the oat flour to the peanut butter and maple syrup mixture. Stir vigorously until the mixture becomes thick but moldable. If too dry, add more maple syrup or peanut butter about one teaspoon at a time. For a moister texture, optionally add 1/4 to 1/3 cup pumpkin puree.
- Prepare Muffin Pan: Line a muffin pan with cupcake liners or use a silicone muffin pan for easier removal. Scoop the peanut butter oat mixture evenly into each cup and press down firmly with your fingers.
- Make Chocolate Topping: In a microwave-safe small bowl, combine chocolate chips and coconut oil. Heat in 30-second increments, stirring between each, until the chocolate is fully melted and smooth.
- Top the Cups: Pour a layer of melted chocolate over each peanut butter oat cup and smooth with the back of a spoon. Optionally sprinkle flaky salt, sprinkles, or mini chocolate chips on top.
- Chill to Set: Refrigerate the muffin pan for 2-3 hours until the cups are completely set.
- Serve and Store: Carefully remove the cups from the pan or liners. Store in an airtight container in the refrigerator for up to 5 days to maintain freshness.
Notes
- For a pumpkin-flavored variation, add 1/3 cup pumpkin puree and 1 1/2 teaspoons pumpkin spice to the base mixture.
- If the mixture appears too dry, add more maple syrup or peanut butter in small increments to improve moldability.
- Using silicone muffin pans eliminates the need for liners and makes removal easier.
- Store these cups in the refrigerator since they contain fresh ingredients such as maple syrup and are not baked.
Nutrition
- Serving Size: 1 cup
- Calories: 220 kcal
- Sugar: 12 g
- Sodium: 90 mg
- Fat: 15 g
- Saturated Fat: 4 g
- Unsaturated Fat: 10 g
- Trans Fat: 0 g
- Carbohydrates: 18 g
- Fiber: 3 g
- Protein: 6 g
- Cholesterol: 0 mg


