
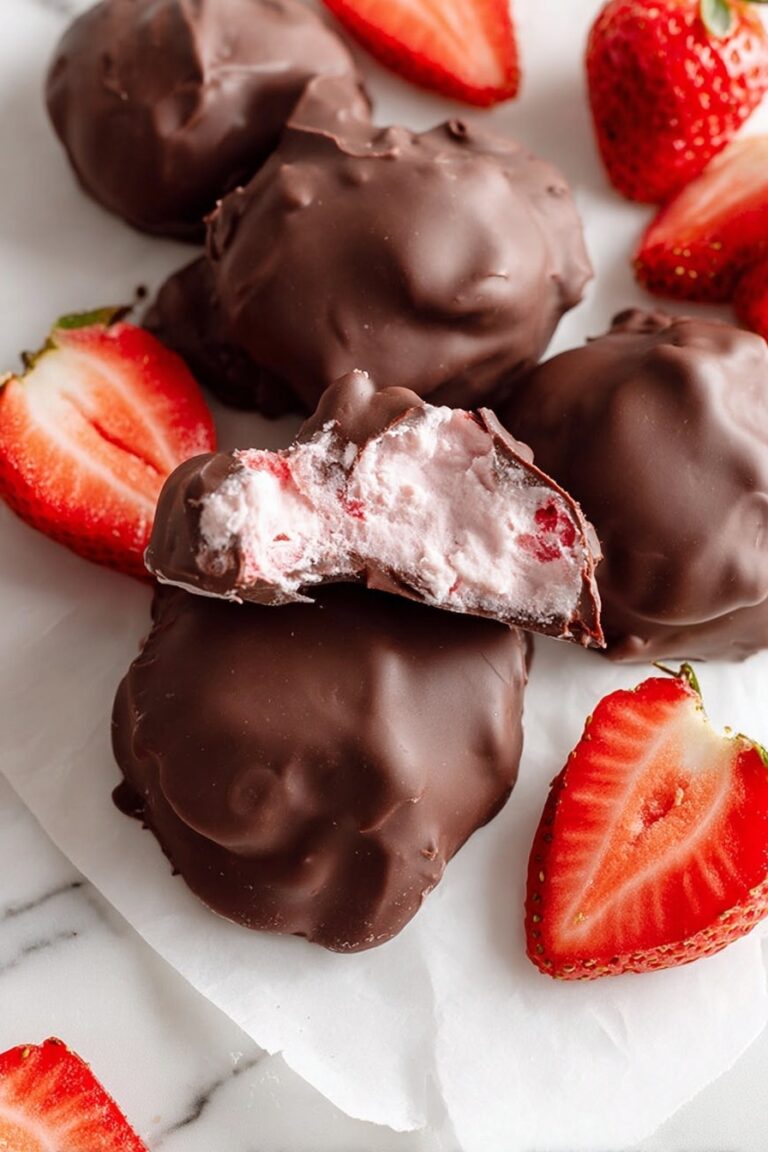
Mini Christmas Cheesecake Bites Recipe
If you’re on the hunt for a festive, charming dessert that everyone will adore, let me introduce you to my all-time favorite Mini Christmas Cheesecake Bites Recipe. These darling little cheesecakes bring together the richness of creamy cheesecake, the crunch of an Oreo crust, and the joyful colors of the holidays in such a fun, bite-sized way. Whether you’re hosting a Christmas party or want a sweet treat to share with loved ones, this recipe is seriously fan-freaking-tastic. Stick with me, and I’ll guide you through how to get these cheesecakes perfect every single time.
Why This Recipe Works
- Perfectly Balanced Crust: Using Oreo cookies with their filling gives a sweet, slightly chocolatey base that’s super easy to press into the cupcake liners.
- Creamy & Tangy Cheesecake Filling: The combination of cream cheese, lemon zest, and a touch of vanilla keeps the cheesecake luscious but fresh, with no overpowering sweetness.
- Festive Marbled Colors: Red and green food coloring swirled in create the perfect holiday vibe without needing extra flavorings—just pure fun!
- Moist Baking Environment: The addition of a water bath during baking prevents cracking and ensures a smooth, creamy texture that melts in your mouth.

Ingredients & Why They Work
These ingredients come together like a festive performance: each one plays a simple but crucial part in making the most tender, flavorful mini cheesecakes imaginable. When shopping, grabbing quality cream cheese and fresh lemons really makes a difference.
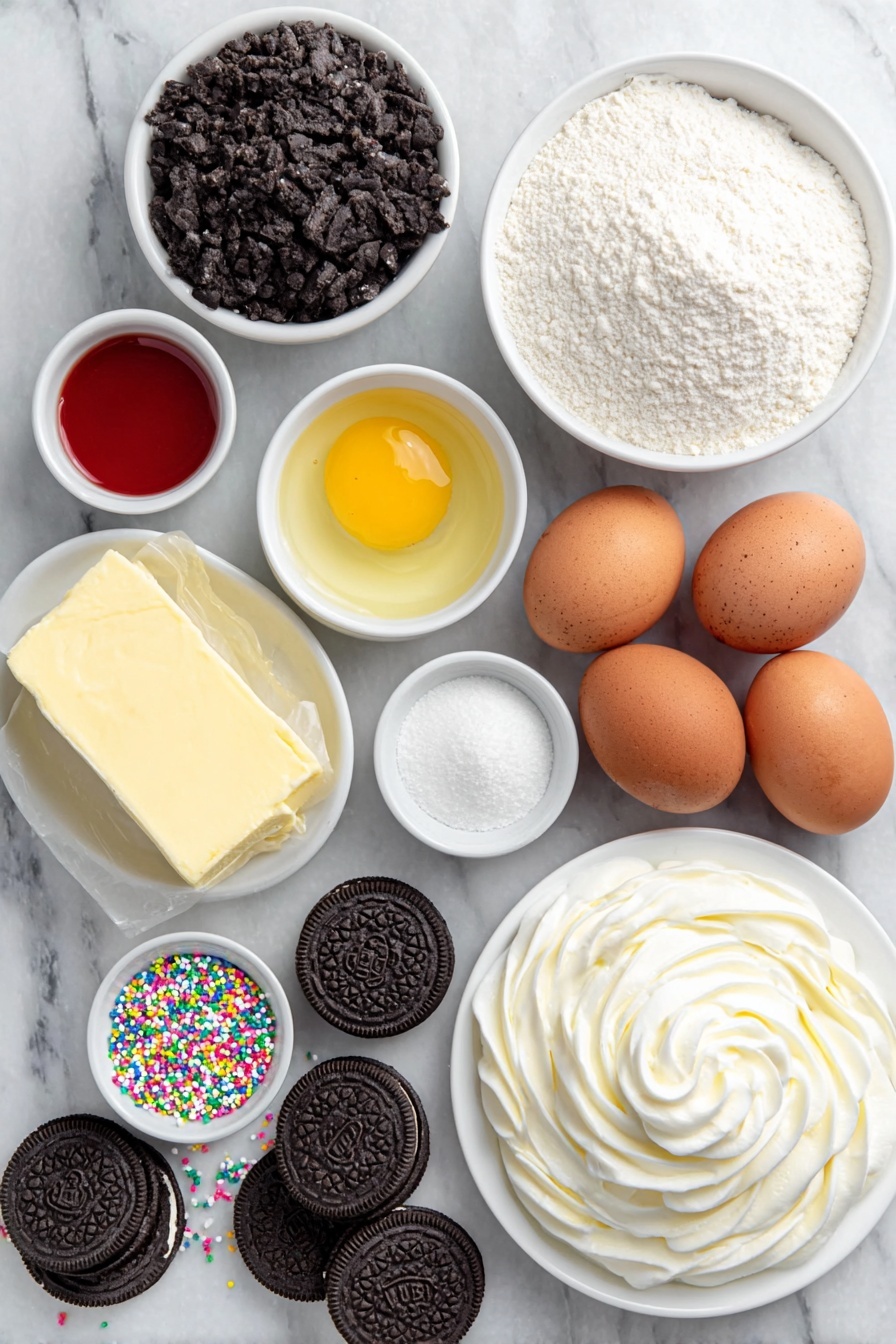
- Oreo Cookies: I love using the classic kind with the filling—it adds moisture and sweetness to the crust that you won’t get from plain cookies.
- Butter: Melted butter binds the crust together perfectly; don’t skip it or your crust might crumble.
- Cream Cheese: Full fat, room temperature cream cheese is key to a silky batter; cold or low-fat versions won’t give the same creamy texture.
- Granulated Sugar: Sweetens without weighing down the cake or making it overly rich.
- All Purpose Flour: Just a small amount to firm up the batter slightly, helping your cheesecake keep its shape.
- Vanilla Extract: Pure vanilla gives depth without distracting from the delicate tang of the cheesecake.
- Lemon Zest: Fresh zest adds a hint of brightness that cuts through the richness beautifully.
- Heavy Cream: This is gently folded in to make the filling richer and silkier without being dense.
- Eggs: They bind everything together and give the cheesecake that classic firm yet creamy bite.
- Red & Green Food Coloring: Just a fun touch to channel Christmas cheer with a pretty marble swirl.
- Whipped Cream & Sprinkles: For topping—adds texture, lightness, and festive sparkle that’s hard to resist.
Tweak to Your Taste
One of the things I love about this Mini Christmas Cheesecake Bites Recipe is how easy it is to make your own spin on it. Whether you prefer a less sweet version or want to sneak in some seasonal flavors, there’s plenty of room for personalization.
- Variation: I sometimes swap the Oreo crust for gingerbread crumbs during the holidays—it adds a warm spice note that’s incredible alongside the creamy cheesecake.
- Dairy-Free: You can try using a vegan cream cheese and coconut cream instead of heavy cream for a non-dairy version, just be mindful that the texture might be a bit different.
- Flavored Swirls: Adding a spoonful of cranberry sauce or raspberry puree to one of the colored batter bowls gives a fruity twist that’s festive and delicious.
- Less Sweet: If you like a tangier cheesecake, reduce the sugar by about 25%; I’ve found it balances nicely with the Oreo crust’s sweetness.
Step-by-Step: How I Make Mini Christmas Cheesecake Bites Recipe
Step 1: Prepare the Crust
Start by preheating your oven to 150°C (300°F) and lining a cupcake tray with paper casings. Crush your Oreo cookies until they’re fine crumbs, including that yummy filling—using a food processor is fastest, but a rolling pin and ziplock bag work if you don’t have one. Mix the cookies with melted butter until everything is evenly moistened—this will help the crust hold together. Press about a tablespoon of the crumb mixture into each cupcake liner with the side of a small rolling pin or your fingers, pushing firmly to create a solid base. This is one of those simple tasks where patience pays off: a nicely packed crust keeps each bite neat and intact.
Step 2: Mix the Cheesecake Batter
In a clean bowl, beat the cream cheese until completely smooth—it usually takes about 30 to 60 seconds, and scraping down the sides helps. Add sugar, flour, and lemon zest, and beat again briefly. Then, add both eggs all at once along with vanilla. Beat gently until combined, scraping frequently to avoid overmixing; overbeating can trap air bubbles, which might cause cracking later. Lastly, fold in the heavy cream carefully to keep the batter silky and lush.
Step 3: Add Festive Colors and Bake
Divide a third of your batter into two small bowls. Color one red and one green—just a few drops to get vibrant hues. Now pour the plain batter into the crust-lined cupcake cups, alternating dollops with the red and green batters. To get that gorgeous marbled effect, carefully swirl a skewer into the batter in circular motions, but watch out not to poke the crust or the layers might mix too much. Bake them at 150°C with a pan of water in the oven to keep moisture high, which keeps your mini cheesecakes silky and crack-free. After 20 minutes, turn off the oven but leave the cheesecakes inside for five more minutes to set gradually.
Step 4: Cool and Chill
Once baked, let the cheesecakes cool at room temperature for about 15 minutes, then refrigerate for at least 4 hours or overnight for best results. This chilling step is crucial—it firms up the cheesecakes and melds all those beautiful flavors and textures. When they’re fully chilled, carefully peel off the cupcake liners. You’ll be rewarded with neat, festive bites ready for their final flourish!
Step 5: Top and Serve
Finish by topping each mini cheesecake with a generous swirl of whipped cream and a sprinkle of colorful holiday sprinkles. It adds the perfect lightness and party-ready sparkle. Serve immediately, or keep chilled until you’re ready to wow your guests.
Pro Tips for Making Mini Christmas Cheesecake Bites Recipe
- Room Temperature Ingredients: Make sure your cream cheese and eggs are at room temp to avoid lumpy batter and ensure smooth mixing.
- Don’t Overmix: Beat just enough to combine but don’t whip air into the batter—this keeps your bite-size cheesecakes from cracking or puffing up unevenly.
- Water Bath Baking: Using a dish of water in the oven makes all the difference for moist, creamy cheesecakes with no cracks.
- Cool Gradually: Let cheesecakes cool in the oven and then on the counter before chilling—rapid temperature changes can cause cracks or sinking centers.
How to Serve Mini Christmas Cheesecake Bites Recipe
Garnishes
I’m a sucker for the classic whipped cream topping—it adds airiness that balances the dense cheesecake. I top mine with multicolored sprinkles or edible glitter because, honestly, what’s Christmas without some sparkle? Another favorite is finely chopped pistachios for a subtle crunch and festive green color.
Side Dishes
Pair these mini cheesecakes with a warm cup of spiced cider or hot chocolate for a dreamy holiday combo. I also love serving them alongside fresh berries or a tangy cranberry compote—it really amps up the festive contrast in flavors.
Creative Ways to Present
For Christmas parties, I like to display these bites on tiered dessert stands to highlight how cute they are, and wrapping each one in a little festive cupcake wrapper adds that extra charm. You can also gift them in decorated boxes tied with ribbons—they make perfect edible presents!
Make Ahead and Storage
Storing Leftovers
Leftover Mini Christmas Cheesecake Bites keep beautifully in the fridge for up to 4 days when covered tightly with plastic wrap or stored in an airtight container. The flavors actually develop a bit overnight, so they’re just as good the next day.
Freezing
I’ve had great success freezing these cheesecakes—just place them on a baking sheet lined with parchment, freeze until solid, then transfer to a freezer-safe container. They keep well for up to 2 months. Thaw overnight in the fridge before serving to maintain their creamy texture.
Reheating
Since these are best enjoyed chilled, I usually serve them straight from the fridge. If you want to take the chill off, just let them sit at room temperature for 10–15 minutes before eating—reheating in a microwave can cause separation or a change in texture.
FAQs
-
Can I make these Mini Christmas Cheesecake Bites Recipe ahead of time?
Absolutely! In fact, making them at least a day before your event is ideal because chilling time improves texture and flavor. Just keep them covered tightly in the fridge until serving.
-
Can I use other cookie crumbs besides Oreo for the crust?
Yes, feel free to experiment with graham crackers, gingerbread, or chocolate wafer cookies. Each brings a unique flavor and texture but remember to add enough melted butter to bind whichever crumbs you choose.
-
Why do I need to bake the cheesecakes with a water bath?
The water bath creates steam in the oven which helps the cheesecakes bake gently and prevents cracks, keeping their creamy texture intact—a little trick professional bakers swear by!
-
Can I prepare these without food coloring?
Of course! The batter will taste just as good without the colors—food coloring is just for a festive touch. You might also try natural alternatives like beet juice or matcha powder if you want a natural color boost.
-
How do I remove the cupcake liners without damaging the cheesecake?
Make sure the mini cheesecakes are well chilled before peeling the liners. Gently pull the liner away from the sides starting at the top; if they stick a little, using a small offset spatula can help ease them off smoothly.
Final Thoughts
This Mini Christmas Cheesecake Bites Recipe is one of those gems I love keeping in my holiday repertoire—it’s approachable, delicious, and always gets compliments. The balance of creamy, tangy bites with just the right festive flair makes it a sweet memory maker at any gathering. So, I hope you’ll give these a try this season; it’s like sharing a little piece of joy, one adorable bite at a time.
Print
Mini Christmas Cheesecake Bites Recipe
- Prep Time: 30 minutes
- Cook Time: 20 minutes
- Total Time: 4 hours 50 minutes
- Yield: 12 servings
- Category: Dessert
- Method: Baking
- Cuisine: American
- Diet: Vegetarian
Description
Mini Christmas Cheesecakes with a festive red, green, and plain marbled batter, a crunchy Oreo cookie crust, topped with whipped cream and sprinkles. Perfectly moist and creamy with a hint of lemon zest and a colorful presentation for holiday celebrations.
Ingredients
Cheesecake Crust
- 100 g Oreo Cookies Crushed with the filling
- 30 g butter melted
Cheesecake Batter
- 450 g cream cheese
- 150 g granulated sugar
- 20 g all purpose flour
- ½ teaspoon vanilla extract
- 1 tablespoon lemon zest
- 60 g heavy cream
- 2 eggs
- red food coloring (as needed)
- green food coloring (as needed)
Topping & Garnish
- Whipped cream
- Sprinkles
Instructions
- Preheat Oven: Preheat your oven to 150°Celsius and place cupcake casings into a cupcake tray to prepare for baking.
- Prepare Crust: Crush Oreo cookies including the filling into fine crumbs using a food processor or by placing them in a zip lock bag and pressing with a rolling pin. Transfer crumbs to a bowl, add melted butter and mix until fully moistened.
- Form Crust Base: Place one tablespoon of the cookie crumbs into each cupcake casing and press down firmly with the side of a small rolling pin to create a compact crust.
- Beat Cream Cheese: In a separate bowl, beat the cream cheese until smooth for about 30 to 60 seconds, scraping the bowl often to ensure even mixing.
- Add Dry Ingredients: Add sugar, all purpose flour, and lemon zest to the cream cheese and beat again for 20 seconds to combine.
- Incorporate Eggs and Vanilla: Scrape the bowl, then add both eggs and vanilla extract. Beat for 10 seconds to combine, scrape the bowl again, and beat for another 10 seconds until the batter is smooth and creamy without overbeating.
- Fold in Heavy Cream: Gently fold in the heavy cream to the batter to maintain a creamy texture.
- Divide and Color Batter: Transfer one-third of the batter into two smaller bowls. Add green food coloring to one and red food coloring to the other, mixing each well to create colored batters.
- Fill Casings: Pour the plain batter into the cupcake casings alternated with spoonfuls of red and green batter. Use a skewer to swirl through the batter in a circular motion, creating a marbled effect without touching the crust.
- Bake Cheesecakes: Bake at 150°Celsius for 20 minutes. Place a baking dish filled with water in the oven to keep humidity high during baking, which helps prevent cracking.
- Post-Bake Rest: After baking, leave the cheesecakes in the oven for an additional 5 minutes to settle.
- Cool Cakes: Remove from oven and let cool at room temperature for 15 minutes.
- Chill Thoroughly: Refrigerate the cheesecakes for at least 4 hours or overnight to fully set.
- Remove Casings and Garnish: Once chilled, carefully peel off cupcake casings. Top each mini cheesecake with whipped cream and decorate with sprinkles before serving.
- Storage: Keep any leftovers refrigerated to maintain freshness.
Notes
- For a full large cheesecake, use the same ingredients but pour into a 7-inch round cake tin and bake for 55 to 60 minutes at 150°Celsius.
- For a 9-inch round cheesecake, double the recipe and bake for 65 to 70 minutes until the edges are firm but the center is still slightly wobbly for a creamy texture.
- Do not overbeat the batter to avoid incorporating excess air which can cause cracks.
- Using a water bath or placing a dish with water in the oven helps maintain moisture and prevents cracking.
- Let cheesecakes chill thoroughly for best texture and easy removal of cupcake casings.
Nutrition
- Serving Size: 1 mini cheesecake
- Calories: 250 kcal
- Sugar: 18 g
- Sodium: 120 mg
- Fat: 18 g
- Saturated Fat: 10 g
- Unsaturated Fat: 7 g
- Trans Fat: 0 g
- Carbohydrates: 16 g
- Fiber: 1 g
- Protein: 4 g
- Cholesterol: 70 mg
