Meringue Ghosts Recipe
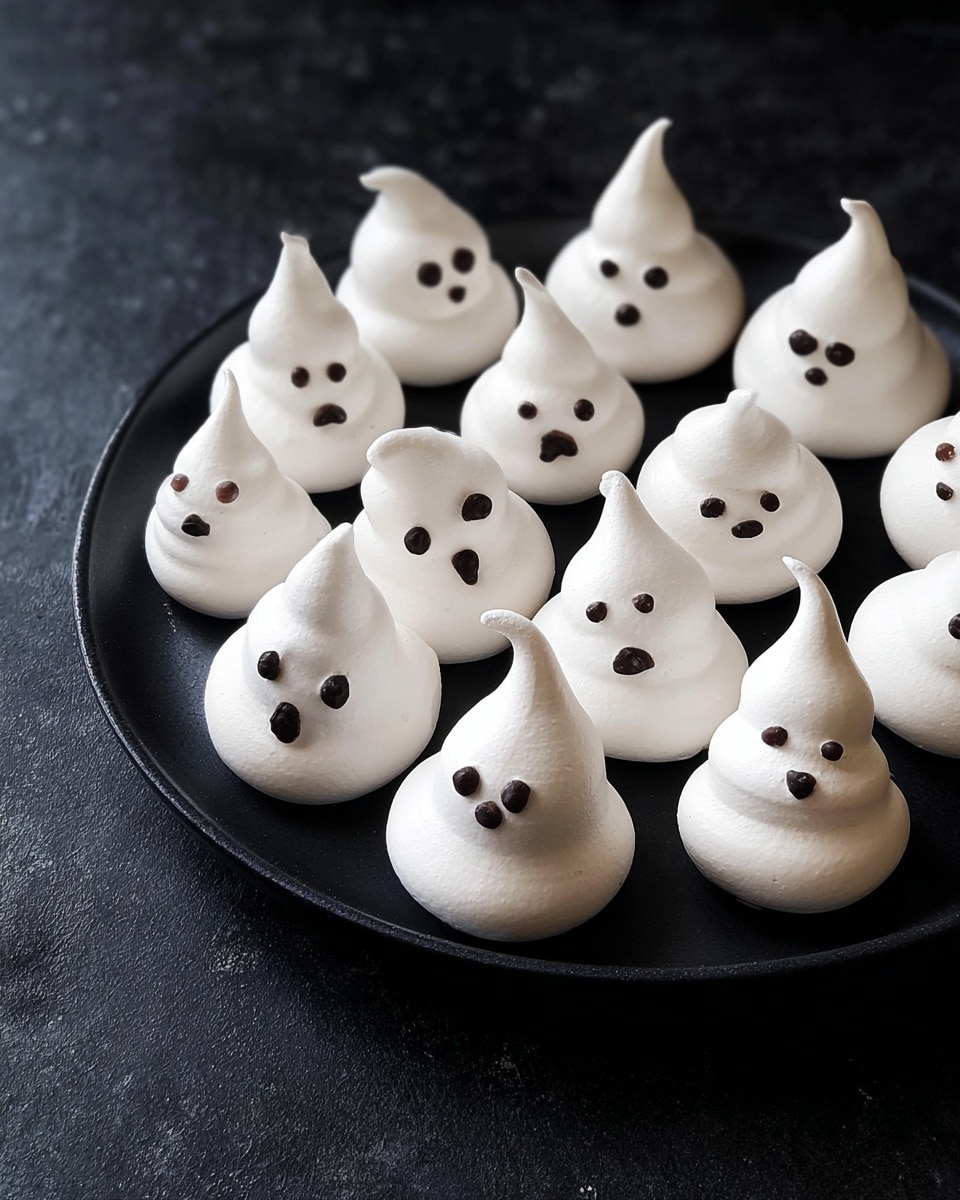
Ready to add a little spooky fun to your treats? This Meringue Ghosts Recipe is an absolute gem for Halloween or any time you want a light, airy, and adorable sweet snack. Trust me, these ghosts aren’t just cute—they’re crisp on the outside, melt-in-your-mouth soft on the inside, and surprisingly simple to make. Stick with me, and I’ll share all my tips so your meringue ghosts come out perfectly every time!
Why This Recipe Works
- Simplicity Meets Delight: Just a few basic ingredients create charming treats everyone loves.
- Texture Perfection: Low-and-slow baking ensures crisp exteriors with tender interiors—no cracks or browning.
- Decor Fun: Adding faces with black food coloring gel gives your ghosts character and personality.
- Room Temperature Eggs: Using eggs at room temp allows you to whisk the whites into stiff peaks with ease.
Ingredients & Why They Work
The magic of this Meringue Ghosts Recipe comes down to a few simple but key ingredients. They’re easy to find and work beautifully together to create that perfect meringue texture we’re all chasing.
- Caster (Super Fine) Sugar: Dissolves quickly, making your meringue glossy and stable without graininess.
- Medium Egg Whites (Room Temperature): Whips better when at room temp, giving you loft and volume.
- Black Food Colouring Gel or Paste: Perfect for drawing spooky eyes and mouths without bleeding or smudging.
Tweak to Your Taste
I love how versatile this Meringue Ghosts Recipe is—you can truly play around with the decoration or even the flavor. I often experiment with adding a hint of vanilla or almond extract for a subtle twist. You can also amp up the spooky factor with colored eyes or mini edible decorations.
- Variation: Once, I tried mixing a tiny bit of peppermint extract into the meringue. It gave the ghosts a lovely, fresh vibe that surprised everyone!
- Dietary Adjustment: Since these are naturally gluten-free and low-fat, they make a fantastic treat for a variety of diets without much fuss.
Step-by-Step: How I Make Meringue Ghosts Recipe
Step 1: Prep Like a Pro
Start by preheating your oven to 100°C (212°F). Line a large baking sheet with non-stick baking parchment—this is crucial because meringues are fragile and can stick if you’re not careful. I always use fresh parchment paper to avoid any tearing when lifting the ghosts later.
Step 2: Whip Those Egg Whites
Make sure your mixing bowl is spotless (no grease allowed!), then whisk your room temperature egg whites on medium speed until soft peaks form. This is the moment they start to hold their shape but aren’t stiff yet. Slowly add in the caster sugar, one spoonful at a time, whisking constantly. Keep going until your meringue looks shiny and holds stiff peaks. You’ll know you’re there when the meringue stands tall without drooping and feels smooth between your fingers.
Step 3: Pipe Your Ghostly Shapes
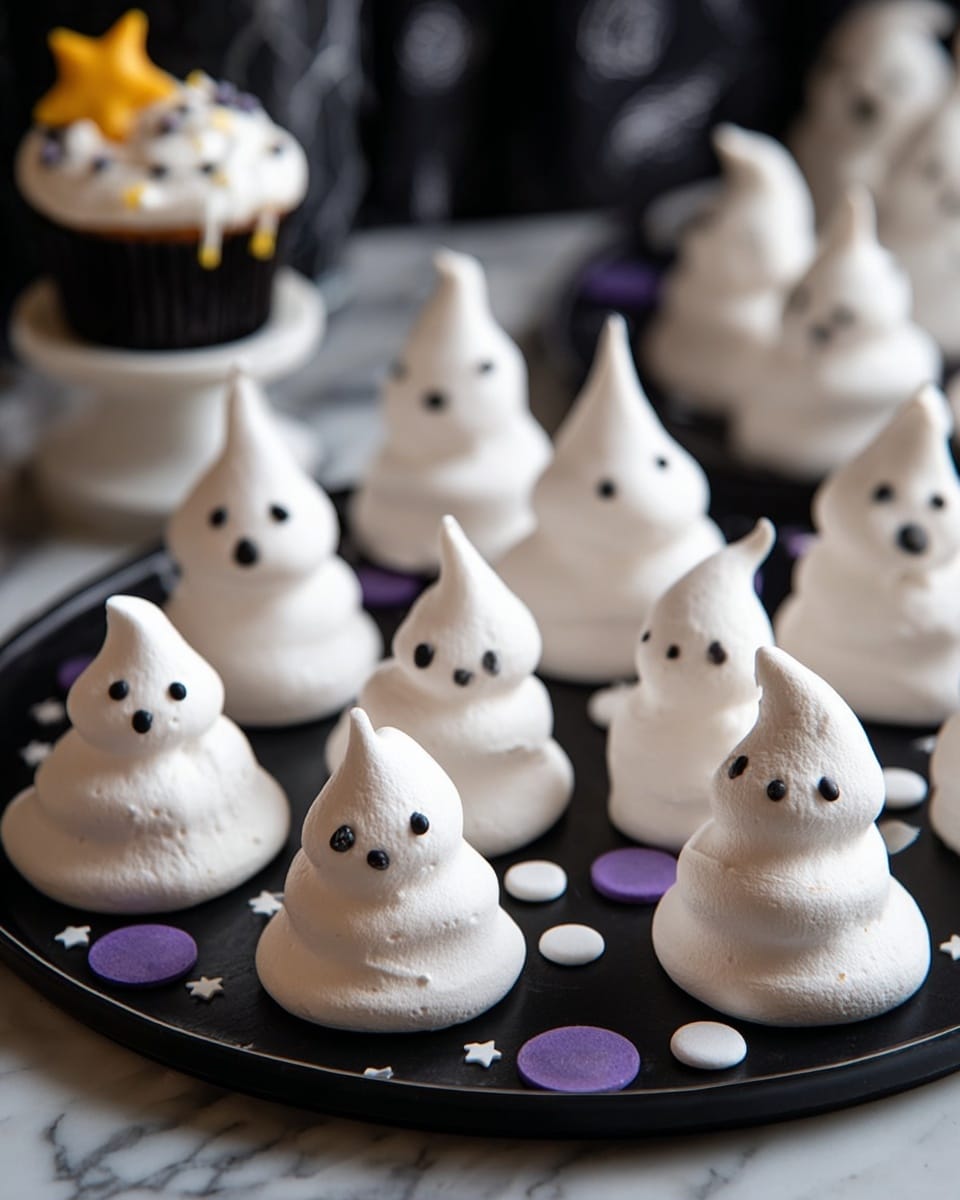
Fit a piping bag with a 1cm round nozzle and spoon in your freshly made meringue. Pipe cute ghost shapes onto the lined sheet—don’t be shy, make them as big or small as you want. I find that keeping them about 5cm tall is perfect for bite-sized fun.
Step 4: Bake Low and Slow
Place your tray in the oven and bake for about 1 hour. The key is slow baking at a low temperature—it dries the meringues out to get that delicate crispness without browning. Once the hour is up, turn off the oven but leave your meringue ghosts inside for several hours or even overnight. This extra time helps them dry perfectly and prevents cracking.
Step 5: Add Faces and Final Touches
When your ghosts are completely cool, grab your black food coloring gel or pen to draw little eyes and a mouth. I love letting the kids do this part—it’s a fun way to get them involved and adds personality to each ghost. Let the faces set for a while before serving.
Pro Tips for Making Meringue Ghosts Recipe
- Spotless Bowls Are Essential: Any grease will stop your egg whites from whipping up—wash bowls and beaters well with hot, soapy water and dry thoroughly.
- Add Sugar Gradually: Slow sugar incorporation ensures a glossy, smooth texture and avoids grainy crunch.
- Don’t Skip the Drying Time: Leaving meringues in the switched-off oven makes them crispier and easier to peel off.
- Use a Quality Food Coloring Gel: It won’t bleed or run, so your ghost faces stay sharp and cute.
How to Serve Meringue Ghosts Recipe
Garnishes
I usually keep it simple with just the black eyes and mouth, but sometimes I sprinkle edible glitter or dust a hint of cocoa powder around the plate for a spooky, misty effect. Tiny candy eyeballs can be a fun alternative if you want to skip the food coloring.
Side Dishes
These meringue ghosts pair beautifully with creamy desserts like chocolate mousse or a rich pumpkin pie—especially during seasonal gatherings. They add a crisp textural contrast that makes every bite interesting.
Creative Ways to Present
For Halloween parties, I love arranging the ghosts on a black platter with edible “spiderwebs” made from spun sugar or drizzled chocolate. You could also serve them perched atop mini cupcakes or nestled in witch hats for an extra festive touch.
Make Ahead and Storage
Storing Leftovers
Store leftover meringue ghosts in an airtight container at room temperature. Moisture is the enemy here, so avoid the fridge—it can make them soggy. Kept right, they maintain their crunchiness for up to a week.
Freezing
If you want to freeze meringue ghosts, gently layer them in an airtight container with parchment between layers to prevent sticking. They thaw quickly at room temp and surprisingly keep most of their lovely texture after freezing.
Reheating
I don’t usually reheat meringue ghosts because they’re perfect straight out of storage. But if they feel a little soft, you can crisp them up in a very low oven (around 90°C) for 5-10 minutes. Keep an eye on them so they don’t brown!
FAQs
-
Can I use a hand mixer or stand mixer for this Meringue Ghosts Recipe?
Absolutely! A stand mixer with a whisk attachment makes whipping egg whites easier and faster, but a hand mixer works just as well. Just make sure the bowl and beaters are clean and completely dry for best results.
-
Why are my meringue ghosts sticky or chewy?
If your meringues are sticky or chewy, they may need more drying time. Try leaving them in the turned-off oven for several hours or overnight to fully dry out. Also, ensure you baked them at a low temperature to avoid browning instead of drying.
-
Can I substitute sugar with powdered sugar in this recipe?
I recommend sticking with caster sugar since it dissolves properly during whisking, giving you that glossy meringue. Powdered sugar might contain additives that can affect the texture and stability.
-
How long do meringue ghosts last?
Stored in an airtight container at room temperature, meringue ghosts can last up to a week without losing their crispness. Just keep them away from humidity for best texture.
-
Can I make meringue ghosts without piping bag?
Yes! If you don’t have a piping bag, you can use a plastic sandwich bag with a tiny corner cut off. You can also spoon the meringue onto parchment though piping gives a much neater ghost shape.
Final Thoughts
This Meringue Ghosts Recipe holds a special place in my kitchen because it’s such a simple way to bring creativity and joy to dessert—especially around spooky seasons. It never fails to impress guests or delight little ones, and it’s a great baking project that teaches you some neat skills. I promise, once you nail the meringue peaks and slow bake method, you’ll be hooked. So go on, give these ghostly treats a whirl and watch your kitchen light up with smiles and “oooohs!”
Print
Delicious Recipe
- Prep Time: 30 minutes
- Cook Time: 1 hour
- Total Time: 1 hour 30 minutes
- Yield: 20 ghosts
- Category: Dessert
- Method: Baking
- Cuisine: British
- Diet: Vegetarian
Description
Light and airy meringue ghosts perfect for Halloween or festive desserts, made with simple ingredients and decorated with black food coloring for cute spooky faces.
Ingredients
Meringue
- 120 g caster (super fine) sugar
- 2 medium egg whites, at room temperature
Decoration
- Black food colouring gel or paste for the eyes and mouth
Instructions
- Preheat oven Preheat your oven to 100C/212F/Gas Mark 1/2 and line a large baking sheet with non-stick baking parchment for easy removal and even baking.
- Whisk egg whites In a spotless bowl, whisk the egg whites on medium speed until soft peaks form. Gradually add the sugar a spoonful at a time while continuing to whisk until the mixture is shiny and holds stiff peaks.
- Pipe meringue Spoon the meringue into a piping bag fitted with a 1cm round nozzle. Pipe ghost shapes onto the lined baking sheet until all the meringue is used.
- Bake meringues Place the baking sheet in the oven and bake for about 1 hour, until the meringues are crisp and lift easily from the paper.
- Cool meringues Turn off the oven and leave the meringue ghosts inside for a few hours or overnight to dry completely for the best crisp texture.
- Decorate Once cool, use a black food colouring pen or a fine paintbrush with food colouring paste to draw eyes and a mouth on the ghosts. Allow the decoration to set before serving.
Notes
- Ensure your mixing bowl is spotless and free from any grease to allow the egg whites to whisk properly and achieve stiff peaks.
- Use either a black icing pen or a small paintbrush with food colouring paste for decorating the features of the ghosts.
- For best results, leave the meringue to dry completely in the oven after baking, which ensures a crisp texture.
Nutrition
- Serving Size: 1 ghost
- Calories: 35 kcal
- Sugar: 6 g
- Sodium: 0 mg
- Fat: 0 g
- Saturated Fat: 0 g
- Unsaturated Fat: 0 g
- Trans Fat: 0 g
- Carbohydrates: 6 g
- Fiber: 0 g
- Protein: 1 g
- Cholesterol: 0 mg


