
Love Bug Oreo Cookies Recipe
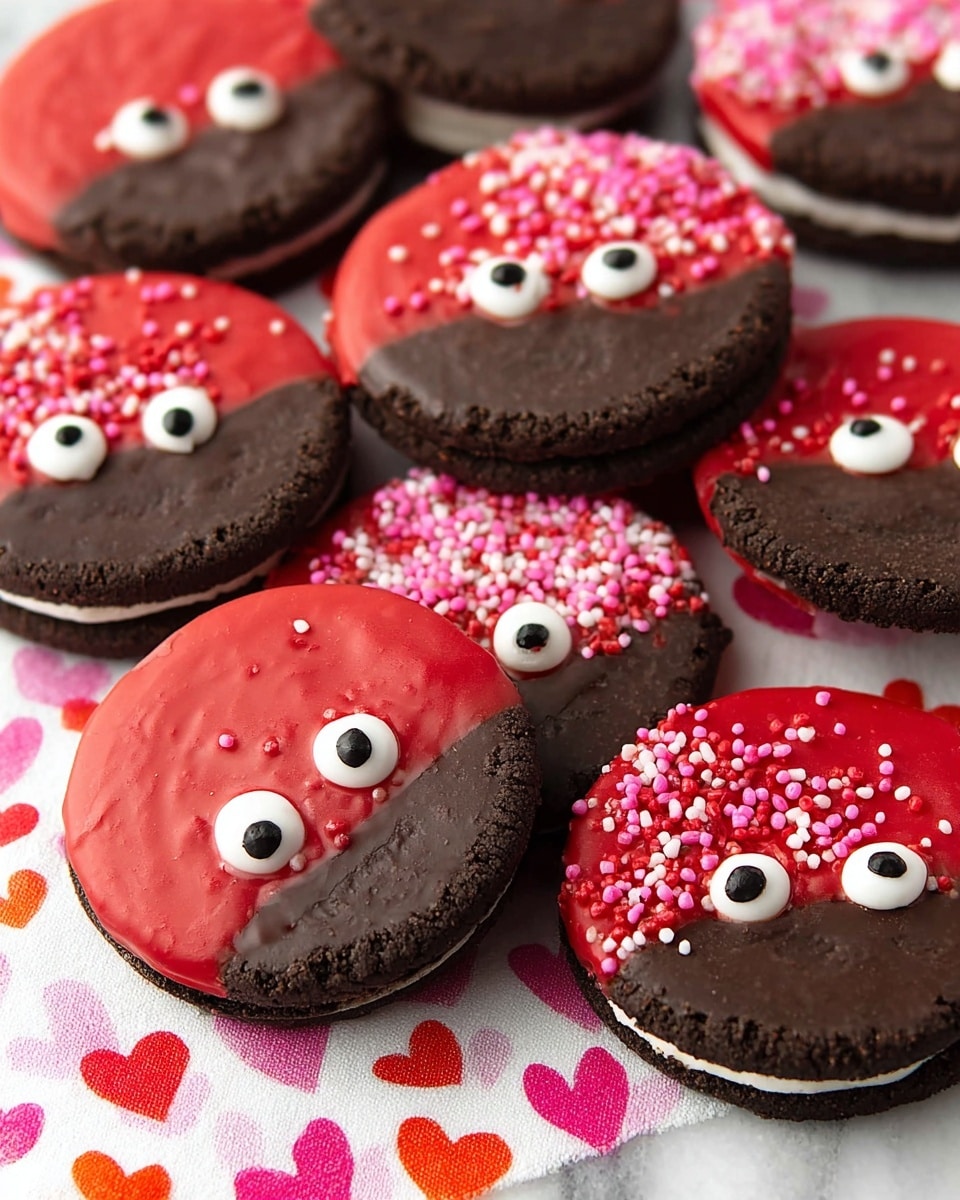
If you’re looking for an adorable, super simple treat that’s perfect for Valentine’s Day (or anytime you want to spread some love), you have got to try this Love Bug Oreo Cookies Recipe. They’re basically Oreo cookies dipped in luscious red chocolate, topped with cute little eyes and heart sprinkles — a fun and whimsical way to jazz up a classic snack. Trust me, once you make these, you won’t want to stop at just one (or two!). Read on to get all the juicy details on making these delightful little sweets that are just as fun to make as they are to eat.
Why This Recipe Works
- Simple Ingredients: Using store-bought Oreos and melting wafers means minimal prep with maximum impact.
- Quick & Kid-Friendly: No baking needed, so it’s perfect to make with kids or when you’re short on time.
- Fun Presentation: The royal icing eyes and heart sprinkles instantly elevate the humble Oreo into a festive treat.
- Customizable: You can easily swap colors or sprinkles depending on the occasion or your personal flair.

Ingredients & Why They Work
The beauty of the Love Bug Oreo Cookies Recipe lies in how a few carefully chosen ingredients come together to create something truly special and eye-catching. Each element adds flavor, texture, or whimsy, making these cookies truly unforgettable. I always suggest picking high-quality melting wafers for that smooth coating—and don’t skimp on cute sprinkles to get the full “love bug” effect!
- Oreo Cookies: The classic cookie & cream combo sets a perfect base that everyone loves, plus they hold up well when dipped.
- Red Chocolate Melting Wafers: These melt evenly and give a vibrant color that’s perfect for Valentine’s-themed treats.
- Royal Icing Eyes: They add personality and a whimsical touch—nothing beats those little eyes staring up at you!
- Micro Heart Sprinkles: Tiny sprinkles pack a big punch in adorability and festive charm.
Tweak to Your Taste
I love making this recipe my own depending on my mood or the season, and honestly, that’s part of what makes it so much fun to bake with friends or family. Feel free to play around with colors, add different sprinkles, or swap in flavored melts to make these your unique version of the classic love bug Oreo.
- Chocolate Color Swap: I once used pink melting wafers and pink and white sprinkles for a softer, more romantic vibe—and it was a hit at my Galentine’s brunch.
- Flavored Melts: Adding a hint of mint or caramel-flavored melting wafers can give the cookies an unexpected twist.
- Sprinkle Variations: Sometimes I use edible glitter or edible pearls for a sparkly, birthday-worthy version.
- Dietary Changes: For a dairy-free version, seek out vegan chocolate wafers and the rest of the toppings with allergen-friendly labels.
Step-by-Step: How I Make Love Bug Oreo Cookies Recipe
Step 1: Prep and Melt Your Chocolate
First things first, line a baking sheet with parchment paper or a Silpat mat — this is crucial to avoid sticky situations later. Next, place your red chocolate melting wafers into a microwave-safe bowl. Heat them in the microwave at medium power for 30 seconds, then take them out and stir slowly but thoroughly. Repeat heating in 15-second bursts, stirring carefully each time, until the chocolate is silky smooth. Don’t rush it, or you risk burning the wafers — take it slow, trust me!
Step 2: Dip Your Oreos Like a Pro
Grab an Oreo and dip it about three-fourths of the way into that luscious melted chocolate. When you pull it out, gently tap it against the bowl edge to shake off any excess — too much dripping can be messy. Then, place it on your prepared baking sheet. This step is all about a steady hand and a bit of patience. I find dipping several Oreos in small batches helps the chocolate stay at the right temperature and consistency.
Step 3: Add the Love Bug Details
While the chocolate is still wet, sprinkle on the micro heart sprinkles — you want them to stick beautifully. Then, use a toothpick to add a tiny dab of chocolate to the backs of your royal icing eyes and place them onto the chocolate area of each Oreo. This little touch gives your love bugs that adorable googly look. Let the cookies rest on the parchment until the chocolate firms up completely. If you’re like me, this is the hardest part — waiting to dig in!
Pro Tips for Making Love Bug Oreo Cookies Recipe
- Use Room Temperature Wafers: Cold wafers take longer to melt and are harder to stir smoothly.
- Don’t Overheat Chocolate: Melt at medium power in short intervals to avoid graininess or burning.
- Work in Small Batches: Keeps the melted chocolate fluid and easy to dip without clumps.
- Secure Eyes with Dabs of Chocolate: The toothpick method prevents excess glue and keeps eyes neat and stuck!
How to Serve Love Bug Oreo Cookies Recipe
Garnishes
I usually keep garnishes simple with these cookies because the little eyes and heart sprinkles say it all. But sometimes, I like adding a tiny dusting of edible glitter for parties — it makes them sparkle and almost too pretty to eat. Fresh edible flowers also make a lovely backdrop if you want to take photos before serving!
Side Dishes
These Love Bug Oreo Cookies pair wonderfully with a classic glass of cold milk (because who can resist milk and cookies?). You can also serve them alongside a rich hot chocolate or even a light fruit salad to balance the sweetness if you’re offering a treat spread.
Creative Ways to Present
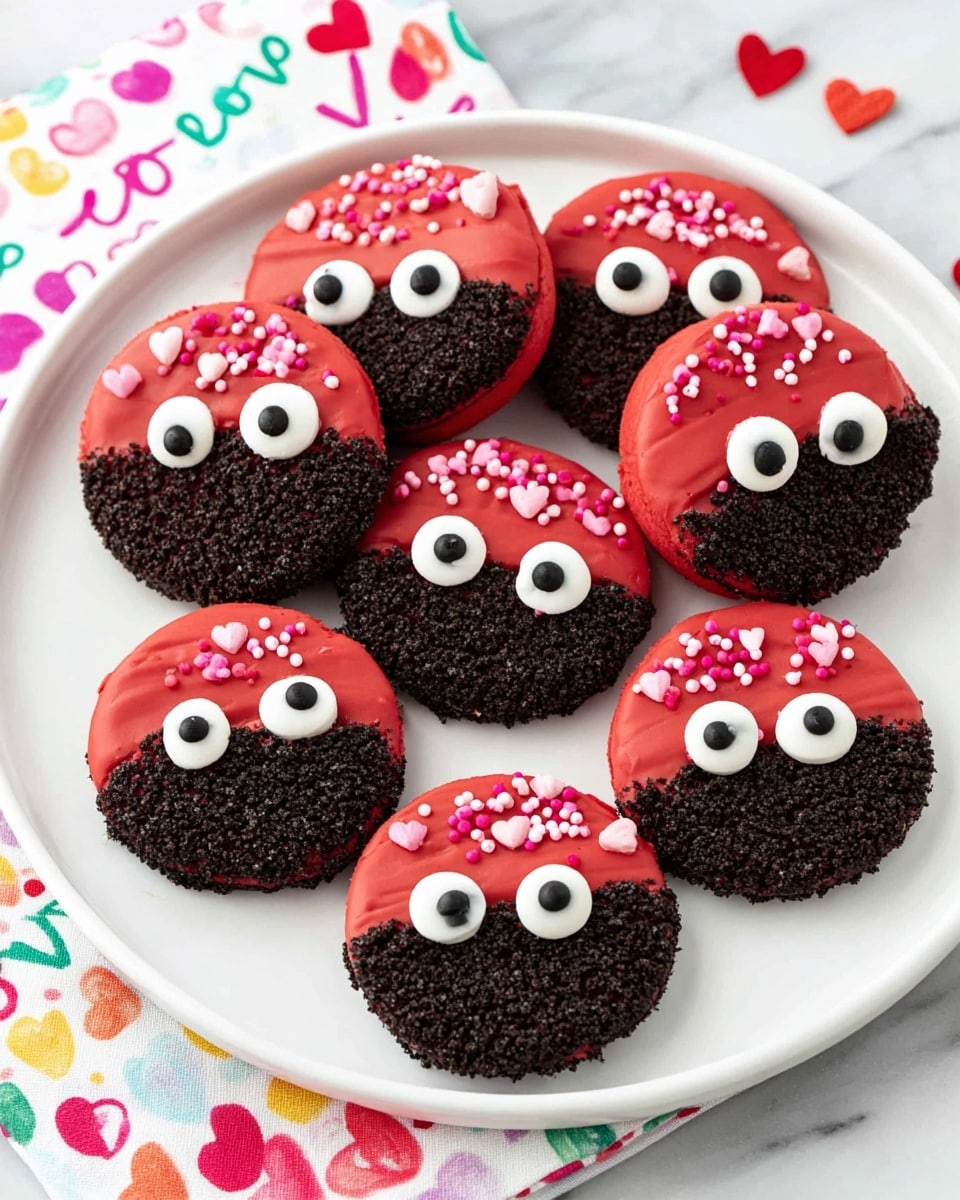
When I’ve made these for Valentine’s parties, I like to put them on cute cupcake stands or inside clear treat bags tied with red ribbon — immediately festive and gift-ready! Another idea: arrange them on a heart-shaped platter or nestle them in a bed of shredded red and white crinkle paper for an extra pop.
Make Ahead and Storage
Storing Leftovers
I store leftover Love Bug Oreo Cookies in an airtight container at room temperature to keep that chocolate shell perfectly crisp. They last beautifully for 7 or more days — not that I’ve ever had any around that long, honestly!
Freezing
If you want to freeze them, wrap cookies individually in parchment or wax paper and place them in a freezer-safe bag. When you thaw them, do it slowly at room temperature to avoid condensation that could make the chocolate bloom (you know, those annoying white streaks).
Reheating
Generally, you don’t need to reheat these cookies — they’re meant to be enjoyed as-is. But if the chocolate starts losing its snap, a quick 5-10 second blast in the microwave can freshen things up without melting the decorations if you watch closely.
FAQs
-
Can I use a different type of cookie instead of Oreos?
Absolutely! While Oreos are classic for this recipe, you can experiment with any sandwich cookie that’s sturdy enough to dip without falling apart. Just keep in mind that the flavor and texture might change, but the fun “love bug” effect remains.
-
What’s the best way to melt chocolate wafers to prevent clumping?
Melting in short increments on medium power and stirring frequently helps keep the chocolate smooth and prevents it from burning or clumping. If the chocolate seems too thick, adding a tiny bit of vegetable oil can help loosen it up.
-
How long can I keep the decorated Love Bug Oreo Cookies fresh?
Stored in an airtight container at room temperature, these cookies stay fresh and delicious for about 7 days, sometimes longer if your kitchen isn’t too warm.
-
Can I make these cookies ahead for a party?
Definitely! These cookies are great made a day or two in advance. Just keep them covered at room temperature, and the chocolate will hold up beautifully for your celebration.
Final Thoughts
Making these Love Bug Oreo Cookies is one of my favorite quick and festive projects that never fails to bring smiles. Whether you’re creating them with kids, sending them as gifts, or just indulging in a sweet treat yourself, they’ve got that perfect balance of fun, flavor, and cuteness that’s hard to beat. I hope you enjoy making (and devouring) these little love bugs as much as I do. Give this recipe a try — it’s a guaranteed crowd-pleaser that will earn you oohs and aahs every time!
Print
Love Bug Oreo Cookies Recipe
- Prep Time: 5 minutes
- Cook Time: 20 minutes
- Total Time: 25 minutes
- Yield: 20 cookies
- Category: Snack
- Method: No-Cook
- Cuisine: American
Description
Delightful Love Bug Oreo Cookies coated in vibrant red melted chocolate wafers, decorated with royal icing eyes and micro heart sprinkles for a festive Valentine’s Day treat perfect for gifting or sharing.
Ingredients
Main Ingredients
- 20 Oreo Cookies
- 1 and ½ cups red chocolate melting wafers
- Royal icing eyes (20 pieces)
- Micro heart sprinkles (as needed)
Instructions
- Prepare Baking Sheet: Line a baking sheet with parchment paper or a silpat mat and set aside to prevent sticking.
- Melt Chocolate Wafers: Place the red chocolate melting wafers in a microwave-safe bowl. Microwave on medium heat for 30 seconds, then stir gently. Continue microwaving in 15 second increments, stirring between each, until the wafers are fully melted and smooth.
- Dip Oreos: Dip each Oreo cookie about three-fourths of the way into the melted red chocolate. Lightly tap the cookie to remove any excess chocolate, then place it onto the prepared baking sheet.
- Add Sprinkles: Immediately decorate the chocolate-coated portion of each Oreo with micro heart sprinkles to add festive color and texture.
- Attach Eyes: Using a toothpick, place a small drop of melted chocolate on the back of each royal icing eye, then stick the eyes onto the chocolate-coated section of the Oreo cookie to create the ‘Love Bug’ look.
- Set Cookies: Allow the decorated cookies to sit at room temperature until the chocolate sets completely, ensuring the decorations stay in place.
- Serve: Enjoy your Love Bug Oreo Cookies once the chocolate has hardened for a perfect Valentine’s Day treat.
Notes
- Store Love Bug Oreo Cookies in an airtight container to keep them fresh for 7 or more days.
- Use a silpat mat if available to prevent sticking more effectively than parchment paper.
- If melted chocolate becomes too thick, warm briefly again in the microwave in 10 second bursts, stirring well.
- For an extra festive touch, vary the colors of chocolate wafers or sprinkles.
Nutrition
- Serving Size: 1 cookie
- Calories: 120 kcal
- Sugar: 12 g
- Sodium: 90 mg
- Fat: 6 g
- Saturated Fat: 3 g
- Unsaturated Fat: 2 g
- Trans Fat: 0 g
- Carbohydrates: 18 g
- Fiber: 1 g
- Protein: 1 g
- Cholesterol: 0 mg

