
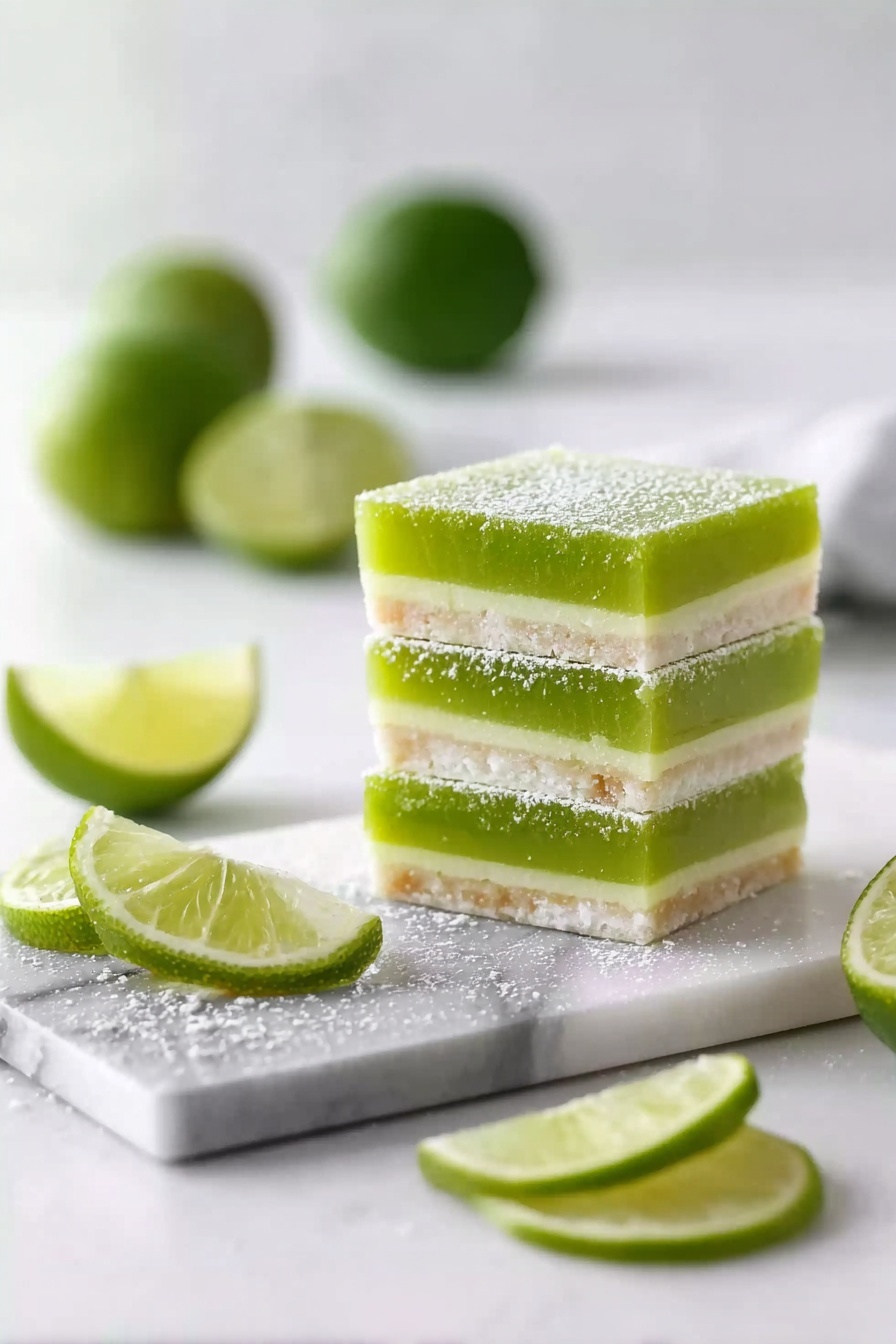
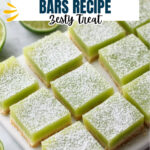
Lime Bars Recipe
If you’re anything like me and love a tangy, sweet treat that’s as refreshing as a summer breeze, then this Lime Bars Recipe is going to become your new go-to dessert. These bars strike the perfect balance between a buttery, crumbly crust and a zesty, luscious lime filling that just melts in your mouth. Trust me, once you try them, you’ll be making these for every occasion — family gatherings, potlucks, or just a cozy afternoon snack with your favorite cup of coffee.
Why This Recipe Works
- Perfectly Balanced Texture: The buttery crust crisps up just right, while the filling stays creamy and smooth without being runny.
- Fresh Lime Zest & Juice: Using fresh lime zest and juice boosts the brightness that makes these bars zing with flavor.
- Simple Ingredients, Big Flavor: No complicated steps or fancy ingredients required—just pantry basics coming together beautifully.
- Make-Ahead Friendly: These bars chill well for a few hours or even overnight, so they’re great for prepping ahead of time.

Ingredients & Why They Work
This Lime Bars Recipe brings together simple ingredients that you might already have on hand—each playing a key role to make the bars taste irresistible. Here’s a little insight on why I love these ingredients for this dessert.
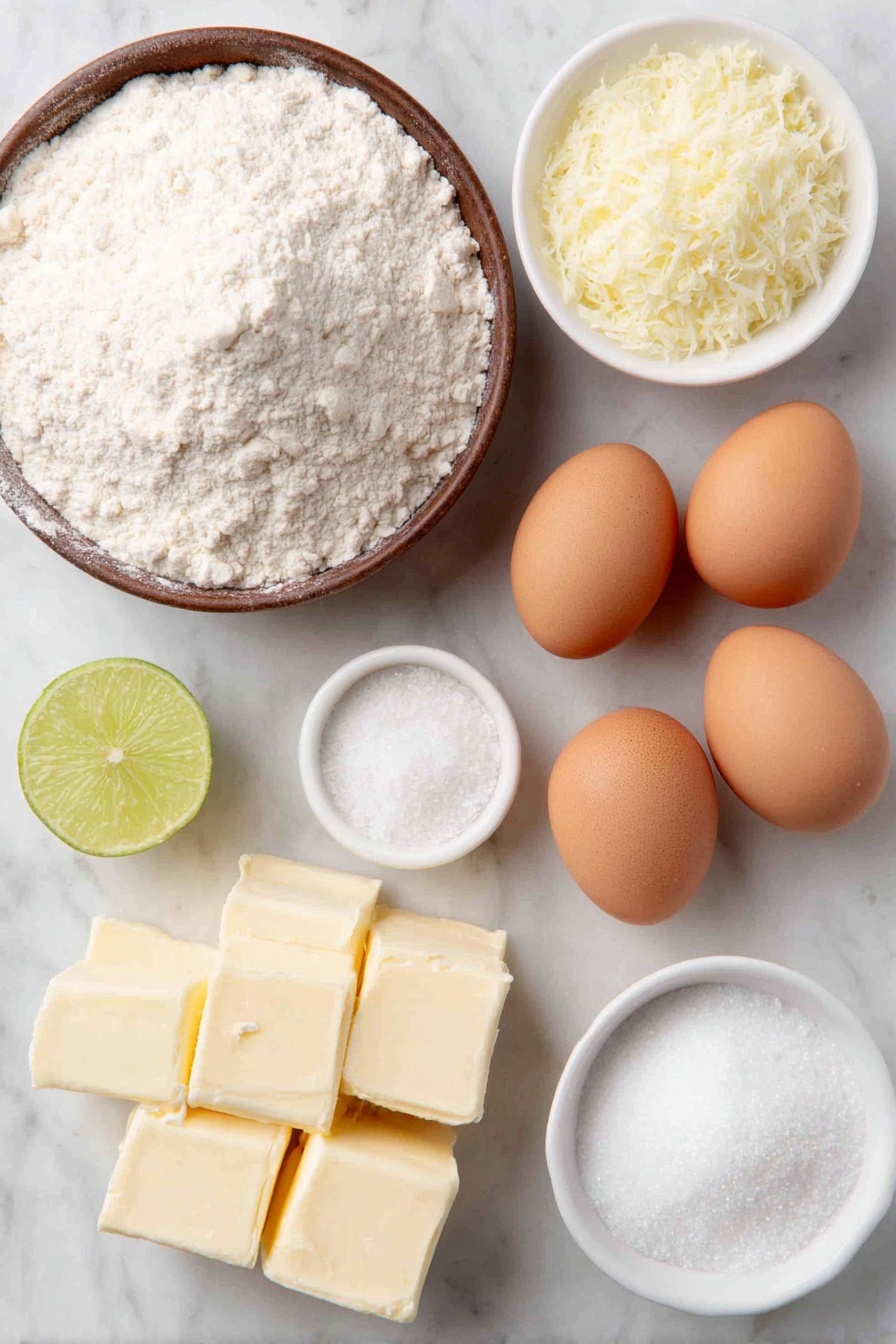
- All-purpose flour: This forms the sturdy and buttery crust base, giving it that satisfying crumbly texture without being too dense.
- Powdered sugar: I prefer this in the crust for a silky-smooth sweetness that helps the crust bake evenly and melt in your mouth.
- Butter: Using cold, cubed butter ensures the crust develops a shortbread-like texture and golden color when baked.
- Granulated sugar: Sweetens the tangy lime filling perfectly without overpowering the citrusy punch.
- Eggs: These act as the binder and give the filling a smooth, custardy consistency once baked.
- Lime zest and juice: The heart of the recipe! Fresh zest brings essential oils and a punchy aroma, while the juice adds tartness that makes the bars lively and refreshing.
- Salt: A pinch balances all the sweetness and brightens the flavors.
- Food coloring (optional): If you want that pretty pastel green color, a drop or two of green (and a little yellow) food coloring does the trick without altering flavor.
Tweak to Your Taste
I love how forgiving this Lime Bars Recipe is, so feel free to make it your own. Whether you like it more tart, sweeter, or even dairy-free (I’ll share some ideas), you can adjust with ease and still end up with a delicious treat.
- Make it extra tart: Sometimes I add a splash more fresh lime juice or an extra teaspoon of zest for a serious zing that wakes up the palate.
- Cut back on sugar: If you prefer less sweetness, decrease the granulated sugar by about 2 tablespoons — just keep the balance with the lime juice so it doesn’t get too sour.
- Gluten-free version: Try swapping the all-purpose flour with a gluten-free blend I trust — the texture is slightly different but still yummy.
- Color it naturally: Skip artificial food coloring and add a tiny bit of matcha powder or a drop of carrot juice for fun color ideas that complement the flavor.
Step-by-Step: How I Make Lime Bars Recipe
Step 1: Prep the Pan and Preheat
I start by preheating my oven to 350°F (175°C). Then, I lightly grease an 11×7-inch baking dish or line it with parchment paper that hangs over the edges by a couple of inches. This little parchment “handle” trick makes removing the bars a breeze later on—trust me, it’s a game-changer!
Step 2: Make the Buttery Crust
Into my food processor go the flour, powdered sugar, salt, and cold butter cut into chunks. I pulse everything until it looks like fine crumbs — no big chunks, but don’t overmix or it turns greasy. Then, I press the mixture firmly and evenly into the pan. This helps the crust hold together while baking. Bake for 18 to 20 minutes or until the crust turns a lovely golden brown. It smells amazing already!
Step 3: Whisk Up the Luscious Filling
While the crust is baking, I whisk together the granulated sugar and flour in a bowl. Then I add eggs one at a time, whisking well after each addition to keep it smooth. Next comes the fresh lime zest and lime juice—this is where the magic happens! I like to add just a drop of green (and sometimes a little yellow) food coloring for that classic lime bar color, but it’s totally optional.
Step 4: Bake the Bars Till Set
Pour the filling over the hot crust right after it comes out of the oven — this layering helps meld the flavors. Return the pan to bake for another 18 to 20 minutes until the filling doesn’t jiggle when you gently shake the pan. That’s your cue it’s perfectly set.
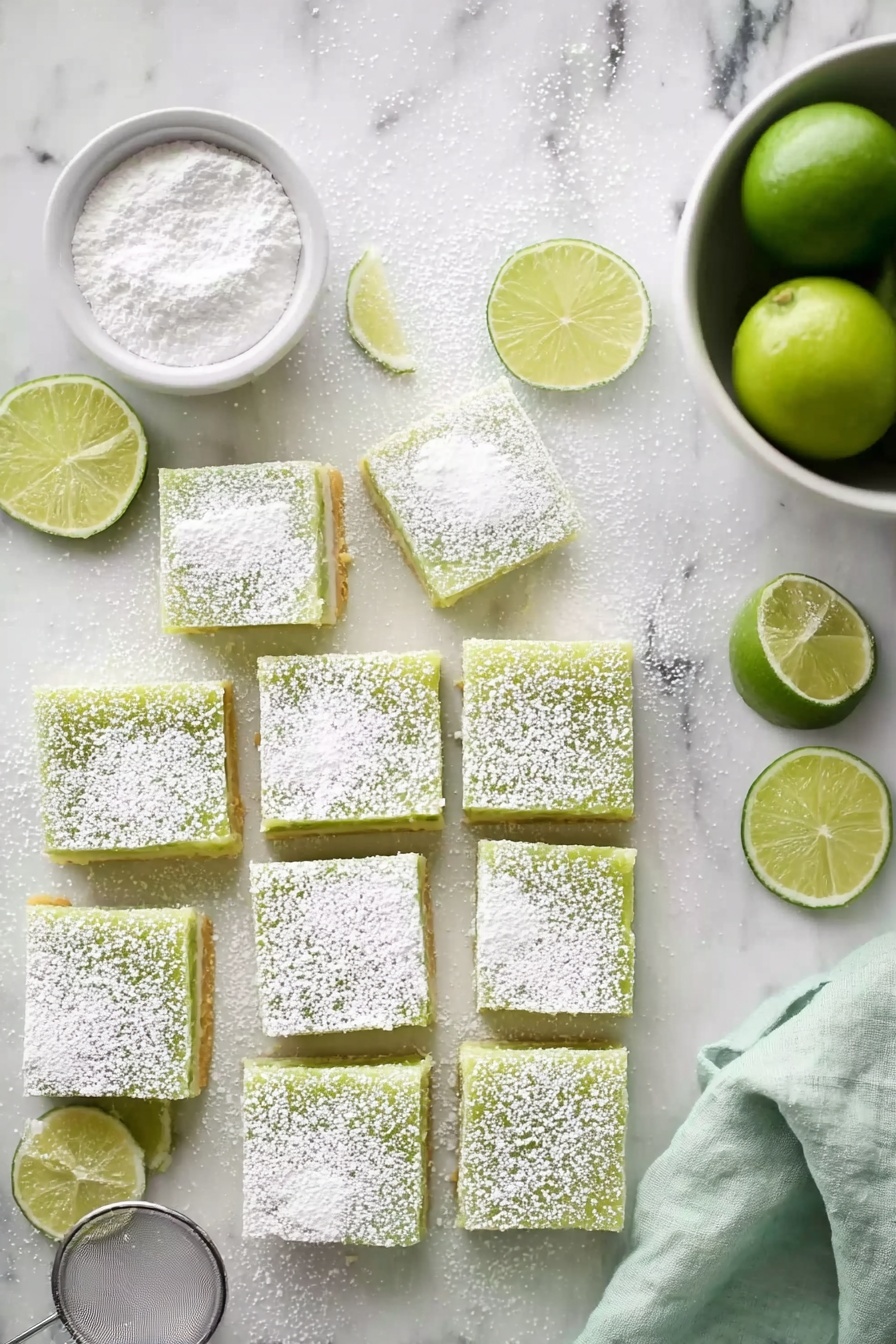
Step 5: Chill and Cut
Let the bars cool completely at room temperature for about an hour. Then, refrigerate for at least 1 to 2 hours before slicing—this chilling step is key for clean, neat slices that hold their shape. Use those parchment edges to lift the bars out, slice into squares, and enjoy!
Pro Tips for Making Lime Bars Recipe
- Use Fresh Limes: Freshly zested and juiced limes pack way more flavor than bottled juice — don’t skip this step!
- Chill Before Cutting: Let the bars chill fully or they’ll be too soft and tricky to slice without crumbling.
- Don’t Overmix the Crust: Pulse just enough to get crumbly texture; over-blending can result in greasy dough.
- Keep an Eye on Baking Time: Oven temps vary—start checking a few minutes before to avoid drying out the filling.
How to Serve Lime Bars Recipe
Garnishes
I often dust these lime bars with a light sprinkle of powdered sugar before serving for that pretty, delicate touch. If you want to get fancy, a small dollop of whipped cream or a thin slice of lime zest makes them pop visually and adds a little extra zing.
Side Dishes
Since lime bars are bright and citrusy, I like pairing them with mellow accompaniments like creamy vanilla ice cream or a mild herbal tea when serving as dessert. They also pair beautifully with a fresh fruit salad or some light coconut macaroons if you want a tropical-themed dessert spread.
Creative Ways to Present
For special occasions, I’ve arranged lime bars on a pretty platter with edible flowers scattered around—adds that wow factor! You can also cut the bars into small rectangles and serve them on mini dessert spoons or skewered with a mint leaf for cute party bites.
Make Ahead and Storage
Storing Leftovers
Leftover lime bars stay fresh for 3 to 4 days when stored in an airtight container in the refrigerator. I usually layer them with parchment paper to prevent sticking, and the chilling really helps maintain that firm, sliceable texture.
Freezing
I’ve successfully frozen lime bars wrapped tightly in plastic wrap and placed in a freezer-safe container. When ready to enjoy, thaw them in the fridge overnight. This method keeps the flavor intact, though the texture can be slightly softer than fresh-baked.
Reheating
I recommend eating them cold or at room temperature because warming can make the filling runny. If you prefer warm, a quick 10-second zap in the microwave works, but don’t overdo it!
FAQs
-
Can I make lime bars without a food processor?
Absolutely! If you don’t have a food processor, you can cut the butter into the flour, powdered sugar, and salt using a pastry cutter or two knives until the mixture resembles coarse crumbs. Alternatively, use your fingertips to rub the butter into the dry ingredients—just work quickly to avoid warming the butter.
-
Why does my lime bar filling sometimes turn out too runny?
Runny filling is often caused by under-baking or not letting the bars chill long enough. Make sure you bake the filling until it no longer jiggles when you gently shake the pan, and give it enough time to cool and refrigerate before slicing.
-
Can I use bottled lime juice instead of fresh?
While you can use bottled lime juice, fresh lime juice and zest truly brighten the flavor and make a difference in taste. If you must use bottled juice, try to find one that’s 100% lime juice with no added preservatives or sweeteners.
-
How do I get clean cuts when slicing lime bars?
Chill the bars thoroughly in the fridge for at least an hour before slicing. Use a sharp knife and wipe it clean between cuts. Lifting the bars out with parchment paper helps keep the edges intact too.
Final Thoughts
This Lime Bars Recipe is one of my absolute favorites because it’s simple, reliably delicious, and feels like a little slice of sunshine on a plate. I love making a batch and sharing it with friends or keeping a stash in the fridge for whenever a citrus craving hits. Give it a try—you won’t regret having these zesty bars to brighten your day or impress your dessert guests!
Print
Lime Bars Recipe
- Prep Time: 10 minutes
- Cook Time: 40 minutes
- Total Time: 2 hours 50 minutes
- Yield: 12 servings
- Category: Dessert
- Method: Baking
- Cuisine: American
Description
These zesty Lime Bars feature a buttery, golden crust topped with a smooth and tangy lime filling. Perfectly balanced between sweet and tart, they are easy to make and a refreshing treat for any occasion.
Ingredients
Crust:
- 1 cup (120 g) all-purpose flour
- ¼ cup (30 g) powdered sugar
- ¼ tsp salt
- ½ cup (113 g) butter, cut into 8 pieces
Filling:
- 1 ¼ cup (250 g) granulated sugar
- ¼ cup (30 g) all-purpose flour
- 4 large eggs
- 2 tsp lime zest
- ⅔ cup (159 ml) fresh lime juice
- drop of green (+ yellow) food coloring, optional
Instructions
- Preheat and prepare pan. Preheat oven to 350 degrees Fahrenheit. Lightly grease or line an 11×7-inch baking dish with parchment paper that overhangs 2-inches on both sides.
- Make the crust. Combine flour, powdered sugar, salt, and butter in a food processor. Pulse until mixture resembles fine crumbs. Press the mixture evenly into the prepared baking dish. Bake for 20 minutes or until golden brown.
- Prepare the filling. While the crust bakes, whisk together granulated sugar and flour in a bowl. Add eggs one at a time, whisking well after each addition. Stir in lime zest, fresh lime juice, and a drop of green (and yellow) food coloring if desired. Mix until smooth and well combined.
- Bake the filling. Pour the lime filling over the hot crust. Return to the oven and bake for an additional 20 minutes until the filling is set and no longer jiggles when gently shaken.
- Cool and chill. Let the baked bars cool completely in the pan for about 1 hour. Then refrigerate for 1 to 2 hours until fully chilled and firm.
- Serve. Use the parchment paper overhang to lift the bars out of the pan. Cut into squares and serve cold. Store any leftovers in the refrigerator.
Notes
- Use fresh lime juice for the best flavor.
- Press the crust firmly into the pan to create an even base.
- For easier cutting, chill the bars thoroughly before slicing.
- Food coloring is optional and can be omitted if you prefer a natural look.
- Store bars in an airtight container in the fridge for up to 4 days.
Nutrition
- Serving Size: 1 bar
- Calories: 220 kcal
- Sugar: 20 g
- Sodium: 70 mg
- Fat: 12 g
- Saturated Fat: 7 g
- Unsaturated Fat: 4 g
- Trans Fat: 0 g
- Carbohydrates: 28 g
- Fiber: 1 g
- Protein: 3 g
- Cholesterol: 70 mg

