
Homemade Angel Biscuits Recipe
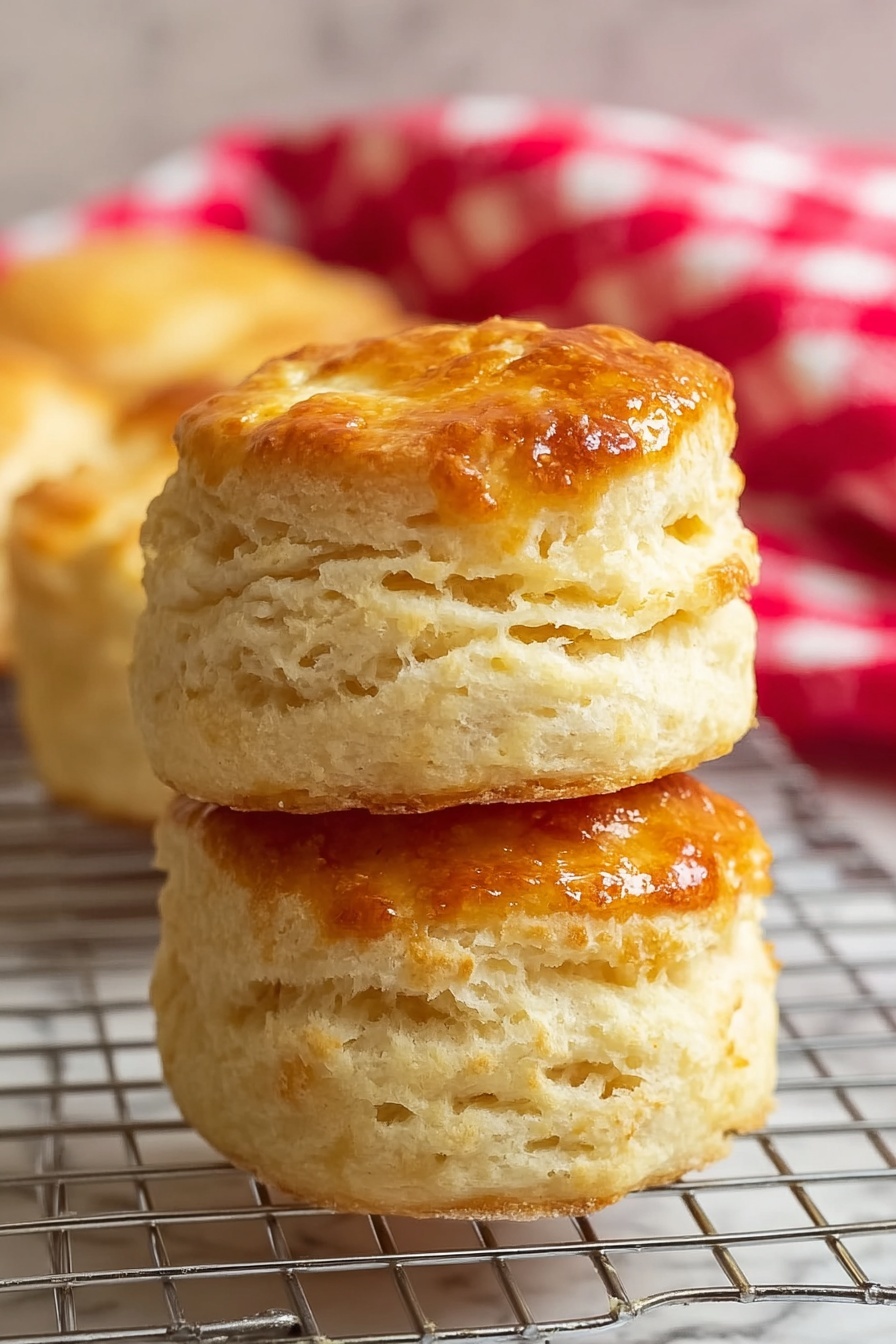
If you’re craving soft, flaky, and utterly divine biscuits, then you’re in for a treat with this Homemade Angel Biscuits Recipe. These biscuits rise beautifully, boast a tender crumb, and have just the right buttery sweetness that makes them irresistible. Trust me, once you make these, you’ll never want to buy pre-made again. It’s like having a little piece of breakfast heaven right in your own kitchen!
Why This Recipe Works
- Rapid Rise Yeast: This speeds up the proofing and rise time, giving the biscuits a beautiful lift without keeping you waiting all afternoon.
- Combination of Butter & Shortening: Using both adds richness and tenderness with flaky layers—something I learned after experimenting a lot!
- Heavy Cream Brush: This simple step before baking creates a gorgeous golden top that looks as good as it tastes.
- Layering Effect: Folding the dough a few times gives these biscuits that signature light, fluffy angelic texture everyone raves about.

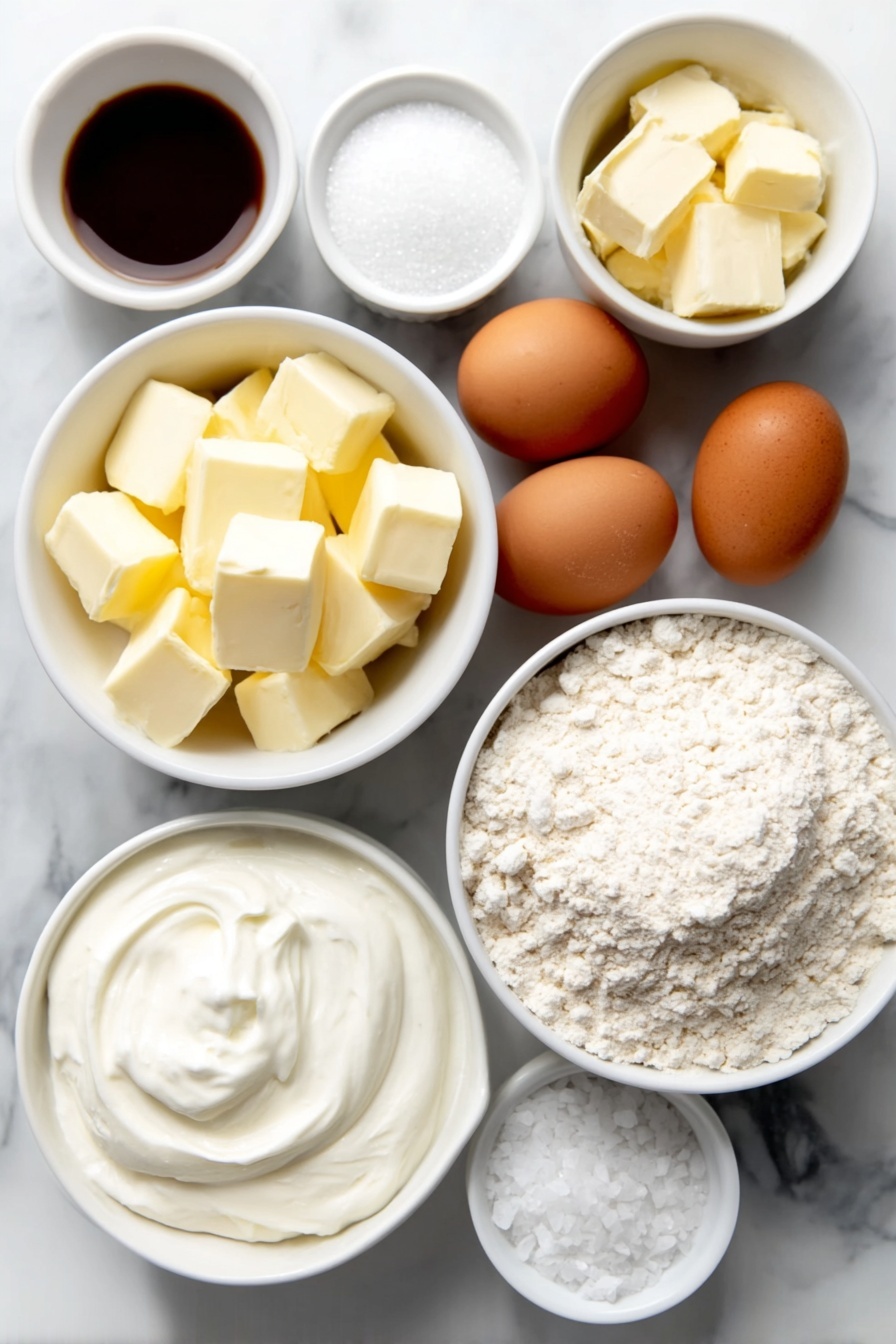
Ingredients & Why They Work
Each ingredient in this Homemade Angel Biscuits Recipe plays a key role in achieving that perfect biscuit texture and flavor. The balance between flour, leavening agents, fats, and dairy is spot on, ensuring your biscuits come out fluffy, tender, and full of buttery goodness every single time.
- Warm water: This activates the yeast perfectly, but it’s important it’s not too hot—about 125°F is just right to proof without killing those little guys.
- Granulated sugar: It feeds the yeast and adds a touch of sweetness to balance the savory.
- Rapid rise instant yeast: Quick rising to save you time and ensure fluffy biscuits.
- All-purpose flour: I prefer White Lily flour since it’s lighter, but any good quality flour will work.
- Baking powder & baking soda: They provide extra lift and tenderness beyond what yeast alone can offer.
- Salt: Enhances all the flavors without overpowering.
- Unsalted butter: Adds rich, creamy flavor and those flaky layers I can’t get enough of.
- Butter-flavored shortening: This boosts tenderness and helps build the fluffy texture when combined with butter.
- Buttermilk: Adds tanginess and reacts with baking soda for a beautiful rise.
- Heavy whipping cream: Used for brushing tops—this little trick browns the biscuits perfectly and adds subtle richness.
Tweak to Your Taste
I love playing around with this Homemade Angel Biscuits Recipe to suit whatever mood I’m in, or what I have in the fridge. You can make these biscuits your own by adding a pinch of your favorite herbs or a little cheese folded right into the dough. Don’t be shy—this recipe is forgiving and flexible.
- Herb Variation: Adding fresh rosemary or thyme to the dough turns them into a savory delight perfect for soups or stews. I tried rosemary once and it was a total crowd-pleaser!
- Cheese Addition: Grated sharp cheddar stirred in before baking makes these biscuits a cheesy, gooey surprise that’s wonderful alongside chili.
- Dairy-Free Option: Swap out butter and cream for non-dairy alternatives, keeping in mind your biscuits may be slightly less rich but still cozy.
- Sweeter Version: Drift toward a breakfast treat by adding cinnamon and a sprinkle of sugar on top before baking—so comforting with a pat of honey.
Step-by-Step: How I Make Homemade Angel Biscuits Recipe
Step 1: Proof Your Yeast to Wake It Up
Start by warming your water to about 125°F — warm enough to be comfy but not hot enough to kill the yeast. Stir in the sugar, then sprinkle the rapid-rise yeast on top. Let it bubble and foam for about 5-10 minutes while you gather the other ingredients. This step is so crucial—if your yeast doesn’t foam, your biscuits won’t rise as beautifully.
Step 2: Mix Your Dry Ingredients and Cut in the Fats
In a large bowl, sift or whisk together your flour, sugar, baking powder, baking soda, and salt. Then use a pastry cutter (or a couple of knives if you don’t have one) to cut the cold butter and shortening into the dry mix. You’re looking for a crumbly mixture with pea-sized bits of fat—we want pockets of fat to melt during baking, creating those flaky layers we love.
Step 3: Combine the Yeast Mixture and Buttermilk
Make a well in the center of your flour mix, then pour in the proofed yeast and buttermilk. Stir them lightly together, then gradually fold in the dry ingredients until the dough just comes together. It’s important not to overmix here—overworking your dough can make the biscuits tough rather than soft and tender.
Step 4: Knead Gently and Layer the Dough
Turn your dough out onto a lightly floured surface and gently knead it just enough to bring it all together into a soft, pliable mound. Fold the dough over itself several times—this layering action gives the biscuits their signature lightness and those delicate layers you’ll adore.
Step 5: Cut Out Biscuits and Let Them Rise
Pat or roll your dough to about an inch thick, then use a floured 2.5-inch biscuit cutter to stamp out 8–10 biscuits. Resist the urge to twist the cutter—that can seal the edges and prevent a good rise. Place the biscuits about half an inch apart on a greased pan. Cover loosely with plastic wrap and set in a warm, draft-free spot to rise for about an hour. I love popping mine in the oven with just the pilot light on—perfect cozy environment!
Step 6: Bake to Golden Perfection
Once your biscuits have puffed beautifully, preheat your oven to 400°F. Gently brush each biscuit with a light coating of heavy cream—this makes the tops golden and irresistible. Bake for 10–12 minutes, but check around 8 minutes just in case your oven runs hot. For that signature angelic golden crown, turn the oven to a low broil for the last minute or so—just watch carefully so they don’t burn! Right out of the oven, brush with melted butter to keep them moist and add extra flavor.
Pro Tips for Making Homemade Angel Biscuits Recipe
- Perfect Proofing Temperature: I always use a thermometer for my water to be sure it hits about 125°F—too hot and you risk killing the yeast before it even starts!
- No Twisting the Cutter: Press straight down with your biscuit cutter and pull straight up to keep those edges nice and fluffy.
- Layer, Layer, Layer: Taking a moment to fold the dough a few times makes all the difference in lightness and flakiness.
- Watch the Broil: Broiling at the end gives the color and crunch but don’t walk away—these go from golden to burnt fast!
How to Serve Homemade Angel Biscuits Recipe
Garnishes
I typically keep it classic by serving these biscuits with a pat of good-quality butter and a drizzle of honey or jam. Sometimes, I’ll add a sprinkle of freshly chopped chives or a dab of clover honey—it really brightens them up and adds a fresh finish without overwhelming the buttery flavor.
Side Dishes
These biscuits are crazy versatile. For breakfast, I love pairing them with scrambled eggs and country ham. When I’m feeding a crowd for dinner, they’re perfect alongside a bowl of hearty chicken and dumplings or a rich pot roast. Honestly, they soak up gravies and sauces like nobody’s business!
Creative Ways to Present
For special occasions, I’ve arranged the biscuits in a beautiful circle on a serving platter, placing tiny ramekins of herb butter and flavored honey in the center—it makes for a charming centerpiece. I’ve even wrapped individual biscuits in parchment paper tied with twine for a rustic brunch party favor—it’s a conversation starter for sure!
Make Ahead and Storage
Storing Leftovers
If you happen to have leftovers (which is rare in my house), wrap them tightly in foil or plastic wrap and store at room temperature for up to two days. To keep them soft overnight, I like putting the wrapped biscuits inside a bread box or an airtight container.
Freezing
The great news is these Homemade Angel Biscuits freeze beautifully! I usually cut and freeze them raw on a baking sheet first, then transfer to a freezer bag. When I want fresh biscuits, I just bake them straight from frozen—adding a few extra minutes to the baking time. Perfect for last-minute breakfasts!
Reheating
To reheat, I cover the biscuits with foil and warm them in a 300°F oven for about 10 minutes or until heated through. For a quick fix, I also pop them in the microwave wrapped in a damp paper towel for 20 seconds and then finish with a quick broil to refresh the crisp tops. Your leftover biscuits will taste almost as heavenly as freshly baked.
FAQs
-
What makes these “angel” biscuits different from regular biscuits?
“Angel” biscuits typically include yeast for a fluffier, lighter texture, layered by folding the dough, which creates delicate flaky layers that melt in your mouth—much lighter than standard drop or baking powder-only biscuits.
-
Can I use regular active dry yeast instead of rapid rise?
You can, but it will take longer to proof and rise. Be prepared to give your dough extra time—about 1.5-2 hours—to rise properly. Also, activate active dry yeast in warm water first as usual before mixing into the dough.
-
Why do I fold the dough instead of just kneading?
Folding creates layers of dough and fat which bake into flaky, tender layers—this technique is key for that signature “angel” lightness and flakiness. Kneading too much can develop gluten making biscuits tougher.
- What’s the secret to getting golden biscuit tops?
Brushing the tops with heavy whipping cream right before baking and finishing with a low broil for the last minute creates a beautiful golden color and a slight crisp on top.
-
Can I make these biscuits vegan?
Yes, by substituting butter and shortening with vegan alternatives and swapping buttermilk for a plant-based milk mixed with lemon juice or vinegar to mimic acidity, though texture and flavor might be slightly different.
Final Thoughts
This Homemade Angel Biscuits Recipe has quickly become a favorite for me to share—not just because they’re delicious but because they bring that little bit of magic to any meal, from breakfast to dinner. I love the way this recipe invites you to get hands-on, layering the dough and watching it rise into golden perfection. You’re gonna love pulling warm, buttery biscuits fresh from your oven, and honestly, nothing beats sharing that joy with family and friends. Give it a go—you’ll thank me later.
Print
Homemade Angel Biscuits Recipe
- Prep Time: 20 minutes
- Cook Time: 11 minutes
- Total Time: 1 hour 31 minutes
- Yield: 8 servings
- Category: Breakfast
- Method: Baking
- Cuisine: American
- Diet: Vegetarian
Description
Homemade Angel Biscuits are fluffy, layered biscuits made with a yeast-raised dough enriched with buttermilk, butter, and shortening. These biscuits feature a tender crumb and a golden brown top brushed with cream and melted butter for extra flavor and texture. Perfect for breakfast or as a side dish, they require a proofing time for the yeast and a quick bake for a deliciously light and airy biscuit.
Ingredients
Yeast Mixture
- 1/4 cup warm water (125 F)
- 1 teaspoon granulated sugar
- 1 package Rapid Rise Instant yeast (1/4 oz) (2¼ teaspoons)
Biscuits
- 2½ cups all-purpose flour (preferably White Lily flour)
- 1/4 cup granulated sugar
- 1 teaspoon baking powder
- 1/2 teaspoon baking soda
- 1 teaspoon salt
- 1/4 cup unsalted butter, chopped + more for brushing finished biscuits
- 1/4 cup butter-flavored shortening
- 1 cup buttermilk
- 1 tablespoon heavy whipping cream
Instructions
- Proof the yeast: Add warm water and sugar to a glass measuring cup or bowl, then stir in the rapid rise instant yeast. Let the yeast proof while preparing the rest of the ingredients.
- Mix dry ingredients: In a large bowl, sift or whisk together the all-purpose flour, granulated sugar, baking powder, baking soda, and salt.
- Cut in fats: Using a pastry cutter, cut in the chopped unsalted butter and butter-flavored shortening until the mixture resembles small crumbs.
- Add liquids: Make a well in the center of the bowl and pour in the yeast mixture and buttermilk, stirring to combine just the yeast and buttermilk initially.
- Form dough: Gradually push the flour mixture into the well until everything is combined and a dough forms.
- Knead the dough: Lightly flour a work surface and turn the dough out. Gently knead to incorporate all crumbs until you have a soft, pliable mound of dough.
- Create layers: Fold the dough several times to develop layers that will give the biscuits their flaky texture.
- Shape dough: Pat the dough into a 1-inch thick rectangle on the floured surface.
- Cut biscuits: Use a floured 2.5 inch round biscuit cutter to cut out 8 to 10 biscuits. Avoid twisting the cutter; press straight down and pull up.
- Arrange and rise: Place biscuits on a lightly greased 9-inch pan about 1/2 inch apart. Cover loosely with plastic wrap and place in a very warm, draft-free location (like an oven with the pilot light on) to rise for 1 hour.
- Preheat oven and prepare biscuits: After rising, preheat the oven to 400 F. Remove plastic wrap and brush the tops lightly with heavy whipping cream to encourage browning.
- Bake biscuits: Bake for 11 minutes, checking at the 8-minute mark. For the last minute, switch the oven to low broil to create golden tops, watching closely to prevent burning.
- Finish and serve: Remove biscuits from the oven and immediately brush with melted butter for a rich, glossy finish.
Notes
- Do not twist the biscuit cutter when cutting biscuits as it can seal the edges and prevent proper rising.
- If you don’t have a warm place to let the dough rise, you can use your oven with just the light on to keep a draft-free warm environment.
- Brushing the tops with heavy cream before baking helps achieve a beautiful golden-brown crust.
- If you prefer, you can substitute the butter-flavored shortening with additional unsalted butter for a different flavor.
- Watch carefully during the broiling step as biscuits can burn quickly.
Nutrition
- Serving Size: 1 biscuit
- Calories: 180 kcal
- Sugar: 3 g
- Sodium: 350 mg
- Fat: 9 g
- Saturated Fat: 4 g
- Unsaturated Fat: 4 g
- Trans Fat: 0 g
- Carbohydrates: 22 g
- Fiber: 1 g
- Protein: 4 g
- Cholesterol: 30 mg


