
Halloween Oreo Candy Melt Treats Recipe
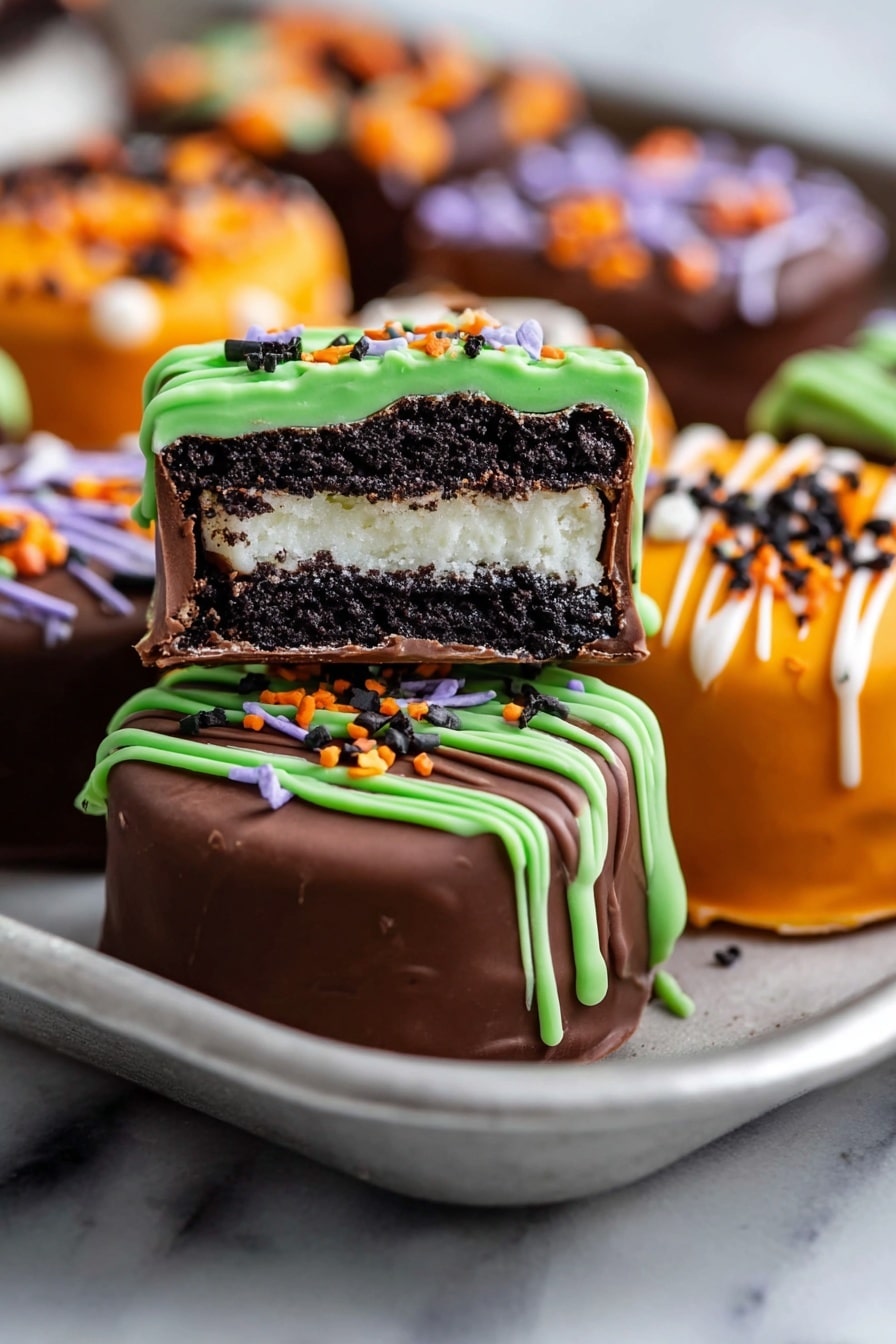
If you’re looking for a fun, festive treat that’ll wow your friends and family this spooky season, you’re in the right place! My Halloween Oreo Candy Melt Treats Recipe is hands-down one of my favorite easy-to-make, no-bake desserts that feel special but require zero stress. Imagine crunchy Oreos wrapped snugly in colorful, glossy candy melts and adorned with quirky Halloween decorations — it’s basically the ultimate seasonal indulgence that kids and adults both adore. Keep reading, and I’ll walk you through every step to ensure your treats come out picture-perfect and delicious!
Why This Recipe Works
- Simple Ingredients: Using everyday Oreos and candy melts makes this recipe super accessible for anyone.
- No Baking Required: Perfect when you want a quick holiday treat that doesn’t heat up the kitchen.
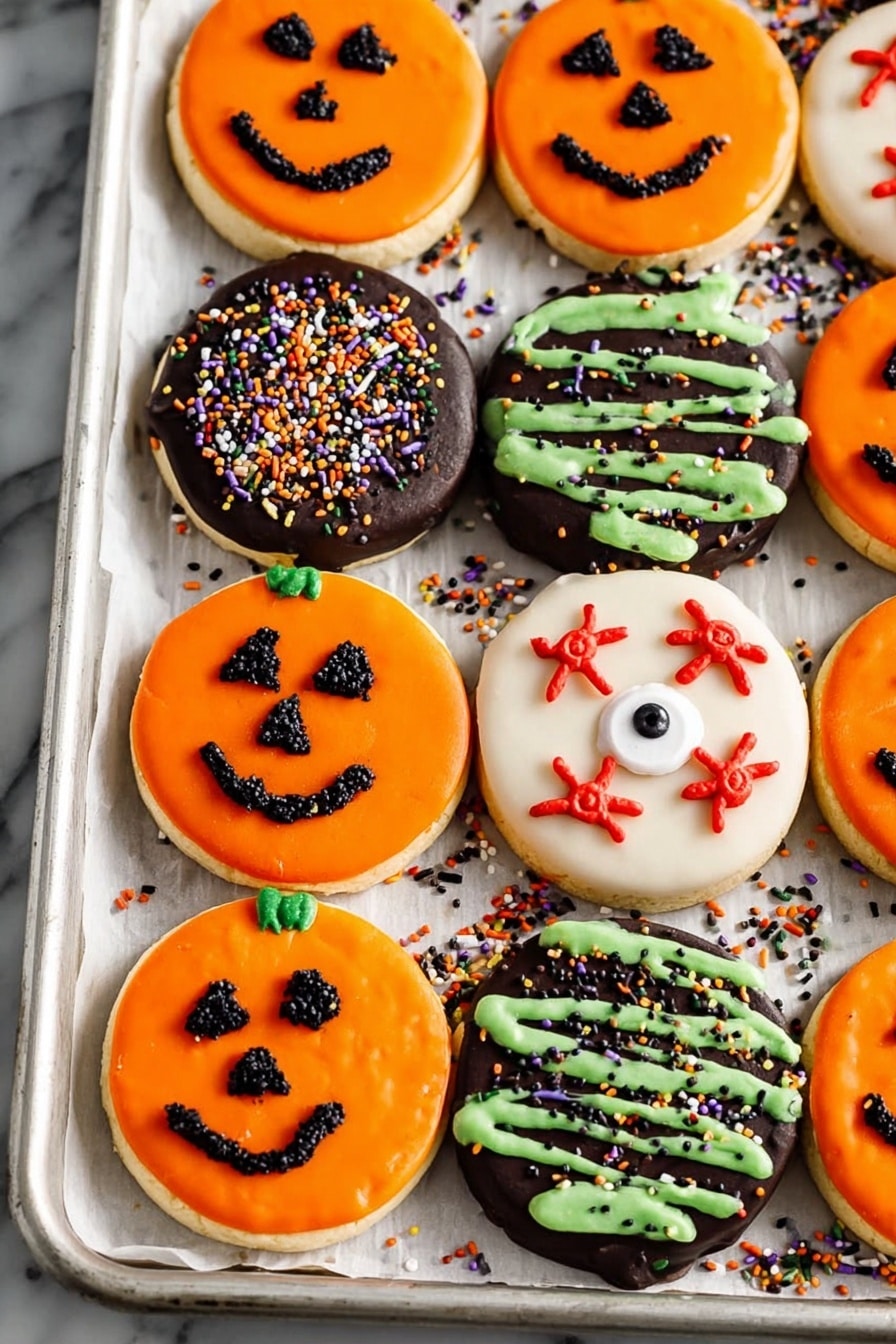
- Endless Decorating Fun: Whether you prefer sprinkles, candy eyes, or piping jack-o’-lantern faces, this recipe invites creativity.
- Kid-Friendly and Crowd-Pleaser: These treats are a guaranteed hit for Halloween parties or classroom snacks.

Ingredients & Why They Work
The magic behind this Halloween Oreo Candy Melt Treats Recipe is in how just a few simple ingredients come together for maximum impact. The Oreos bring that beloved crunch and creamy surprise, while candy melts transform them into a colorful, festive masterpiece. Shopping tip: pick up candy melts in your favorite Halloween colors for the biggest wow factor!
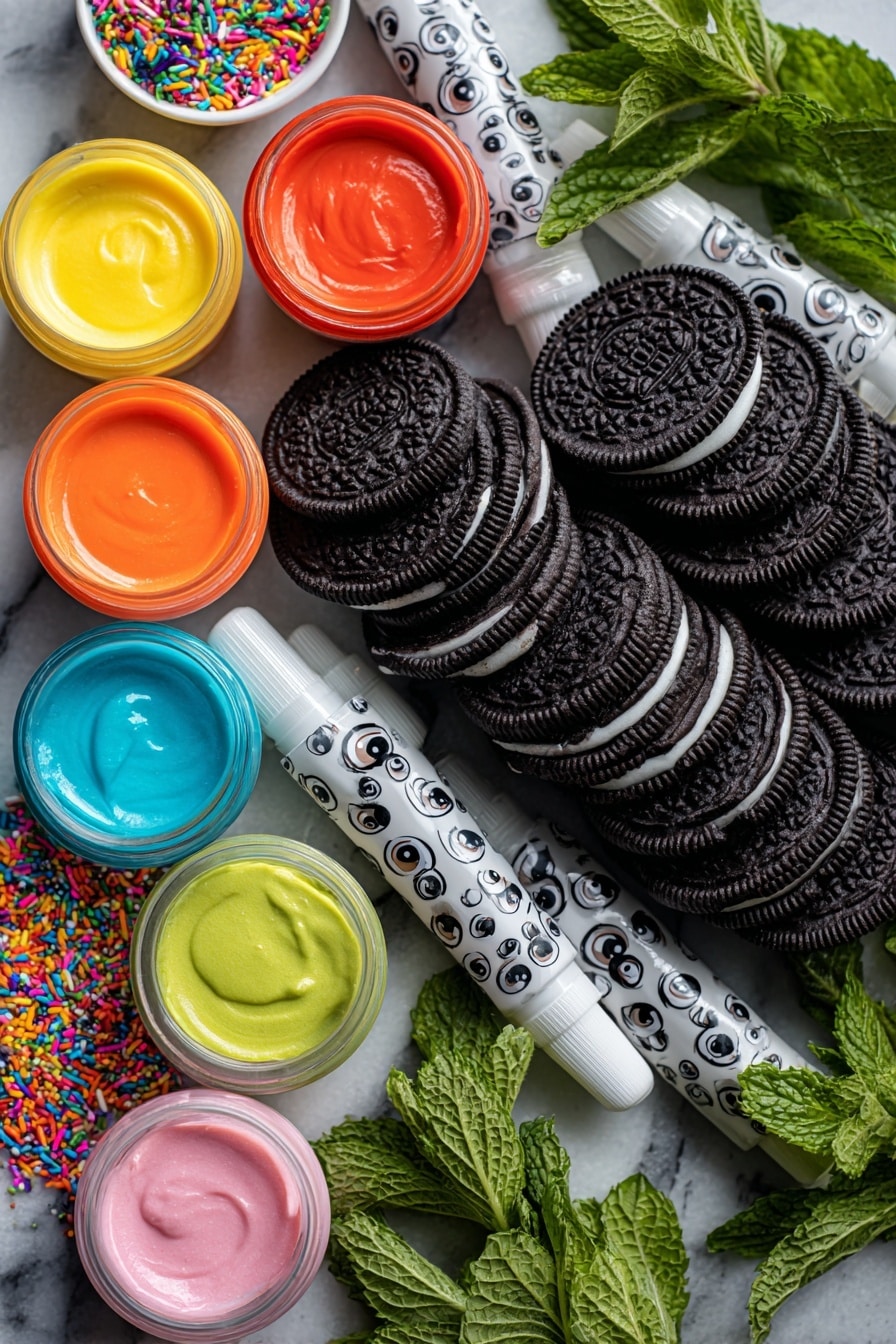
- Oreos: Their perfect balance of crunchy cookie and smooth filling holds up well when coated in candy melts.
- Candy Melts: These colored, easy-melting wafers are essential for getting a smooth, glossy coating — don’t skip on quality.
- Sprinkles and Decorations: Use candies, gel colors, or edible markers to add personality and fun toppings to your treats.
Tweak to Your Taste
One of the best things about this Halloween Oreo Candy Melt Treats Recipe is how customizable it is. I love playing with different color combos and decorations depending on my mood or who I’m making them for. Don’t hesitate to mix it up and add your own twist!
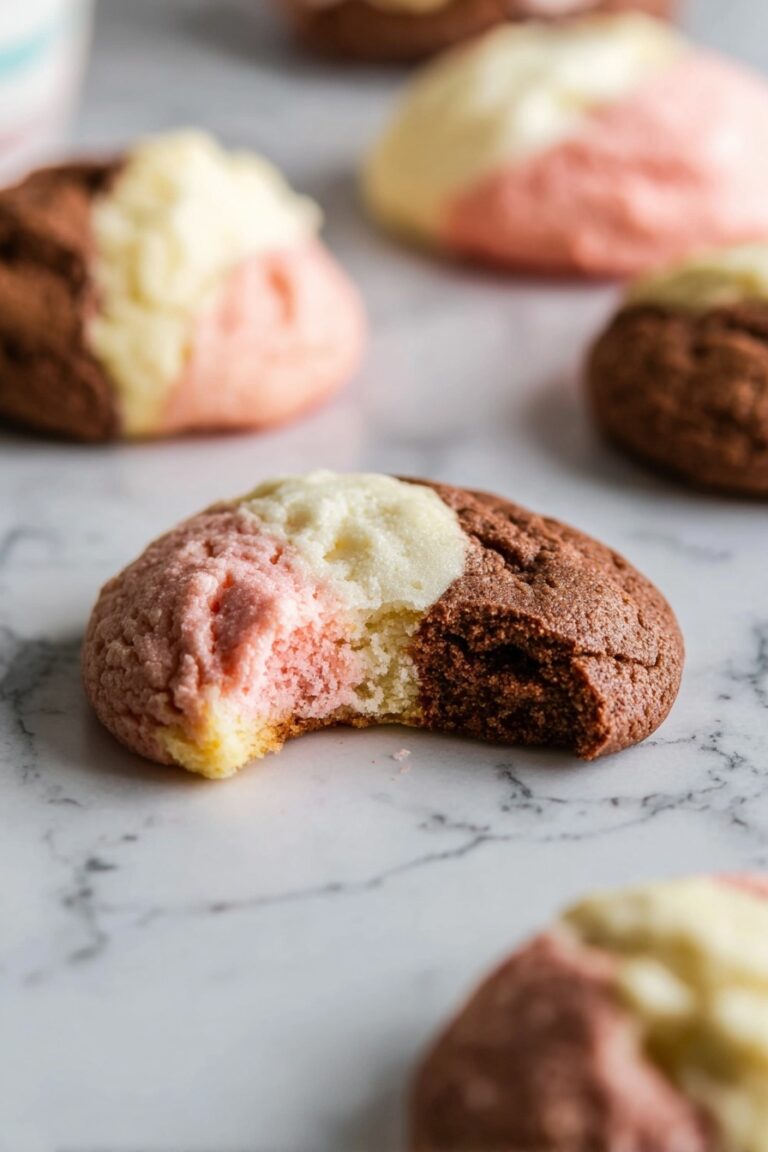
- Variation: I once swapped Oreos for mint-flavored cookies to add a grown-up flair, and it was surprisingly delightful!
- Dietary tweaks: Gluten-free Oreos or vegan candy melts work well if you have special diets in the family.
- Seasonal changes: Switch candy melt colors to pastel shades for spring, or red and green for Christmas – the base recipe still shines!
Step-by-Step: How I Make Halloween Oreo Candy Melt Treats Recipe
Step 1: Melt Your Candy Melts Gently
Start by melting your candy melts according to the package instructions. I like using paper dixie cups because they’re super easy to clean and the microwave heats the melts evenly without burning. Just zap in short bursts (30 seconds at a time), stirring in between to get a smooth, glossy melt. If you’re finding the candy too thick, add a tiny splash (about 1/2 teaspoon) of vegetable oil to thin it out — that trick always saves the day!
Step 2: Coat the Mold and Place Your Oreos
Pour about a tablespoon of melted candy into the bottom of each mold cavity, then gently tap your Oreo on top. Follow up by drizzling more candy melts over the cookie, making sure it’s fully covered. This sandwich effect traps the Oreo inside, giving that perfectly smooth candy shell. If you don’t have molds, you can do this on parchment paper too – just drizzle candy on the bottom, place the Oreo, then cover it gently.
Step 3: Chill Until Set
Pop your trays into the fridge for at least an hour to give your candy melts plenty of time to fully harden. This step is key — if you rush it, your treats might not come out clean and glossy. When they’re firm, carefully pop them out of the molds and get ready to decorate!
Step 4: Add Your Halloween Flair
Now the fun part — decorating! Melt a few more colors of candy melts for piping or drizzling. For classic jack-o’-lantern faces, I melt dark chocolate candy melts and put them in a tiny plastic bag with the tip snipped off so I can pipe eyes and mouths delicately. You can also use a black edible food writer pen if that’s easier. Or, sprinkle on candy eyes, gels, and colorful sprinkles while the drizzle is still tacky. Once decorated, chill again briefly to let your designs set.
Pro Tips for Making Halloween Oreo Candy Melt Treats Recipe
- Use Quality Candy Melts: I personally swear by Ghirardelli melts—they melt more smoothly and taste better than craft store brands.
- Temperature Matters: Be patient melting your candy melts slowly to avoid a grainy texture or burning them.
- Piping Precision: To get crisp Jack-o’-lantern faces, always pipe on a chilled surface so the lines set quickly.
- Storing Tricks: Keep your finished treats in an airtight container in the fridge to maintain crispness and prevent melting.
How to Serve Halloween Oreo Candy Melt Treats Recipe
Garnishes
I like adding a fun finishing touch by sprinkling edible glitter or mini candy eyes right on top after the last drizzle. It makes the treats sparkle, and the candy eyes? Instant cuteness overload. If you want to go classic, a simple drizzle of contrasting color candy melt does the trick beautifully.
Side Dishes
These candies pair surprisingly well with a piping hot cup of spiced apple cider or a simple glass of cold milk — a perfect balance of sweet and refreshing. For Halloween party spreads, I serve them alongside popcorn balls and pumpkin-shaped cookies for a diverse dessert lineup.
Creative Ways to Present
One year, I arranged these treats inside a hollowed-out pumpkin and scattered dry ice around for a spooky fog effect. Another time, I placed them in clear treat bags tied with orange and black ribbons, making them perfect party favors kids went crazy for. The key is to play with colors and layers — even simple cupcake liners in Halloween prints can elevate your presentation.
Make Ahead and Storage
Storing Leftovers
Leftover Halloween Oreo Candy Melt Treats keep best stored in an airtight container in the fridge. The cool temperature helps the candy shell stay firm and crisp. I usually layer parchment paper between them to prevent sticking and keep those decorations intact.
Freezing
I’ve frozen extras a couple of times by placing them in a single layer on a baking sheet first, then transferring to a freezer-safe container once solid. When you want to enjoy them, thaw in the fridge to preserve the candy coating’s texture, and avoid condensation that can dull the shine.
Reheating
Since these treats are best served chilled, I typically don’t reheat. But if your candy melts have dulled, a few seconds in a warm, dry room (not microwave) helps them regain a slight shine without melting entirely. Remember, these are best cold so the candy stay crisp and delicious.
FAQs
-
Can I use regular chocolate instead of candy melts for this Halloween Oreo Candy Melt Treats Recipe?
While you can use regular chocolate, candy melts are specially formulated to harden smoothly and quickly at room temperature, making them ideal for coating and decorating. Regular chocolate tends to be thicker and requires tempering to get the same glossy finish. If you want to use regular chocolate, make sure to temper it for the best results, or add a bit of vegetable oil to thin it out as needed.
-
How do I prevent the candy melts from seizing or becoming grainy?
The key is to melt candy melts slowly at low heat. I always use short microwave bursts, stirring thoroughly between each. Avoid any water or steam from getting into your candy melts, as moisture causes seizing. If your melts do seize, sometimes adding a bit of vegetable oil can help smooth them out again.
-
Can I make Halloween Oreo Candy Melt Treats Recipe in advance?
Absolutely! These treats actually keep well when made a day or two ahead of time. Just store them in an airtight container in the fridge to keep the candy coating firm and fresh. This makes them perfect for prepping before a busy Halloween party day!
-
What are the best molds to use for this recipe?
I usually use mini silicone candy molds or even silicone cupcake liners — they’re flexible, so it’s easy to pop out the treats when set. If you don’t have molds, you can also do the layering on parchment paper for a rustic look.
Final Thoughts
Honestly, this Halloween Oreo Candy Melt Treats Recipe has become one of my seasonal go-tos because it strikes that perfect blend of easy prep, adorable presentation, and irresistibly tasty results. Every year, hearing the “ooohs” and “ahhhs” when I bring these to a party never gets old. Give this recipe a try—you’ll impress your guests with minimal fuss, and I guarantee you’ll want to make them again and again. Happy Halloween baking, friend!
Print
Halloween Oreo Candy Melt Treats Recipe
- Prep Time: 45 minutes
- Cook Time: 0 minutes
- Total Time: 1 hour 45 minutes
- Yield: 8 servings
- Category: Dessert
- Method: No-Cook
- Cuisine: American
- Diet: Vegetarian
Description
Halloween Oreos are festive treats made by coating classic Oreos in colorful candy melts and decorating them with sprinkles, candy eyes, and other fun toppings, perfect for Halloween parties and celebrations.
Ingredients
Oreos
- 12 Oreos
Candy Coating
- Assorted candy melts in different colors (approximately 1 cup)
- Optional: 1/2 teaspoon vegetable oil (to thin candy melts if needed)
Decorations
- Sprinkles, gel coloring, candy eyes, or any preferred decorating items
Instructions
- Melt Candy Melts: Melt the candy melts according to the package instructions. Using paper dixie bowls makes cleanup easy and helps prevent burning the chocolate in the microwave.
- Assemble Oreo Treats: Fill the bottom of each cavity of your mold with about 1 tablespoon of melted candy. Place one Oreo on top, then cover the Oreo with more melted candy melt to fully coat it.
- Chill to Set: Place the molds in the refrigerator and chill until the candy melts are fully set and firm.
- Remove from Mold & Melt Additional Candy: Once set, carefully remove the coated Oreos from the molds. Melt additional candy melts in your desired colors for decorating.
- Decorate: For jack-o’-lantern faces, use dark chocolate or black candy melts in a small bag with the tip cut off to pipe eyes and mouth, or use a black food writer pen. For other decorations, drizzle different colored candy melts over the top and sprinkle with sprinkles or candy eyes. Chill again to harden the decorations.
Notes
- Chocolate candy melts, like Ghirardelli, melt and spread better and have superior taste compared to standard craft store candy melts.
- If using thicker craft store candy melts, add about 1/2 teaspoon of vegetable oil to the melted candy and stir to thin the consistency for easier coating and drizzle.
- Use paper dixie bowls for melting candy melts to simplify cleanup and to avoid overheating in the microwave.
- See additional posts or tutorials on candy decorating for tips on melting and decorating techniques.
Nutrition
- Serving Size: 1 cookie
- Calories: 150 kcal
- Sugar: 20 g
- Sodium: 110 mg
- Fat: 7 g
- Saturated Fat: 5 g
- Unsaturated Fat: 2 g
- Trans Fat: 0 g
- Carbohydrates: 22 g
- Fiber: 1 g
- Protein: 1 g
- Cholesterol: 0 mg

