
Halloween Marshmallow Pops Recipe
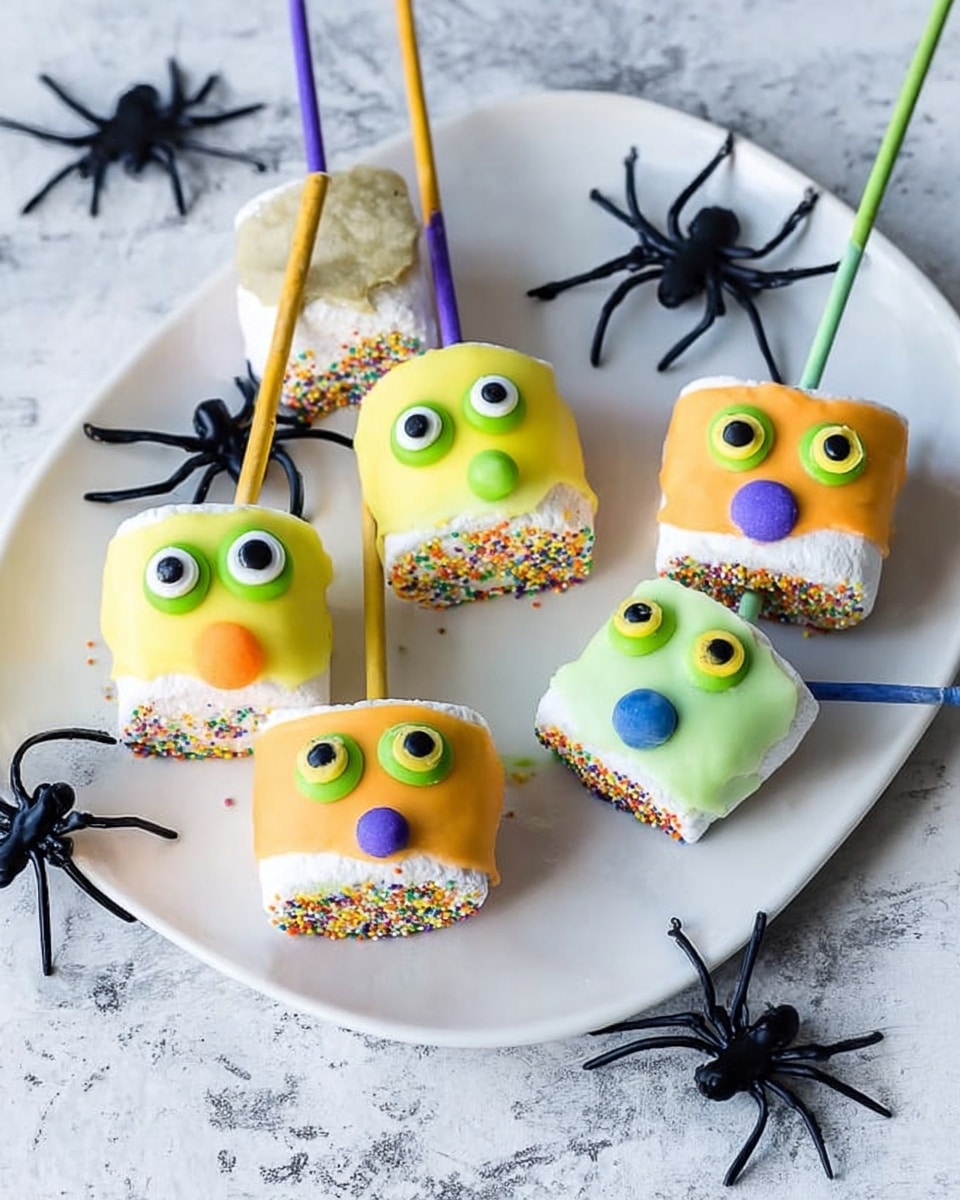
If you’re on the hunt for a quick, adorable, and downright festive treat, this Halloween Marshmallow Pops Recipe is exactly what you need. Trust me, these little pops have become a favorite at every Halloween party I’ve brought them to, and they’re so simple to make that you’ll have a blast crafting them alongside your kids or friends. Ready to turn jumbo marshmallows into spooky, colorful delights? Let’s dive in!
Why This Recipe Works
- Simple but Striking: With just a few ingredients and easy steps, these pops look impressive and festive.
- Kid-Friendly Fun: Perfect for little hands to help decorate, making it a creative family activity.
- Customizable Colors and Faces: The candy melts and decorations let you create all sorts of spooky characters.
- Fast & No-Bake: Ready in under 15 minutes, so it’s a great last-minute Halloween treat.

Ingredients & Why They Work
I love how this Halloween Marshmallow Pops Recipe combines simple pantry staples with vibrant candy melts and fun decorations — everything works together to make these pops both playful and delicious. Here’s a little about the essentials before you dive in.

- Jumbo marshmallows: Big, fluffy, and perfect for holding on a stick, they’re the main “canvas” for your decoration.
- Cake pop sticks: These make the marshmallows easy to dip and hold — but if you don’t have any, wooden skewers can work too.
- Sprinkles for hair: I use colorful, textured sprinkles to give fun “hair” — it’s a quirky detail that makes each pop unique.
- Candy eyes: Store-bought candy eyes add instant personality without a fuss.
- Sweets for mouth: Small candies or mini chocolate chips work well to create cute or spooky smiles.
- Orange, green, and yellow candy melts: These melts coat the marshmallows with a smooth, colorful shell and harden quickly to keep everything neat.
Tweak to Your Taste
One of my favorite things about this Halloween Marshmallow Pops Recipe is how easy it is to personalize. You can swap colors, try new decorations, or even add a little edible glitter to up the charm factor. It’s your treat — make it as quirky or classic as you want!
- Variation: I’ve made these with purple and black candy melts when I wanted a spookier vibe, and kids absolutely loved them.
- Dietary swap: Use gluten-free marshmallows (which I always do) and check your candy eyes for allergens if that’s a concern.
- Seasonal twist: Add mini chocolate chips for a “witch’s teeth” look or use edible markers to draw scary faces instead of candy eyes.
Step-by-Step: How I Make Halloween Marshmallow Pops Recipe
Step 1: Prep Your Marshmallow Pops
First things first — gently poke a cake pop stick into each jumbo marshmallow. I usually twist it just a little to make sure it’s securely in there without squishing the marshmallow. Lay these out on a tray or plate while you prepare your dipping station.
Step 2: Set Out Your Decorations
Before melting any candy, I arrange my sprinkles, candy eyes, and tiny sweets on small plates or bowls close to my work area. When the pops come out of their candy shells, everything’s within easy reach — this little prep makes decorating so much smoother.
Step 3: Melt Your Candy Melts
Follow the package instructions for melting, usually microwaving in short bursts and stirring in between. I like to melt my orange, green, and yellow candy melts separately so I can mix up the colors on the pops. Don’t overheat, or it can get clumpy, and no one wants that!
Step 4: Dip and Decorate
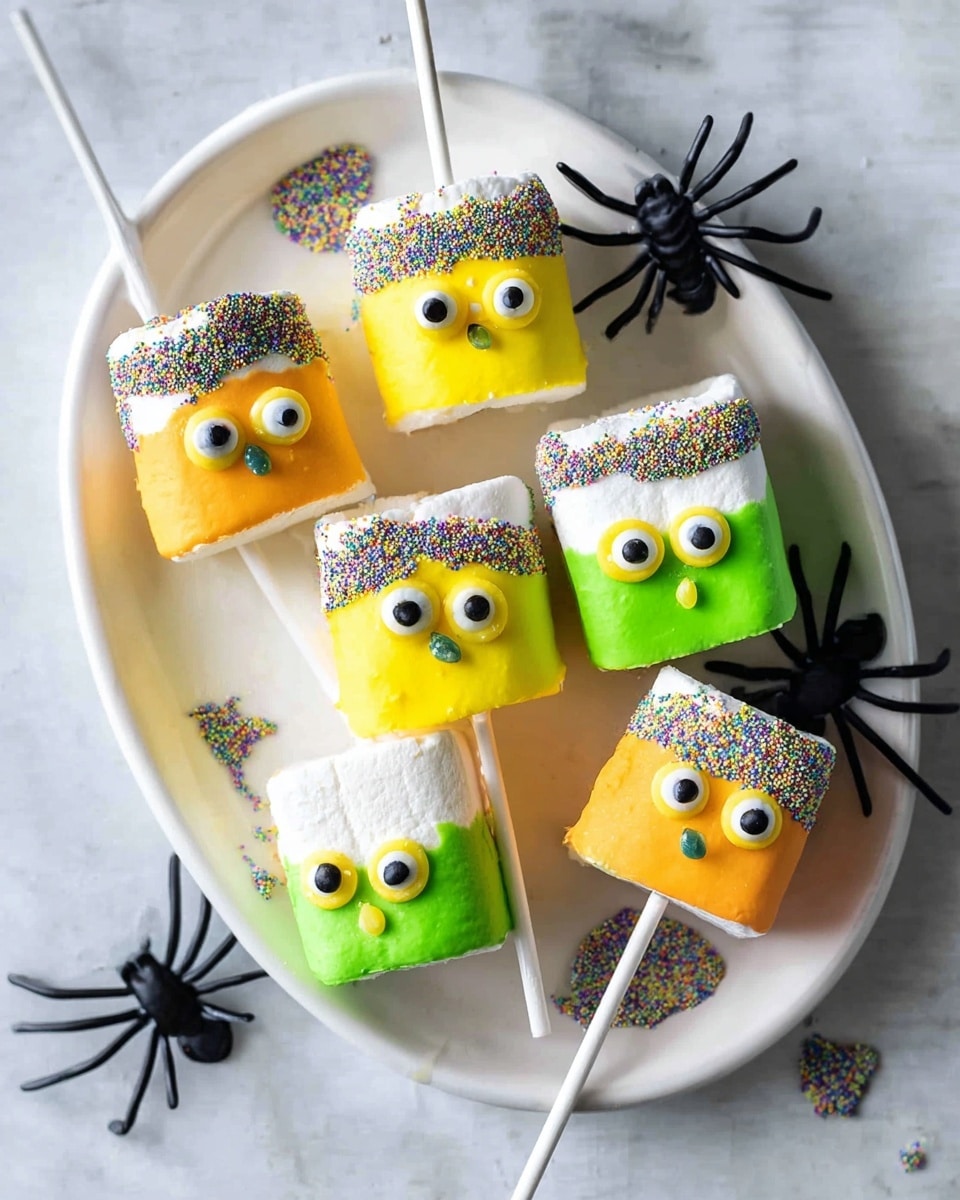
This is the most fun part! Dip each marshmallow into your melted candy, covering it completely. Then immediately dip the top into sprinkles to create “hair.” While the candy is still wet, gently press on candy eyes and sweets for mouths. I find working in small batches helps keep the coating fresh and shiny.
Step 5: Let Them Harden
Place your decorated pops on wax or parchment paper to set. It usually only takes about 10 minutes for the candy melts to harden fully, but I like to give them a little extra time so the decorations stay put during handling.
Pro Tips for Making Halloween Marshmallow Pops Recipe
- Keep Things Dry: Make sure your marshmallows aren’t sticky or cold before dipping, or the candy melts won’t stick properly.
- Use a Spoon for Control: If you don’t want to fully dunk the marshmallow, spoon the melted candy over to create fun partial coats.
- Work Quickly with Decorations: The candy sets fast, so have your eyes and mouths ready to press on immediately after dipping.
- Avoid Overcrowding: Let pops dry with enough space between them to keep decorations crisp and prevent smudging.
How to Serve Halloween Marshmallow Pops Recipe
Garnishes
I usually add a few extra sprinkles or edible glitter dust after the candy hardens for that little extra “wow” factor. Sometimes a light brush of colored edible dust adds a spooky shimmer that’s perfect for Halloween parties.
Side Dishes
These pops pair beautifully with other Halloween treats like mini pumpkin muffins or “zombie fingers” cookies — both a hit with kids and adults alike. A hot cocoa bar or autumnal punch complements the sweetness perfectly too.
Creative Ways to Present
One fun way I presented these was by sticking the finished pops into a foam block inside a decorated bucket filled with candy corn candies — it looked like a spooky bouquet! You could also wrap each pop in cellophane tied with a Halloween ribbon for easy party favors.
Make Ahead and Storage
Storing Leftovers
I keep leftovers fresh by storing the pops upright in an airtight container at room temperature. Avoid refrigerating, since the candy coating can sweat and get sticky. They usually last well for 2-3 days this way, if they make it that long!
Freezing
I haven’t personally frozen these pops because the texture of marshmallows changes when thawed, but if you want to try, wrap each pop tightly in plastic wrap and place in a freezer-safe container. Let them thaw fully at room temperature before serving to avoid condensation issues.
Reheating
These pops are best enjoyed as-is, so I don’t recommend reheating. If the candy coating seems dull or soft, just let them sit at room temperature a bit — the magic is in that crunchy shell!
FAQs
-
Can I use regular chocolate instead of candy melts for this Halloween Marshmallow Pops Recipe?
While you can use regular chocolate, candy melts are designed to harden smoothly and quickly at room temperature, which gives the pops that perfect crisp shell. Regular chocolate needs tempering and can be messier, so candy melts are my go-to for convenience and appearance.
-
How do I prevent the candy coating from cracking on the pops?
Make sure your candy melts are melted evenly without overheating, and don’t handle the pops too roughly while drying. Also, avoid sudden temperature changes—room temp is best for letting them set to avoid cracking.
-
What decorations work best on marshmallow pops for Halloween?
Small candy eyes, sprinkles for hair, and tiny candies for mouths make the marshmallows look fun and festive. You can also get creative with edible markers or colored sugar for personalized faces.
-
Is this Halloween Marshmallow Pops Recipe safe for kids to help with?
Absolutely! Kids love dipping and decorating, and since it involves no baking, it’s a safe and fun activity for all ages under adult supervision for handling hot candy melts.
Final Thoughts
This Halloween Marshmallow Pops Recipe has quickly become one of my go-to treats during the spooky season because it delivers big on fun and flavor without any fuss. I love how it brings out the creativity in everyone and gets the whole family involved in making something memorable. If you’re looking for a delightfully easy treat that doubles as Halloween decor, you really can’t go wrong here. Give it a try — you’ll be smiling (and snacking!) in no time.
Print
Halloween Marshmallow Pops Recipe
- Prep Time: 5 minutes
- Cook Time: 10 minutes
- Total Time: 15 minutes
- Yield: 12 servings
- Category: Dessert
- Method: No-Cook
- Cuisine: American
- Diet: Gluten Free
Description
These Halloween Marshmallow Pops are a fun and festive treat perfect for kids’ parties or spooky celebrations. Made with colorful candy melts and decorated with sprinkles, candy eyes, and sweets, these pops are easy to assemble and sure to delight.
Ingredients
Main Ingredients
- 12 jumbo marshmallows (gluten-free)
- 12 cake pop sticks
- Sprinkles for hair
- Candy eyes
- Sweets for mouth
Candy Coating
- 170 g (1 cup) orange candy melts
- 170 g (1 cup) green candy melts
- 170 g (1 cup) yellow candy melts
Instructions
- Prepare the Marshmallows: Insert a cake pop stick into each jumbo marshmallow, making sure it is secure and stable for dipping.
- Set Up Decorations: Arrange the sprinkles, candy eyes, and sweets on a plate or bowl for easy access while decorating.
- Melt Candy Melts: In separate microwave-safe bowls, melt the orange, green, and yellow candy melts according to the package instructions until smooth and pourable.
- Dip and Decorate: Dip each marshmallow into the melted candy coating of your choice, ensuring it is fully covered. Immediately dip the top of the marshmallow into the sprinkles to create the hair texture.
- Add Eyes and Mouth: Place candy eyes and sweets on the marshmallow to form the face while the candy coating is still wet so they stick properly.
- Allow to Harden: Set the decorated marshmallow pops aside on parchment paper or a cooling rack to harden completely before serving.
- Repeat: Continue with the remaining marshmallows until all are dipped, decorated, and set to harden.
Notes
- Use gluten-free marshmallows to ensure the pops are safe for those with gluten intolerance.
- For easier handling, chill the candy melts slightly before dipping to prevent dripping.
- Customize the decorations to suit different Halloween themes or other occasions.
- If candy melts are not available, white chocolate can be used and colored with oil-based food coloring.
- Store the marshmallow pops in a cool, dry place to keep them fresh and prevent melting.
Nutrition
- Serving Size: 1 pop
- Calories: 120 kcal
- Sugar: 18 g
- Sodium: 20 mg
- Fat: 3 g
- Saturated Fat: 2 g
- Unsaturated Fat: 1 g
- Trans Fat: 0 g
- Carbohydrates: 25 g
- Fiber: 0 g
- Protein: 0 g
- Cholesterol: 0 mg

