
Halloween Brownies with Graveyard Cookies and Green Buttercream Frosting Recipe
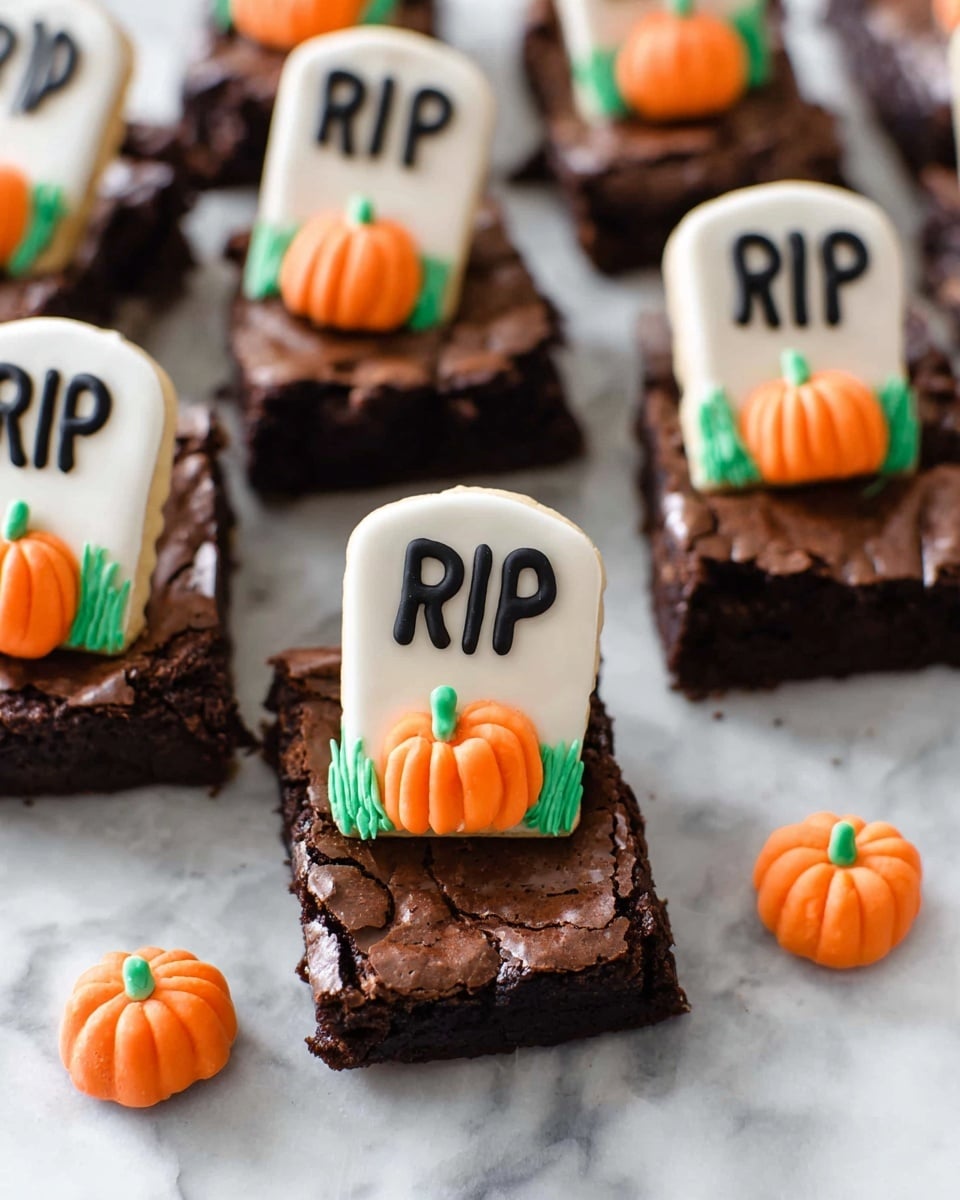
If you’re on the hunt for a spooky yet utterly delightful treat this fall, let me introduce you to my Halloween Brownies with Graveyard Cookies and Green Buttercream Frosting Recipe. It’s a fan-freaking-tastic combination of rich, fudgy brownies decked out to look like a creepy little graveyard—complete with cute Milano cookie tombstones and vibrantly green, creamy frosting. Trust me, this dessert is a total showstopper at any Halloween gathering, and you’re going to love how fun and approachable it is to make.
Why This Recipe Works
- Perfect Balance of Flavors: The rich fudgy brownies complement the sweet, creamy green buttercream frosting beautifully, making every bite irresistible.
- Fun and Festive Presentation: Using Milano cookies as headstones and candy pumpkins brings a charming, spooky vibe that your guests will love.
- Easy to Customize: Whether you make your own brownie batter or use a boxed mix, this recipe adapts well without losing its magic.
- Minimal Fuss, Maximum Impact: With simple ingredients and steps, this recipe makes you look like a total baking pro without hours in the kitchen.

Ingredients & Why They Work
Each ingredient in this Halloween Brownies with Graveyard Cookies and Green Buttercream Frosting Recipe has a purpose, working harmoniously to bring you that perfect combo of texture, flavor, and spooky flair. I’ve learned that quality ingredients and simple swaps go a long way when you want your dessert to enchant both kids and adults alike.

- Prepared brownie batter: Using either homemade or your favorite boxed mix is totally fine—I’m all about what saves time without sacrificing taste.
- Milano cookies: Their crispy texture adds the perfect crunchy contrast and shapes beautifully as tombstones.
- Black decorating gel: Essential for writing the iconic “R-I-P” on your cookie headstones—easy to find near baking supplies.
- Candy pumpkins: These little orange treats are perfect to place by the graves, adding color and whimsy.
- Powdered sugar: The base for your frosting’s sweetness and smooth texture.
- Butter: Makes your buttercream rich and creamy; room temperature ensures smooth mixing.
- Milk: Just enough to loosen the frosting for spreading, but add carefully to avoid a runny consistency.
- Green food coloring: This is what transforms the buttercream into eerie graveyard grass—you can adjust the shade to your liking.
Tweak to Your Taste
I like to play around with the intensity of the green buttercream—sometimes I go for a pastel mint, other times a vibrant lime green depending on my mood or party theme. Don’t be shy about making this recipe your own. You can add crushed candy corn over the frosting for extra crunch or swap candy pumpkins for mini gummy worms if you want a creepier graveyard vibe.
- Variation: Once, I swapped the Milano cookies for chocolate wafers and loved the deeper chocolate crunch it added—definitely worth trying!
- Dietary sub: Using dairy-free butter and milk alternatives works well if you’re catering to dietary needs without losing that creamy texture.
- Flavor twist: A pinch of cinnamon in the frosting adds a subtle warmth that complements the chocolate base beautifully.
Step-by-Step: How I Make Halloween Brownies with Graveyard Cookies and Green Buttercream Frosting Recipe
Step 1: Prep and bake that fudgy brownie base
Start by lining an 8-inch baking pan with parchment paper, leaving a bit of overhang on the edges—this is a lifesaver when lifting the brownies out later. Pour your prepared brownie batter into the pan and smooth it evenly with a spatula. Bake according to your recipe or mix instructions—about 30 minutes usually does the trick. The key here is not to overbake; you want those brownies fudgy and rich, so they hold up nicely when adding the frostings and decorations.
Step 2: Cool completely and cut into perfect graves
Once baked, let your brownies cool completely. I can’t stress this enough—cool brownies make cutting much cleaner and fuss-free. Use the parchment paper to gently pull the whole slab out of the pan, then slice into 12 rectangles (4 rows by 3 columns works nicely). These will form each grave plot.
Step 3: Whip up that green buttercream frosting
In a medium bowl, beat together powdered sugar, softened butter, and milk for about 2 minutes until the mixture turns light and fluffy. You’re looking for a texture that’s spreadable but still holds shape. Add more powdered sugar if it’s too runny or a bit more milk if it’s too stiff. Stir in a few drops of green food coloring—adjust as needed until you get that perfect eerie cemetery green. Set aside.
Step 4: Customize your spooky cookies
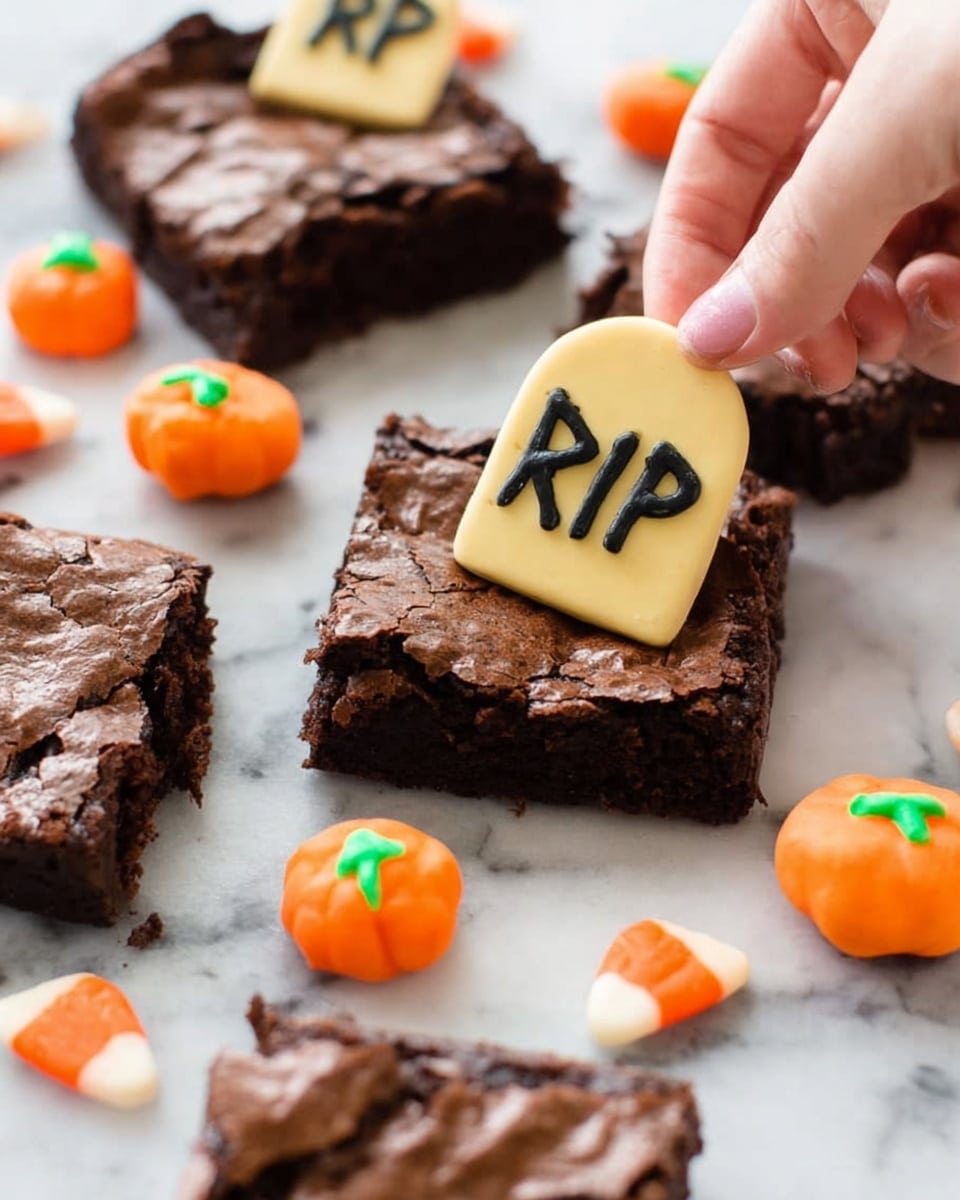
Grab your Milano cookies and, using black edible decorating gel, carefully write “R-I-P” on each. Quick tip: I like to slice a tiny bit off the bottom of each cookie to make them shorter and more tombstone-like, but it’s optional. These little details really make a difference and add to the fun.
Step 5: Assemble your graveyard masterpiece
Press one decorated cookie into the top center of each brownie rectangle to form your headstone. Next, spoon a small dollop of green frosting near the cookie, and top it off with a candy pumpkin for that final festive flourish. Voilà—you’ve built your very own spooky graveyard in dessert form!
Pro Tips for Making Halloween Brownies with Graveyard Cookies and Green Buttercream Frosting Recipe
- Cool Before Frosting: Never frost warm brownies—this causes your buttercream to melt and get runny, and you want that thick, vibrant green color standing out.
- Use Sharp Knives for Cutting: A sharp knife, wiped clean between cuts, helps keep brownies neat so your graveyard looks tidy and professional.
- Personal Touch on Tombstones: Feel free to change your cookie messages—kids love adding silly or spooky names with the black gel.
- Choose Quality Candy Picks: Picking firm candy pumpkins (or alternatives) prevents them from sinking into the frosting or making the graves collapse.
How to Serve Halloween Brownies with Graveyard Cookies and Green Buttercream Frosting Recipe
Garnishes
I love to sprinkle a little crushed pistachio or shredded coconut dyed green around the brownies to look like grass or moss. It adds texture and brings the graveyard to life. Sometimes, a tiny edible spider or a few orange sprinkles can give surprise little scary touches that delight kids! Adding just a few sprigs of fresh mint nearby enhances the green theme and brings an herbal note to balance sweetness.
Side Dishes
Pair these brownies with a cold glass of milk or a warm spiced cider to really elevate your Halloween party spread. For adults, I’d recommend serving alongside a cup of strong black coffee or even a pumpkin spice latte to complement those chocolatey notes.
Creative Ways to Present
During my last Halloween bash, I arranged the brownies on a black platter lined with decorative cobwebs and tiny LED tea lights shining softly beneath. It gave a spooky glow that really impressed my friends! You can also set the brownies on a tiered cake stand with some dry ice around for a misty graveyard effect—so fun and atmospheric.
Make Ahead and Storage
Storing Leftovers
I usually store leftover Halloween brownies in an airtight container at room temperature. They stay moist and delicious for up to three days. Just make sure they’re kept away from direct sunlight or heat that could melt your green frosting or candy decorations.
Freezing
Yes, you can freeze these brownies! I recommend freezing the unassembled brownies first—wrap them tightly in plastic wrap and foil to avoid freezer burn. When you’re ready, thaw completely, add the frosting and decorate for best texture. The cookies and candy pumpkins don’t freeze well with the frosting, so it’s best to add those fresh for that crispness.
Reheating
To enjoy leftovers warm, microwave individual brownie pieces for about 10–15 seconds—just enough to loosen that fudgy center but not melt your frosting completely. This way, you get that gooey edge combined with the fun of your graveyard decorations.
FAQs
-
Can I use a boxed brownie mix for this Halloween Brownies with Graveyard Cookies and Green Buttercream Frosting Recipe?
Absolutely! I often use a quality boxed mix like Ghirardelli for convenience without sacrificing flavor. Just prepare and bake according to the package, then follow the decorating steps for that festive graveyard look.
-
How do I make the green buttercream frosting the right consistency?
Start by mixing powdered sugar, softened butter, and milk until fluffy. Add powdered sugar to thicken if too runny or a little milk if too stiff. The frosting should be spreadable but hold its shape for decorating.
-
Can I make the brownies ahead of time?
Yes! Bake the brownies a day ahead, cool completely, then wrap tightly. Add frosting and decorations just before serving so everything looks fresh and crisp.
-
What can I use if I can’t find Milano cookies?
Chocolate wafer cookies or any thin, crisp chocolate cookies will work well as tombstones. Just make sure they’re sturdy enough to hold the decorating gel writing and stand up on the brownies.
Final Thoughts
This Halloween Brownies with Graveyard Cookies and Green Buttercream Frosting Recipe holds a special place in my heart because it’s easy enough for weekday baking but fun and impressive for parties. Every year, it brings a little magic and laughter to my kitchen with friends and family helping decorate. I can’t wait for you to try it and see how delighted everyone will be biting into a spooky-graveyard-with-a-sweet-tooth twist. Go ahead, dig in, and enjoy every delicious (and delightfully eerie) bite!
Print
Halloween Brownies with Graveyard Cookies and Green Buttercream Frosting Recipe
- Prep Time: 10 minutes
- Cook Time: 30 minutes
- Total Time: 40 minutes
- Yield: 12 servings
- Category: Dessert
- Method: Baking
- Cuisine: American
Description
These Halloween Brownies are a spooky and delicious treat perfect for the fall season. Featuring fudgy brownies topped with mini Milano cookie headstones decorated with edible black gel, green buttercream frosting, and candy pumpkins, they create a festive graveyard scene that’s sure to impress at any Halloween party.
Ingredients
For the Brownies:
- 1 batch prepared brownie batter for an 8” pan
- 12 Milano cookies
- Black decorating gel
- 12 candy pumpkins
For the Green Buttercream Frosting:
- 1 cup powdered sugar
- 1/4 cup butter (salted or unsalted), softened
- 2 teaspoons milk
- a few drops green food coloring to reach desired color
Instructions
- Prepare the baking pan: Line an 8-inch baking pan with parchment paper, leaving a bit of overhang on the sides for easy brownie removal.
- Bake the brownies: Pour the prepared brownie batter into the pan and smooth into an even layer. Bake according to the brownie recipe instructions, approximately 30 minutes.
- Cool and cut brownies: Allow the brownies to cool completely. Using the parchment paper overhang, transfer brownies to a flat surface and cut into 12 rectangular pieces (4 rows by 3 columns).
- Make green buttercream frosting: In a bowl, mix powdered sugar, softened butter, and milk for about 2 minutes until light and fluffy. Adjust consistency by adding more powdered sugar to thicken or more milk to thin. Stir in green food coloring until the desired shade is achieved. Set aside.
- Decorate Milano cookies: Using the black edible decorating gel, write “R-I-P” on each Milano cookie to resemble grave headstones. Optionally, trim the bottom edge of each cookie to shorten them for a better headstone effect.
- Assemble the brownies: Press one decorated Milano cookie into the top of each brownie piece to serve as a headstone.
- Add frosting and pumpkins: Spoon a small amount of green buttercream near each headstone on the brownie and place a candy pumpkin on top of the frosting to complete the graveyard look.
Notes
- For brownies, use your favorite chocolate brownie recipe halved for an 8×8-inch pan, or for a larger 9×13-inch pan, double the ingredients and decorations accordingly.
- If using a boxed brownie mix, Ghirardelli brand is recommended for rich flavor.
- Black decorating gel can be found in the baking aisle near birthday candles or at stores like Walmart.
- To adjust the frosting consistency, add powdered sugar to thicken or milk to thin as needed.
- Cutting the bottom of the Milano cookies is optional but helps create more realistic headstone shapes.
Nutrition
- Serving Size: 1 brownie
- Calories: 280 kcal
- Sugar: 25 g
- Sodium: 150 mg
- Fat: 15 g
- Saturated Fat: 8 g
- Unsaturated Fat: 6 g
- Trans Fat: 0 g
- Carbohydrates: 34 g
- Fiber: 2 g
- Protein: 3 g
- Cholesterol: 30 mg

