Giant Halloween Spider Cookie Recipe
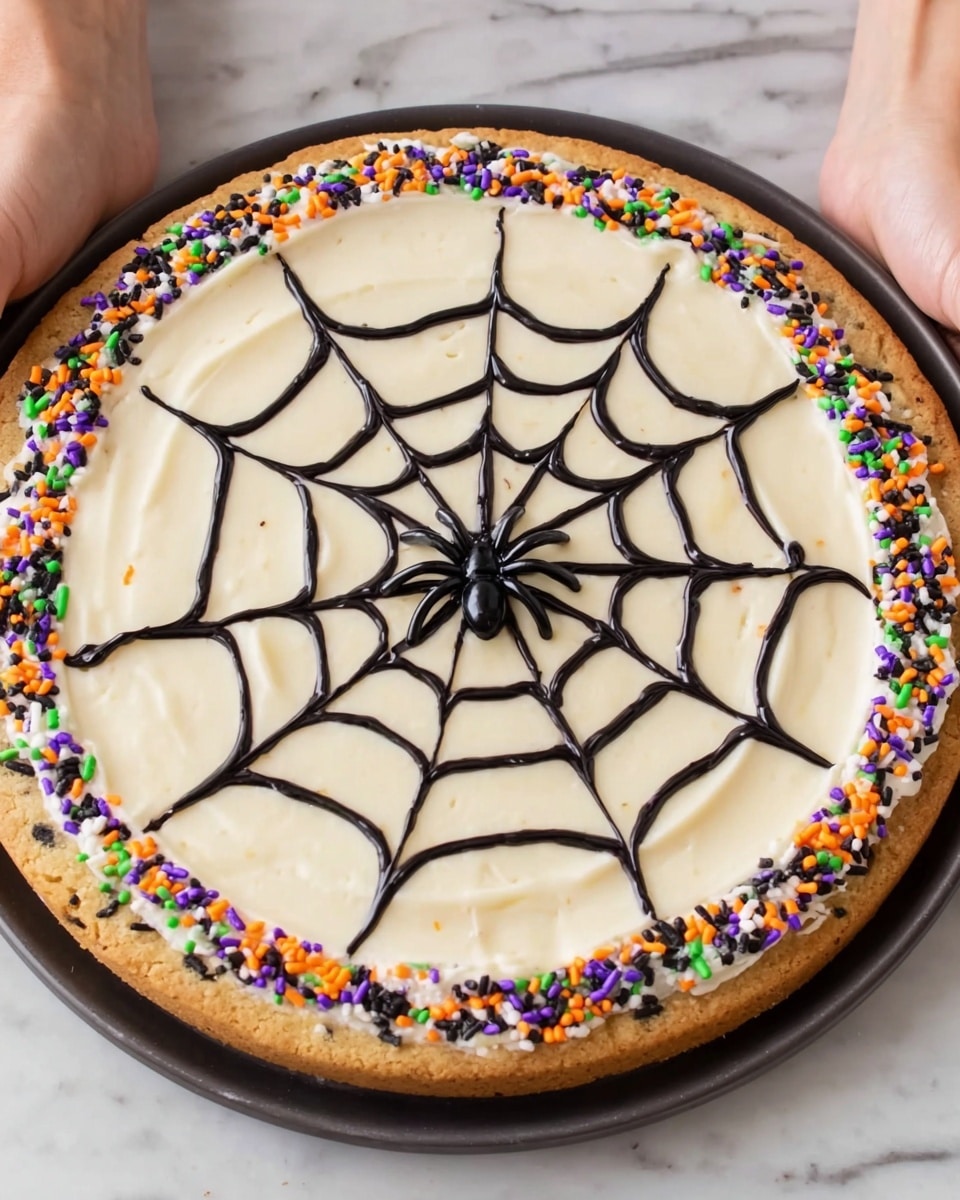
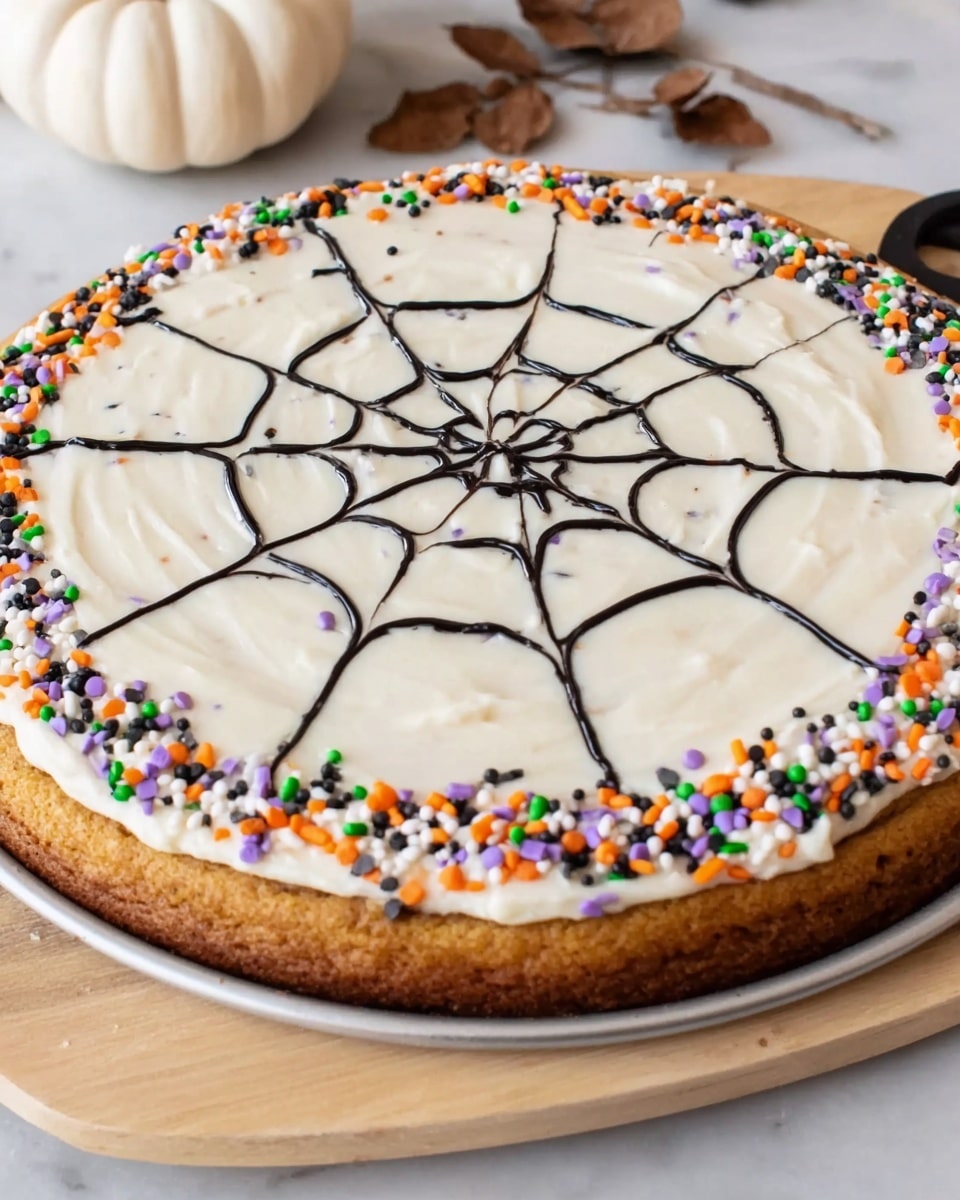
Alright, friends, gather ’round because I have something seriously fun and festive to share. This Giant Halloween Spider Cookie Recipe is perfect for your spooky celebrations, and trust me, it’s as impressive as it is delicious. Imagine a huge chocolate chip cookie decorated like a spiderweb with sprinkles and icing—that’s exactly what you get here. Whether you’re hosting a Halloween party or just want a cute treat to share, this recipe will wow your guests and satisfy every sweet tooth!
Why This Recipe Works
- Big Impact with Minimal Effort: Using pre-made cookie dough and frosting keeps things simple while still delivering that wow factor for Halloween.
- Perfect Texture and Taste: The giant cookie bakes up soft and chewy with golden edges that everyone loves.
- Customizable Decorating Fun: The frosting, sprinkles, and icing web let you get creative and personalize your spooky masterpiece.
- Great for Sharing: At 16 inches wide, this cookie feeds a crowd, making it ideal for parties or a family treat.
Ingredients & Why They Work
This Giant Halloween Spider Cookie Recipe uses simple, store-bought ingredients that work together to make an irresistible dessert. The ready-made dough saves you time and effort while still baking into a perfect chewy cookie canvas. Vanilla frosting adds a sweet, smooth surface that’s great for decorating, and the sprinkles and icing bring everything to life—so don’t skip them!
- Chocolate chip cookie dough: Using tubes of pre-made dough means quick prep and consistent flavor and texture—just press and bake!
- Vanilla frosting: Melting this frosting makes it easier to pour and spread evenly over the cookie for a smooth finish.
- Halloween sprinkles: These add festive color and texture that make your cookie pop.
- Black decorating icing: Essential for piping the spiderweb design and adding the creepy details.
- Plastic spider: A fun (and reusable!) topper to really sell the “spider” theme—an easy way to make your cookie stand out.
Tweak to Your Taste
I love making this recipe my own by switching up the sprinkles or frosting colors depending on the year or party vibe. Don’t be afraid to get playful with your decorating—you can even use colored icing to add more spider details or candy eyes for a fun twist.
- Variation: Last year, I swapped vanilla frosting for cream cheese frosting to add a little tang, and it was a hit—give it a try if you want something richer.
- Dietary Alternatives: Looking to make it gluten-free? There are delicious gluten-free chocolate chip doughs available now that bake similarly.
- Seasonal Changes: This cookie is so versatile that it could easily double as a giant spider cookie for spring by using pastel sprinkles instead of Halloween colors.
Step-by-Step: How I Make Giant Halloween Spider Cookie Recipe
Step 1: Preheat & Prepare Your Pan
Set your oven to 350°F and get a large 16-inch pan ready—something with low sides works best so your cookie bakes evenly. I like to lightly grease or line mine with parchment paper for an easy release.
Step 2: Press the Dough
Take the cookie dough from the two tubes and press it evenly into the pan. You want the dough to fill the entire surface without being too thick or super thin—about a half-inch thickness is perfect. I find using your fingers and the back of a spatula helps get an even, smooth layer quickly.
Step 3: Bake to Golden Perfection
Pop the dough into your preheated oven and bake for 12-13 minutes. Keep an eye on the edges—they should start to turn golden brown while the center stays soft. Don’t overbake or the cookie will dry out.
Step 4: Melt & Spread the Frosting
While the cookie cools slightly, melt the vanilla frosting in the microwave in 20-second intervals, stirring between each until smooth and pourable (just be sure to remove the foil lids first!). Then, pour it in an even layer over the warm cookie. This helps the frosting spread easier and soak in slightly for amazing flavor.
Step 5: Decorate with Sprinkles and Icing
Sprinkle the Halloween sprinkles around the edge for a festive border. Using your black decorating icing, pipe a spiral web starting from the center and then drag a skewer or toothpick outward to create the classic spiderweb look. Top it with your plastic spider right in the center for maximum spookiness.
Step 6: Chill to Set
Put your masterpiece into the fridge or freezer for 30 minutes to an hour. This helps the frosting set firmly and gives you those clean, sharp web lines. Plus, it’s easier to slice and serve once chilled.
Pro Tips for Making Giant Halloween Spider Cookie Recipe
- Even Layer Pressing: Don’t rush pressing the dough; an even thickness ensures uniform baking without burnt edges.
- Frosting Consistency: Melt frosting slowly and stir well so it’s pourable but not too thin to run off the cookie.
- Decorating Patience: Let the cookie cool fully before pouring frosting so it doesn’t all melt away, but still warm so frosting smooths easily.
- Web Design Technique: Use a gentle touch dragging the skewer to avoid tearing the frosting web lines.
How to Serve Giant Halloween Spider Cookie Recipe

Garnishes
I usually add some extra Halloween-themed sprinkles or candy eyes around the web to amp up the cuteness factor. And don’t skip the plastic spider—it’s a showstopper and can be reused year after year, trust me on that one!
Side Dishes
Pair this giant cookie with a cold glass of milk or even some hot apple cider for a cozy, seasonal combo. If you want to go a bit wild, a scoop of vanilla ice cream on the side makes for a decadent treat.
Creative Ways to Present
I’ve had fun placing the spider cookie on a black cake stand surrounded by little pumpkin candles and fake cobwebs for Halloween parties. You can also slice it like a giant pizza and serve on individual plates decorated with spooky napkins to impress your guests.
Make Ahead and Storage
Storing Leftovers
After serving, keep any leftover cookie wrapped tightly in plastic wrap or stored in an airtight container at room temperature for up to 2 days. If you refrigerated to set the frosting before serving, bring to room temp before enjoying again for best flavor.
Freezing
I’ve frozen slices wrapped individually in foil and placed in a freezer bag. When ready to eat, just thaw in the fridge overnight. The frosting stays pretty good, but the cookie might lose a bit of its fresh-baked softness.
Reheating
To revive the cookie’s soft texture, warm slices in the microwave for 10-15 seconds or pop briefly into a low oven (300°F) for a few minutes. Avoid overheating so you don’t melt the frosting too much.
FAQs
-
Can I make this Giant Halloween Spider Cookie Recipe from scratch?
Absolutely! While using store-bought dough is super convenient, you can use your favorite chocolate chip cookie dough recipe as a base. Just make sure to press it evenly in the pan and adjust baking times as needed.
-
What pan works best for baking this giant cookie?
A large round pizza pan or baking sheet with a rim about 16 inches in diameter works great. Low-sided pans ensure even baking and easier removal. If you don’t have a 16″ pan, you could use a 9×13 inch pan and adjust for thickness and bake time accordingly.
-
How do I avoid frosting melting on the warm cookie?
Let the cookie cool for about 10-15 minutes after baking until it’s warm but not hot. This prevents the frosting from melting and sliding off but still allows it to spread smoothly.
-
Can I use other types of frosting?
Definitely! Cream cheese frosting or buttercream can both work; just make sure they’re melty enough to pour but not too runny. You can also tint the frosting for different effects.
-
Is the plastic spider safe to bake on the cookie?
No, you should add the plastic spider only after baking and decorating—the heat can damage it or release chemicals. It’s just for decoration before serving.
Final Thoughts
This Giant Halloween Spider Cookie Recipe has become a favorite in my household for good reason. It’s quick, fuss-free, and fun to decorate—as well as super delicious to eat. Whether you’re baking with family, hosting a party, or just craving something festive and sweet, this cookie checks all the boxes. I can’t wait for you to try it and make your own spooky masterpiece that everyone will be talking about. Happy baking and happy Halloween!
Print
Giant Halloween Spider Cookie Recipe
- Prep Time: 5 minutes
- Cook Time: 13 minutes
- Total Time: 1 hour 18 minutes
- Yield: 8 servings
- Category: Dessert
- Method: Baking
- Cuisine: American
Description
This Giant Halloween Spider Cookie is a fun and festive treat perfect for Halloween celebrations. It features a large, soft chocolate chip cookie base topped with creamy melted vanilla frosting, decorated with spooky Halloween sprinkles, a piped spider web design made from black icing, and a plastic spider centerpiece. Chilling the cookie before serving allows the frosting to set perfectly.
Ingredients
Cookie Base
- 2 tubes 30 oz chocolate chip cookie dough
Toppings and Decorations
- 2 containers 16 oz vanilla frosting
- 1 cup Halloween sprinkles (approximate)
- 1 tube black decorating icing
- 1 plastic spider
Instructions
- Preheat Oven. Preheat your oven to 350 degrees Fahrenheit to prepare for baking the cookie base.
- Prepare and Bake Cookie. Press both tubes of cookie dough evenly into a 16-inch baking pan to form a large cookie layer. Bake in the preheated oven for 13 minutes or until the edges are golden brown and the cookie is set.
- Melt Frosting. Remove any foil from the frosting containers and melt the vanilla frosting in the microwave in 20 second intervals, stirring between each, until smooth and pourable.
- Frost Cookie. Pour the melted frosting over the warm cookie to create an even layer covering the entire surface.
- Add Sprinkles. Sprinkle Halloween-themed sprinkles evenly around the edge of the frosted cookie to add festive color and texture.
- Create Web Design. Using black decorating icing, pipe a spiral spider web pattern starting from the center of the cookie outward. Drag a wooden skewer from the center outward across the spirals to create cross sections resembling a spider web.
- Place Plastic Spider. Position the plastic spider in the center of the web design to complete the spooky decoration.
- Chill to Set. Place the decorated cookie into the refrigerator or freezer for 30 minutes to 1 hour so the frosting cools down and sets firmly before serving.
Notes
- Use a large 16-inch round pan to ensure even baking of the giant cookie.
- Microwaving frosting in short intervals prevents burning and helps achieve a smooth texture.
- Substitute any color or type of frosting if desired to customize flavor and appearance.
- Chilling the cookie is important to ensure the frosting is firm enough to cut cleanly.
- Plastic spider decoration is reusable and can be swapped according to preferred Halloween themes.
Nutrition
- Serving Size: 1 slice (1/8 of cookie)
- Calories: 450 kcal
- Sugar: 35 g
- Sodium: 150 mg
- Fat: 22 g
- Saturated Fat: 9 g
- Unsaturated Fat: 12 g
- Trans Fat: 0 g
- Carbohydrates: 58 g
- Fiber: 2 g
- Protein: 4 g
- Cholesterol: 30 mg

