
Easy Pumpkin Brownies Recipe
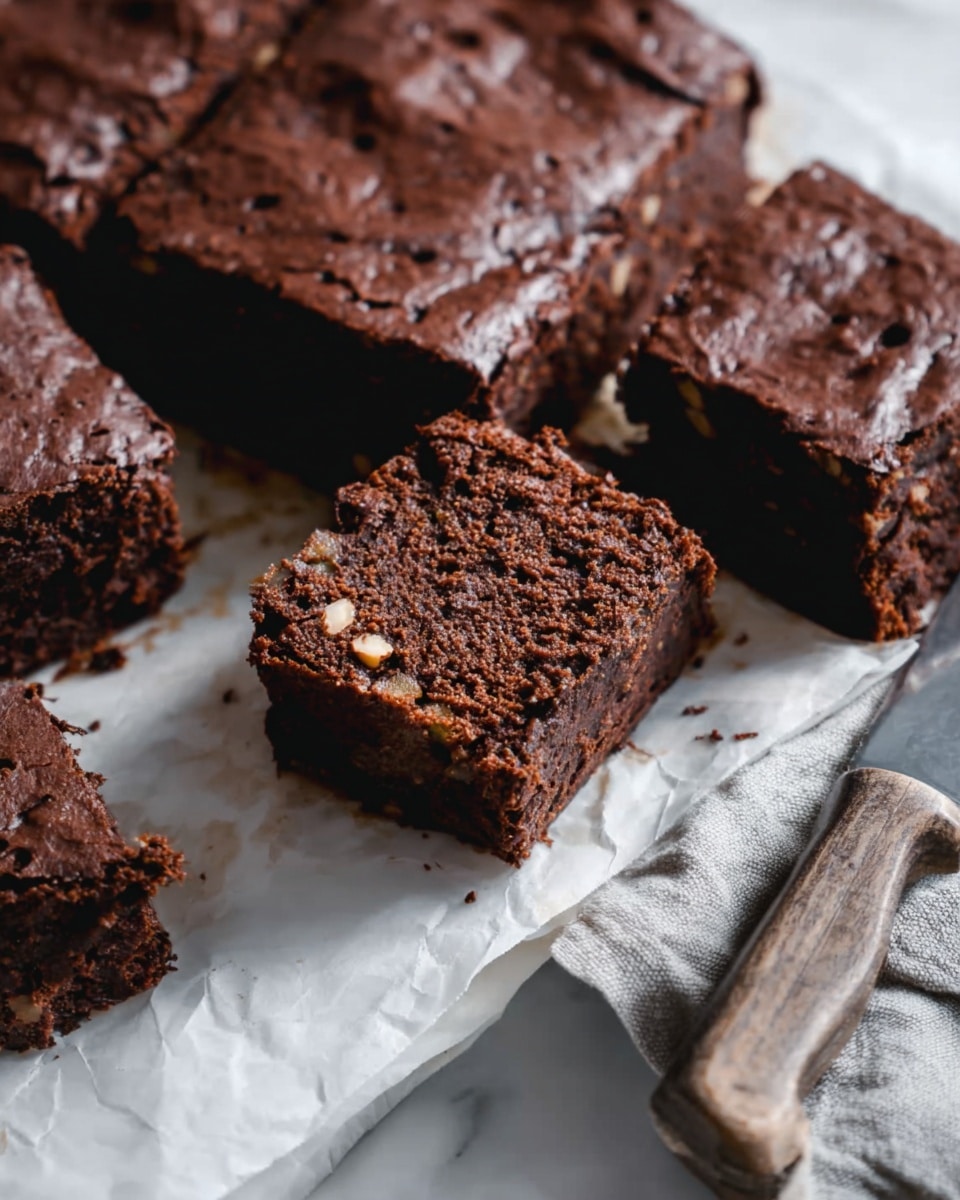
I’m so excited to share this Easy Pumpkin Brownies Recipe with you because it’s honestly one of those cozy, fall-inspired treats that also happens to be super simple to throw together. I love how the pumpkin adds a moist, tender texture while the cocoa powder keeps things chocolaty and rich — perfect for when you want brownies but also crave something a little lighter and seasonal.
This recipe works beautifully as a quick snack, a lunchbox surprise, or even dessert on a chilly evening. What I appreciate most is how forgiving it is: you don’t have to fuss with fancy ingredients or complicated techniques. Trust me, once you try these, you’ll find yourself making this Easy Pumpkin Brownies Recipe all year round, not just in pumpkin season!
Why This Recipe Works
- Simple Ingredients: Uses pantry staples and pumpkin puree for easy prep and consistent flavor.
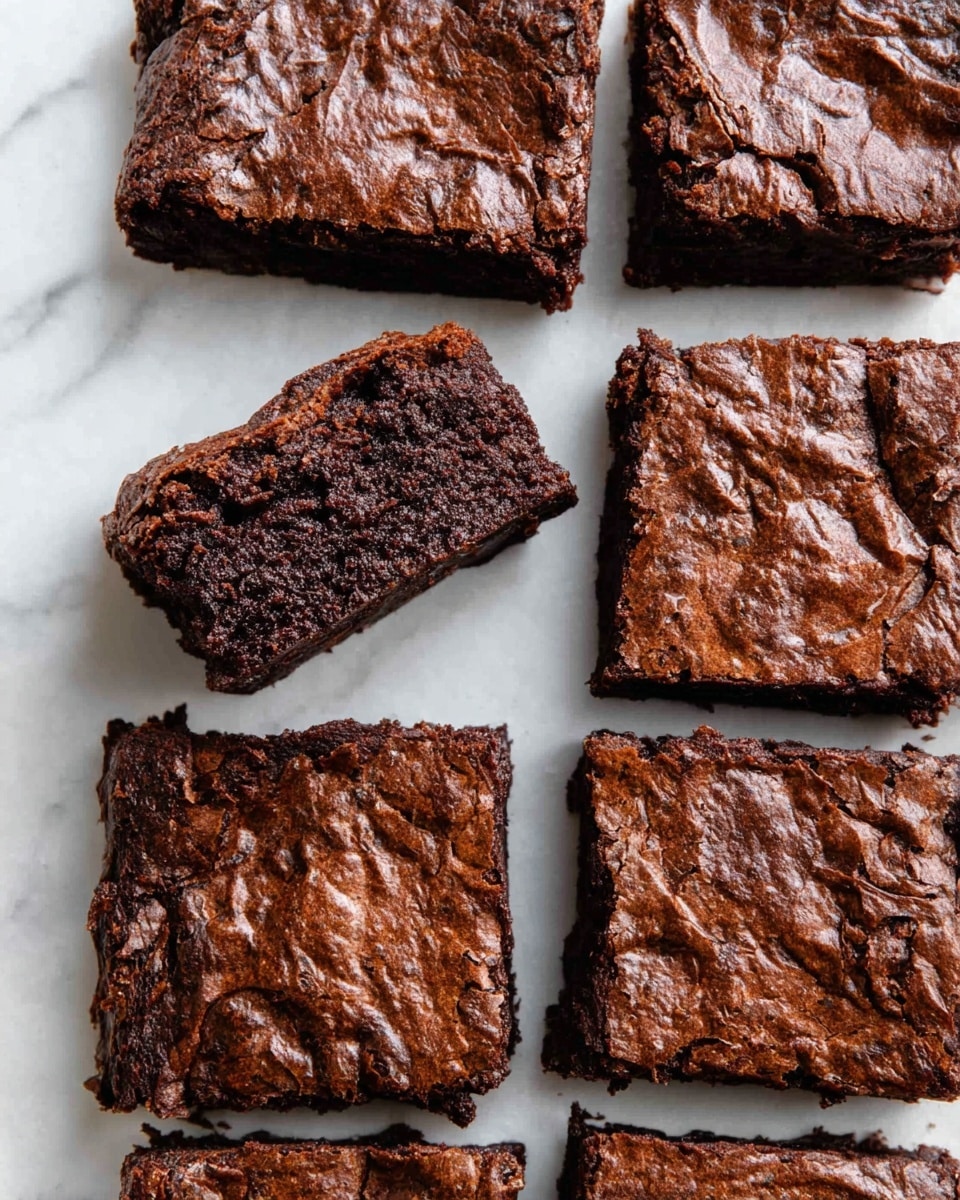
- Perfect Texture: Moist inside with just the right fudgy center thanks to the pumpkin’s moisture and careful baking time.
- Quick to Make: Mix everything in one bowl and bake in 25 minutes — ideal for busy days or last-minute cravings.
- Versatile Flavor: Cocoa powder balances the pumpkin’s sweetness, creating a rich yet light brownie you don’t feel guilty about.

Ingredients & Why They Work
The beauty of this Easy Pumpkin Brownies Recipe is in how these simple ingredients come together perfectly — pumpkin puree for moisture and a subtle earthiness, cocoa for chocolate depth, and a hint of sweetness from maple syrup or sugar. When you shop, stick to canned pumpkin for consistency and good-quality cocoa powder for that chocolaty kick.

- Flour: Provides structure to the brownies while keeping them soft and tender.
- Cocoa powder: Use unsweetened for rich chocolate flavor without extra sweetness.
- Baking powder: Helps give a gentle lift to keep your brownies from getting too dense.
- Salt: Elevates all the flavors and balances the sweetness.
- Pumpkin puree: Adds moisture and that seasonal taste with a silky texture—canned is best for stability.
- Agave or maple syrup: Natural sweeteners that blend wonderfully with pumpkin, but sugar works too if you prefer.
- Vegetable or canola oil: Keeps the brownies moist and tender without overpowering the pumpkin flavor.
Tweak to Your Taste
I like to keep this Easy Pumpkin Brownies Recipe pretty classic, but I’ve found adding a few mix-ins really amps things up if you’re in the mood. Don’t be shy about customizing it to your liking—it’s one of those recipes where a little experimentation goes a long way.
- Chocolate Chips: I sometimes toss in some semi-sweet or dark chocolate chips for pockets of melty goodness—you get brownie and pumpkin flavor in every bite!
- Spices: Add a dash of cinnamon, nutmeg, or pumpkin pie spice if you want to boost the seasonal vibes.
- Nutty Crunch: Chopped walnuts or pecans add a lovely texture contrast and complement the pumpkin’s creaminess.
- Reduced Sweetness: If you’re watching sugar, try using just ¼ cup of maple syrup instead and enjoy a naturally sweet treat.
Step-by-Step: How I Make Easy Pumpkin Brownies Recipe
Step 1: Preheat and Prep Your Pan
Start by preheating your oven to 350°F (180°C) so it reaches temperature by the time you’re done mixing. I like to grease a 9×9 inch baking pan with a little vegetable oil or line it with parchment paper—this helps you lift the brownies out easily later without any sticking.
Step 2: Mix All the Ingredients
In a medium bowl, combine your flour, cocoa powder, baking powder, and salt first. Then add the pumpkin puree, sweetener (agave, maple syrup, or sugar), and oil. Stir everything together until the batter is completely smooth with no lumps. This is key for that perfect brownie texture—don’t overmix, but make sure all dry ingredients are fully incorporated.
Step 3: Bake with Care
Pour the batter into your prepared pan and smooth it out with a spatula. Pop it in the oven and bake for about 25 minutes. You’ll want to watch for when the edges are set but the center still wobbles slightly—that’s your cue that it’s moist inside and not overbaked. I’ve learned that baking any longer can dry them out, so keep an eye on the time!
Step 4: Cool and Cut
Once done, take the brownies out and let them cool completely in the pan. This cooling step is crucial because the brownies will finish setting up as they cool, making them nice and chewy but easy to cut. I usually wait 20-30 minutes before slicing into squares, but if you’re in a hurry, just know they’ll be a bit more delicate warm.
Pro Tips for Making Easy Pumpkin Brownies Recipe
- Use Canned Pumpkin: I always recommend canned pumpkin for consistency—homemade puree can be too watery and change the texture.
- Don’t Overbake: Pull the brownies when the center still wobbles a little; they firm up perfectly as they cool.
- Mix-ins Are Your Friend: I learned that adding a half cup of chocolate chips or nuts takes these brownies from good to unforgettable.
- Let Them Rest: Cutting warm brownies can make a mess, so give them time to cool completely for clean squares.
How to Serve Easy Pumpkin Brownies Recipe
Garnishes
When I serve these pumpkin brownies, I love to dust them lightly with powdered sugar for a simple, elegant touch. Sometimes, I add a drizzle of melted white chocolate or a sprinkle of chopped toasted pecans on top for some crunch and contrast. Whipped cream or a scoop of vanilla ice cream alongside makes for a dreamy dessert experience, especially during fall or winter.
Side Dishes
If you’re enjoying these brownies as an afternoon snack, a cup of hot coffee or chai tea pairs beautifully with their subtle sweetness and pumpkin spice vibe. For a more decadent treat, serve alongside a spiced latte or even a glass of cold milk to balance the richness.
Creative Ways to Present
For special occasions, I’ve dressed these Easy Pumpkin Brownies up by cutting them into mini bite-sized squares and stacking them on a pretty platter, then dusting with cinnamon sugar. Another fun idea is to sandwich softened cream cheese frosting between two brownie squares for pumpkin brownie “whoopie pies.” These twists make the recipe feel extra festive and gift-worthy!
Make Ahead and Storage
Storing Leftovers
I store my leftover Easy Pumpkin Brownies in an airtight container at room temperature if I plan to eat them within 2 days. They stay moist and tender that way. If your kitchen is warm, you can keep them in the fridge, but just know they’ll firm up and might lose a touch of their fudgy feel.
Freezing
Want to prep ahead? These brownies freeze beautifully. I wrap individual squares tightly in plastic wrap, then place them in a freezer-safe bag or container. When ready to enjoy, just thaw at room temperature for a few hours or overnight in the fridge. They taste almost as good as fresh, which is always a win.
Reheating
If you like your brownies warm (I definitely do!), you can pop one in the microwave for about 15 seconds or warm it in a low oven wrapped in foil. It brings back that fresh-baked softness without drying out the pumpkin brownie.
FAQs
-
Can I use homemade pumpkin puree for this recipe?
You sure can! Just make sure your homemade puree isn’t too watery to avoid a soggy brownie. If it seems watery, try draining excess liquid or cooking it down slightly before using it in the recipe.
-
What’s the best way to sweeten these pumpkin brownies?
Maple syrup and agave are both great natural sweeteners that complement the pumpkin’s earthy flavor, but granulated sugar works fine too if you prefer a more traditional sweetness. Adjust to taste but be mindful that more sugar can change texture slightly.
-
Can I add chocolate chips or nuts to this Easy Pumpkin Brownies Recipe?
Absolutely! Up to a half cup of mix-ins like chocolate chips, chopped nuts, or dried fruit blend nicely without messing with the batter’s texture or baking time.
-
How do I store leftover pumpkin brownies?
Store them in an airtight container at room temperature for up to 2 days, or refrigerate if you need them to last longer. For freezing, wrap individual pieces tightly and thaw when ready to eat.
-
Can I make these brownies gluten-free?
You can substitute regular flour with a 1-to-1 gluten-free baking blend. Just remember gluten-free flours can sometimes change the texture a bit, so keep an eye on baking time.
Final Thoughts
Honestly, this Easy Pumpkin Brownies Recipe is one I keep coming back to whether it’s the middle of October or just a random Wednesday night. The balance of pumpkin and rich chocolate hits that comfort food sweet spot that feels special yet so approachable. I hope you enjoy baking and sharing these as much as I do — they’re a perfect little indulgence that brings a smile every time.
Print
Easy Pumpkin Brownies Recipe
- Prep Time: 10 minutes
- Cook Time: 25 minutes
- Total Time: 35 minutes
- Yield: 9 brownies
- Category: Dessert
- Method: Baking
- Cuisine: American
- Diet: Vegetarian
Description
This easy pumpkin brownies recipe delivers moist, fudgy brownies with a subtle pumpkin flavor. Made with simple ingredients including pumpkin puree, cocoa powder, and a touch of sweetener, these brownies are perfect for a seasonal treat or anytime dessert. With a quick prep time and a straightforward baking method, these brownies are deliciously soft with a slight wobble in the middle, ensuring a rich and satisfying texture.
Ingredients
Dry Ingredients
- 1 ¼ cups flour
- ½ cup cocoa powder
- 2 teaspoons baking powder
- ½ teaspoon salt
Wet Ingredients
- 1 ½ cups pumpkin puree
- ⅓ cup agave syrup or maple syrup (sugar can be used as a substitute)
- ¼ cup vegetable oil or canola oil
Instructions
- Preheat and Prepare Pan: Preheat your oven to 350 degrees F (180 degrees C). Grease a 9×9 inch (17×17 cm) baking pan thoroughly to prevent sticking.
- Mix Ingredients: In a medium-sized bowl, combine the flour, cocoa powder, baking powder, and salt. Add the pumpkin puree, agave or maple syrup, and vegetable oil. Stir all ingredients together until the batter is completely smooth and evenly mixed.
- Pour and Bake: Pour the batter into the greased baking pan, spreading it evenly. Bake in the preheated oven for 25 minutes, or until the edges are set and the center still has a slight wobble. This ensures a moist and fudgy interior.
- Cool Down: Remove the pan from the oven and allow the brownies to cool completely in the pan. Cooling helps the brownies to set further and allows easier cutting.
- Serve: Once cooled, cut the brownies into 9 equal squares. Enjoy them fresh or slightly warmed for best texture and flavor.
Notes
- Use canned pumpkin puree for consistent texture and flavor; homemade puree works but may vary.
- Optional mix-ins like chocolate chips or nuts can be added, but keep the total amount under ½ cup to maintain texture.
- Allow brownies to cool for at least 20-30 minutes before slicing; this helps them finish cooking and makes for cleaner cuts.
Nutrition
- Serving Size: 1 brownie
- Calories: 180 kcal
- Sugar: 12 g
- Sodium: 150 mg
- Fat: 8 g
- Saturated Fat: 1.5 g
- Unsaturated Fat: 6 g
- Trans Fat: 0 g
- Carbohydrates: 27 g
- Fiber: 3 g
- Protein: 3 g
- Cholesterol: 0 mg


