
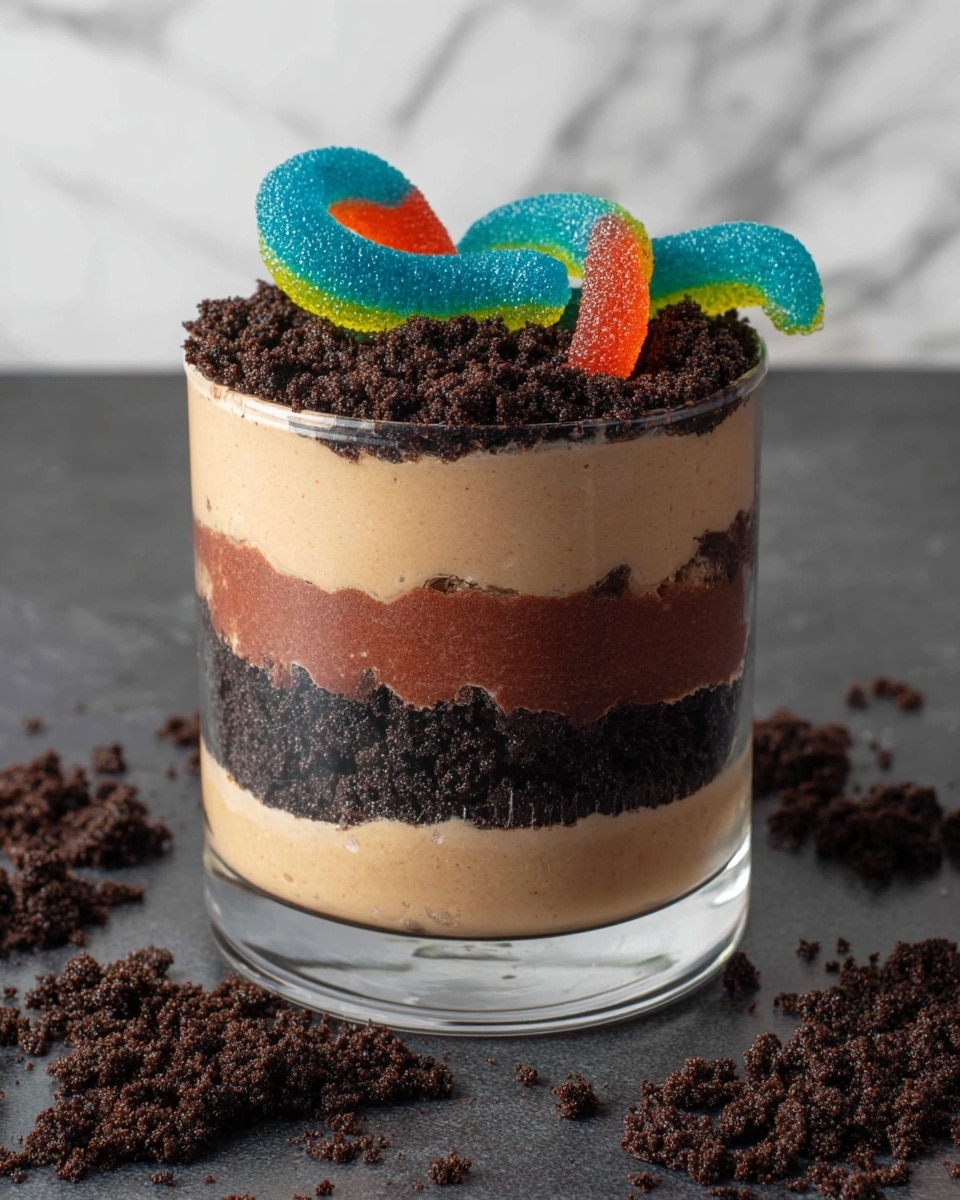
Dirt Pudding Cups with Gummy Worms Recipe
If you’re looking for a fun, easy, and utterly delightful dessert that brings a smile to both kids and adults alike, you’re going to adore this Dirt Pudding Cups with Gummy Worms Recipe. Think creamy chocolate pudding, crunchy cookie crumbs, and those playful gummy worms wriggling right on top — it’s nostalgic, delicious, and ready in just 15 minutes. Whether you’re hosting a party or just craving something sweet and whimsical, this recipe delivers every time. Stick around, and I’ll walk you through how to make these cups perfectly every time.
Why This Recipe Works
- Creamy Texture: Using vanilla Greek yogurt and heavy cream creates a rich, fluffy pudding that’s lighter than traditional versions.
- Crunch Contrast: Crushed chocolate sandwich cookies provide that perfect “dirt” crunch that kids and adults both love.
- Playful Presentation: Gummy worms top it off with a fun, whimsical touch that makes this dessert instantly memorable.
- Simple & Quick: This recipe takes only 15 minutes from start to finish – perfect for busy weeknights or last-minute parties.

Ingredients & Why They Work
The harmony of these ingredients is what makes the Dirt Pudding Cups with Gummy Worms Recipe so irresistible. The vanilla Greek yogurt adds a tangy creaminess, balanced by a touch of honey for sweetness. Cocoa powder brings that deep chocolate flavor without heaviness. The cookie crumbs add the essential dirt texture, and of course, the gummy worms bring the fun factor!

- Vanilla Greek Yogurt: Provides creaminess with a slight tang, which balances the dessert beautifully and adds protein.
- Heavy Cream: Whipped into the mixture, it gives the pudding a light, fluffy texture reminiscent of classic mousse.
- Honey: A natural sweetener that complements the cocoa and yogurt without being overpowering.
- Cocoa Powder: Ensures deep chocolate flavor without extra fat or sugar, making the pudding rich and satisfying.
- Creamy Peanut Butter (Optional): Adds a luscious nutty depth if you’re a peanut butter fan—totally optional but highly recommended.
- Vanilla Extract: Elevates all flavors and adds a warm aromatic touch.
- Salt: Balances sweetness and enhances the chocolate notes.
- Chocolate Sandwich Cookies: Crushed to create the “dirt” layer—look for classic Oreos or your favorite brand.
- Gummy Worms: The star of the show—choose your favorite brand for the best chew and bright colors.
Tweak to Your Taste
This Dirt Pudding Cups with Gummy Worms Recipe is so versatile that you can easily make it your own. I’ve played around with peanut butter in the pudding mix myself, and it makes it richer and a little nutty. But don’t be afraid to experiment—you might discover a combo you love!
- Peanut Butter Variation: I love swirling creamy peanut butter into the pudding for a decadent twist that pairs wonderfully with the chocolate and cookie flavors.
- Dairy-Free Version: Substitute coconut yogurt and coconut cream if you’re avoiding dairy—just make sure to use a creamy coconut yogurt for the best texture.
- Extra Crunch: Mix in some crushed nuts or pretzels to add a salty crunch that contrasts nicely with the sweet pudding.
- Seasonal Flavors: Around Halloween, I’ve swapped gummy worms for spooky shapes and added a pinch of cinnamon to the cocoa for a seasonal upgrade.
Step-by-Step: How I Make Dirt Pudding Cups with Gummy Worms Recipe
Step 1: Whip Up Your Chocolate Pudding Base
Start by combining vanilla Greek yogurt, heavy cream, honey, cocoa powder, peanut butter if using, vanilla extract, and salt in the bowl of your stand mixer. I usually give everything a good scrape down halfway through to make sure it mixes evenly. Whip it for about a minute until it’s smooth, fluffy, and beautifully chocolatey. This step is key to achieving that light, mousse-like texture—don’t rush it!
Step 2: Crush the Cookies into “Dirt”
I like to place the chocolate sandwich cookies in a plastic bag and crush them with a rolling pin. You want a mix of fine crumbs and little chunks so it has a nice texture in the cups. This will give you the “dirt” look and a satisfying crunch after every creamy bite.
Step 3: Build Your Layers in Cups or Jars
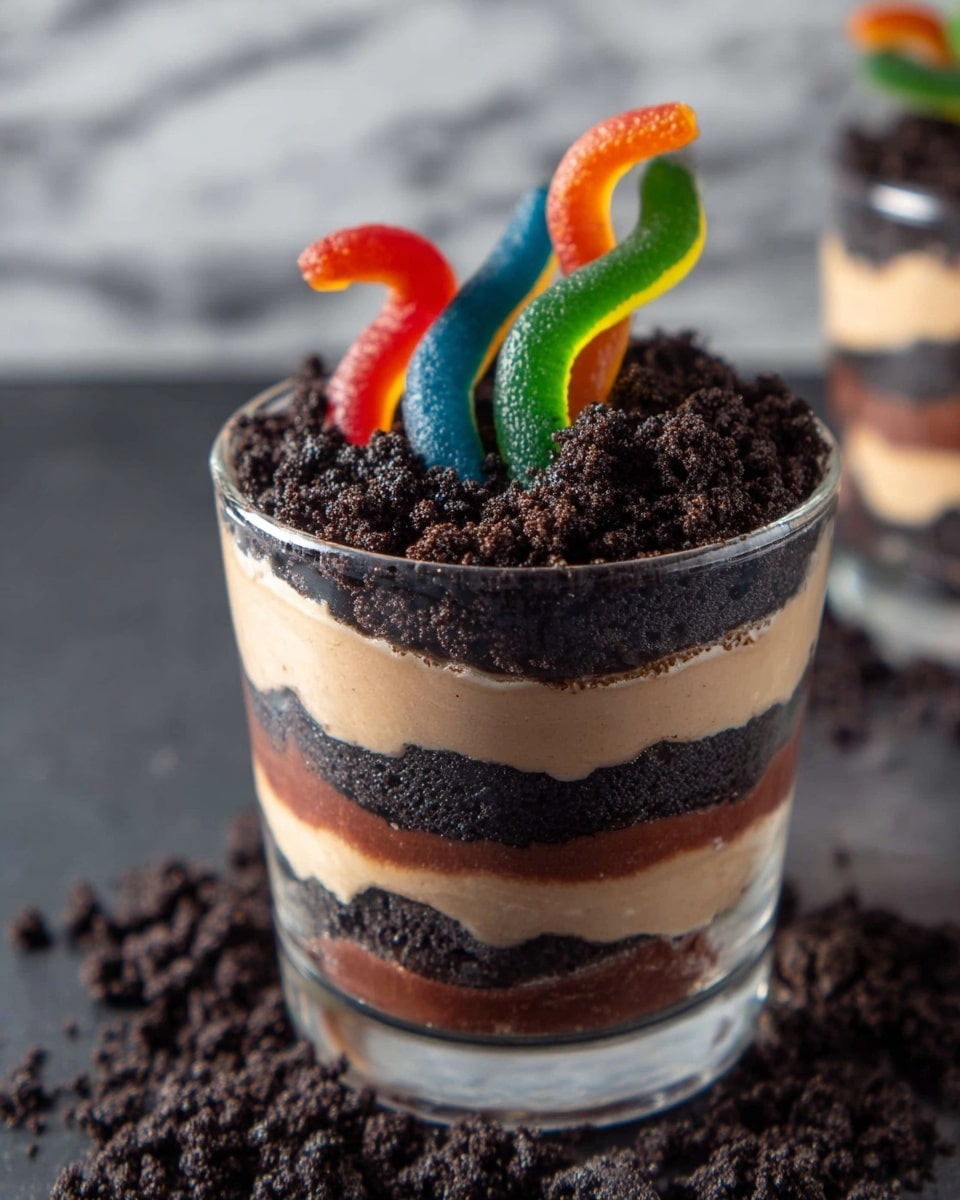
Now the fun part—layering. I alternate between crushed cookies and pudding, usually starting with a cookie layer on the bottom. Repeat this twice so you get that satisfying contrast in every spoonful. This recipe makes enough for six small cups, which works perfectly for snack-sized treats or kid’s parties.
Step 4: Top It Off with Gummy Worms
The finishing touch is, of course, the gummy worms! Wiggle a few right on top so it looks like they’re crawling out of the dirt. It’s such a simple detail but it makes all the difference—guaranteed smiles at serving time.
Pro Tips for Making Dirt Pudding Cups with Gummy Worms Recipe
- Room Temperature Ingredients: Let your yogurt and heavy cream warm slightly so it whips up easier and smoother without lumps.
- Crush Cookies by Hand: For texture, avoid pulverizing the cookies too fine—leave some small chunks for a better “dirt” effect.
- Make Ahead Convenience: You can prepare this dessert a few hours ahead and keep chilled. Just add gummy worms before serving so they don’t get soggy.
- Avoid Overmixing: Mix the pudding until just fluffy—overmixing can break down the cream and yogurt texture.
How to Serve Dirt Pudding Cups with Gummy Worms Recipe
Garnishes
I usually keep it simple with just the gummy worms on top because they really steal the show. Sometimes, I sprinkle a few mini chocolate chips or a tiny pinch of edible glitter for festive occasions—it’s a quick way to add extra sparkle and fun.
Side Dishes
Since this is a sweet treat in itself, I like pairing it with light snacks like fresh fruit or a crisp glass of milk. It’s also a lovely finish after casual dinners, especially ones with kids who adore the whole “dirt and worms” theme.
Creative Ways to Present
For birthday parties or Halloween, I’ve served the Dirt Pudding Cups in little flower pots lined with parchment for that gardener’s delight theme. You can also layer in clear mason jars to show off the layers beautifully. Adding plastic shovels or themed spoons adds whimsy and makes the serving super fun for kids.
Make Ahead and Storage
Storing Leftovers
I store leftovers covered tightly with plastic wrap or lids in the fridge. They keep well for up to 2 days, but I usually find they’re gone by then because everyone loves them so much! Just remember to add the gummy worms fresh before serving again.
Freezing
Freezing these pudding cups isn’t my top recommendation because the texture can change once thawed—the pudding might separate or become watery. If you really want to freeze them, do so without the cookie layer and gummy worms, then thaw in the fridge overnight and add the “dirt” and worms fresh.
Reheating
Since this dessert is served cold, there’s no reheating needed. Just give it a gentle stir if necessary to restore fluffiness before serving again. Remember to keep the gummy worms separate until the last minute.
FAQs
-
Can I make Dirt Pudding Cups with Gummy Worms Recipe ahead of time?
Absolutely! You can prepare the pudding and cookie layers up to a day in advance and keep them refrigerated. Just add gummy worms right before serving to keep them fresh and chewy.
-
What can I substitute for gummy worms?
If gummy worms aren’t your thing, try using sour candy strips, fruit snacks shaped like worms, or even chocolate sprinkles for a worm-free but still fun dirt effect.
-
Is this recipe suitable for kids?
This Dirt Pudding Cups with Gummy Worms Recipe is perfect for kids! It’s fun, not messy, and packed with familiar flavors. Just be mindful of any allergies if you add peanut butter.
-
Can I use regular yogurt instead of Greek yogurt?
Regular yogurt can work, but Greek yogurt gives a thicker and creamier texture. If you use regular yogurt, you might want to drain it in a cheesecloth for a bit to remove extra liquid.
Final Thoughts
Making these Dirt Pudding Cups with Gummy Worms is one of my favorite quick treats because they’re playful, delicious, and perfect for sharing with friends or family. Honestly, every time I bring them out, they spark joy and a little bit of nostalgia, reminding me of carefree childhood days. I can’t wait for you to try this recipe—and don’t be surprised if you find yourself adding it to your regular dessert rotation like I have!
Print
Dirt Pudding Cups with Gummy Worms Recipe
- Prep Time: 15 minutes
- Cook Time: 0 minutes
- Total Time: 15 minutes
- Yield: 6 servings
- Category: Dessert
- Method: No-Cook
- Cuisine: American
- Diet: Vegetarian
Description
Dirt Pudding Cups are a fun and delicious dessert featuring layers of creamy chocolate pudding made with vanilla Greek yogurt and cocoa powder, crunchy crushed chocolate sandwich cookies, and gummy worms for a playful touch. Perfect for parties or a sweet treat for kids and adults alike.
Ingredients
Pudding Mixture
- 1 ½ cups vanilla Greek yogurt
- ¼ cup heavy cream
- ¼ cup honey
- ¼ cup cocoa powder
- ¼ cup creamy peanut butter (optional)
- 1 teaspoon vanilla extract
- ½ teaspoon salt
Additional Ingredients
- 1 ½ cups crushed chocolate sandwich cookies (about 16 cookies)
- 15 gummy worms
Instructions
- Prepare the pudding mixture. Place the vanilla Greek yogurt, heavy cream, honey, cocoa powder, peanut butter (if using), vanilla extract, and salt in the bowl of a stand mixer. Process on medium-high speed until the mixture is smooth and fluffy, about 1 minute, stopping to scrape down the sides of the bowl as needed to ensure thorough mixing.
- Assemble the dirt pudding cups. In each of six small cups or jars, create alternate layers starting with crushed chocolate sandwich cookies, then the chocolate pudding mixture. Repeat layering once more so that each cup has two layers of cookies and two layers of pudding.
- Add the finishing touch and serve. Top each cup with gummy worms scattered on top to resemble dirt and worms. Serve immediately for the best texture and freshness.
Notes
- If you prefer a peanut-free version, simply omit the peanut butter.
- For a dairy-free alternative, substitute the heavy cream and Greek yogurt with coconut cream and a non-dairy yogurt of your choice.
- Crush the chocolate sandwich cookies finely for easier layering and better texture.
- You can prepare the pudding mixture a few hours ahead and store it refrigerated, but assemble just before serving to keep the cookies crunchy.
- Use mini cups or jars to create individual servings that are easy to serve and fun to eat.
Nutrition
- Serving Size: 1 cup
- Calories: 240 kcal
- Sugar: 18 g
- Sodium: 150 mg
- Fat: 10 g
- Saturated Fat: 4 g
- Unsaturated Fat: 5 g
- Trans Fat: 0 g
- Carbohydrates: 29 g
- Fiber: 2 g
- Protein: 6 g
- Cholesterol: 15 mg

