

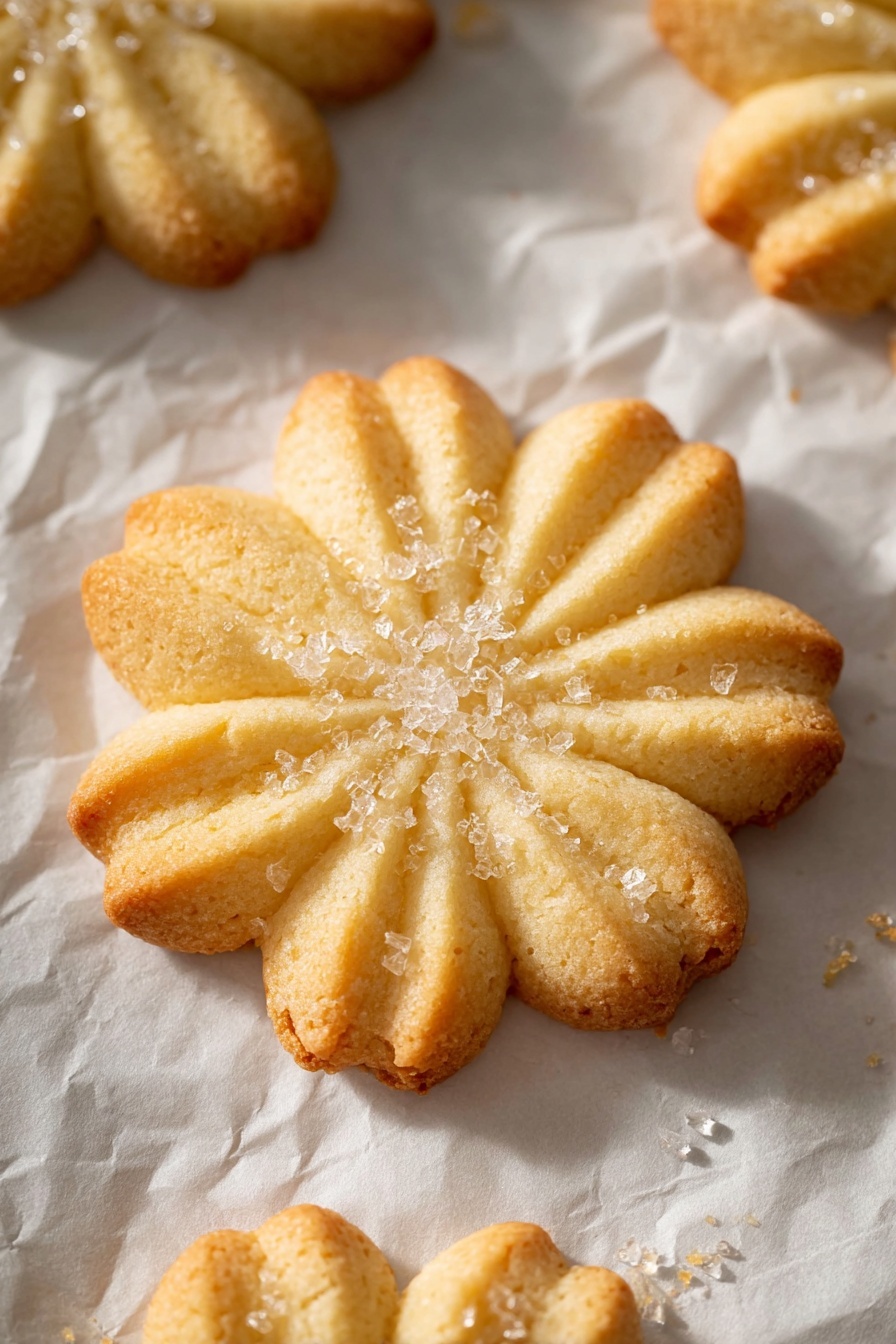
Danish Butter Cookies Recipe
If you’ve ever tasted those delightfully crisp, melt-in-your-mouth treats from elegant tins during the holidays, then you know exactly what I mean when I say I love the classic Danish Butter Cookies Recipe. It’s one of those recipes that feels fancy yet is so straightforward to make at home. I’m excited to share my tried-and-true method for these buttery delights that aren’t just good—they’re fan-freaking-tastic. Stick around, and I’ll walk you through every step so you nail them just right, every time.
Why This Recipe Works
- Rich Butter Base: Using European salted butter gives these cookies their signature creamy flavor and perfect texture.
- Dual Flour Blend: Combining all-purpose and cake flour balances crispiness and tenderness flawlessly.
- Piping & Chilling Step: Piping the dough and chilling it before baking ensures those buttery shapes hold up without spreading too much.
- Simple Ingredients, Big Flavor: Basic pantry staples come together to create an elegant cookie you’ll want to bake again and again.

Ingredients & Why They Work
Each ingredient in this Danish Butter Cookies Recipe is carefully chosen to create that perfect balance of flavor and texture. I’ve included some tips so you know exactly why each one deserves a spot in the mix—and where to maybe switch things up if you want to.
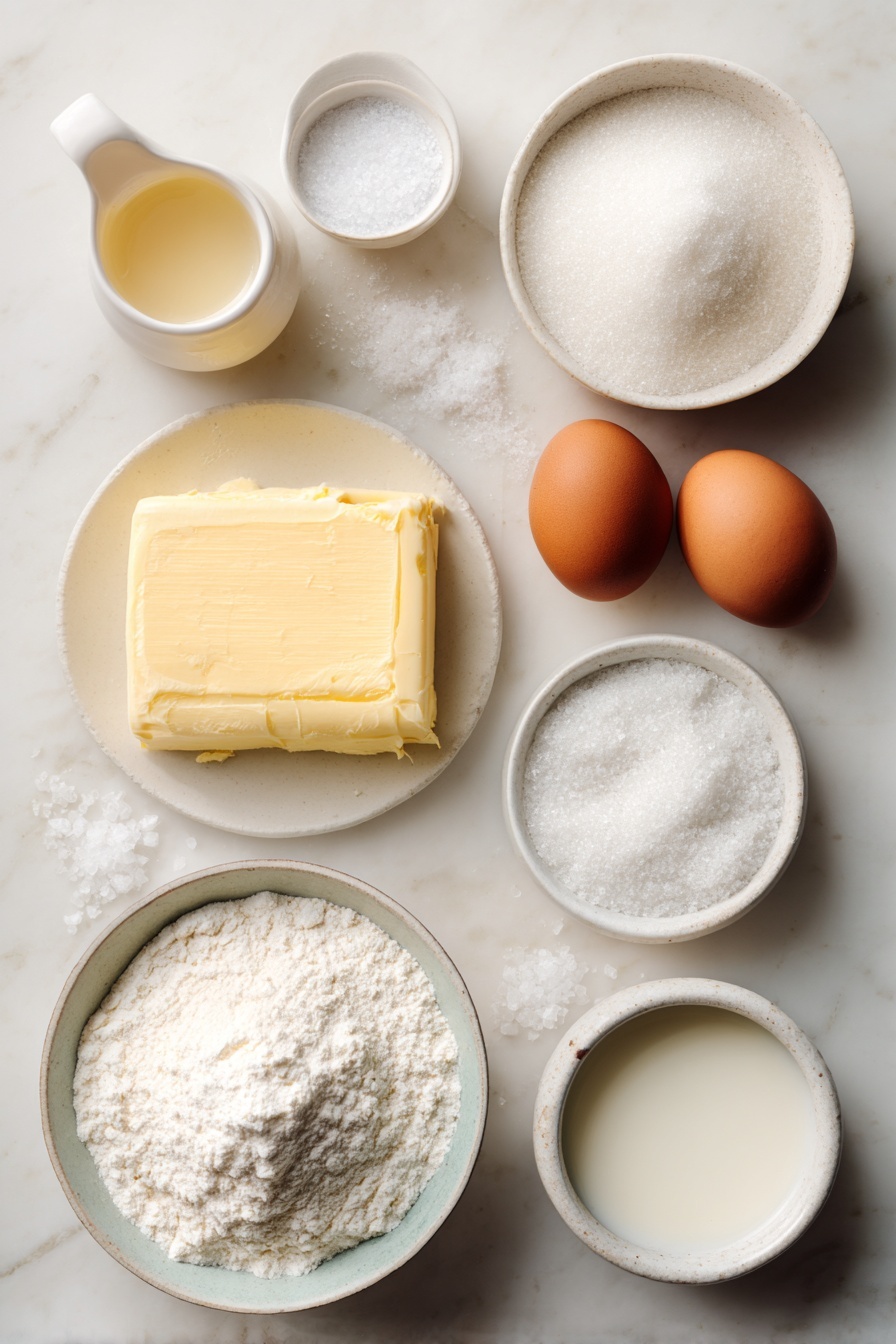
- European Salted Butter: The heart of this recipe, it’s richer and creamier than regular butter, adding amazing flavor and ensuring your cookies melt just right.
- Granulated Sugar: Provides sweetness and slight crunch on the surface after baking.
- Salt: Enhances the butter’s flavor and balances sweetness; if using unsalted butter, increase salt to compensate.
- Egg Yolks: Adds richness and helps bind the dough while keeping it tender.
- Vanilla Extract: Classic flavor enhancer that rounds out the buttery notes perfectly.
- Whole Milk: Softens the dough just enough for easy piping without making it too wet.
- All-Purpose Flour: The structural base that gives the cookies their sturdy yet delicate texture.
- Cake Flour: This ingredient lightens up the dough for a melt-in-your-mouth experience—no dense cookies here.
- Coarse Sugar (for decorating): A little sprinkle adds festive sparkle and an extra bit of crunch.
Tweak to Your Taste
I love how this Danish Butter Cookies Recipe offers a perfect base for personalization. Over the years, I’ve played with little tweaks that make the cookies suit different moods or occasions. Don’t hesitate to experiment with your own favorite flavors or textures!
- Lemon Zest Variation: Adding fresh lemon zest to the dough gives a bright, citrusy twist I adore in springtime batches.
- Chocolate Dip: Sometimes I half-dip the cooled cookies in melted dark chocolate — trust me, your cookie game will go through the roof.
- Nutty Touch: Sprinkle chopped toasted almonds or pecans on top before baking for crunch and a toasty flavor that pairs beautifully with the butter.
Step-by-Step: How I Make Danish Butter Cookies Recipe
Step 1: Preparing Your Workspace & Chilling Setup
First off, make sure you’ve cleared some space in your fridge to chill the shaped cookies later on. I line up two baking sheets with parchment or silicone mats—this way, everything’s prepped and ready to go. Chilling is crucial here; without it, your piped cookies might spread too thin and lose their shape.
Step 2: Creaming Butter, Sugar & Salt
Pop your room temperature European butter into a stand mixer fitted with a paddle attachment. Cream on medium speed until smooth. While the mixer’s running on low, slowly add sugar and salt. Keep creaming until the mixture becomes light and fluffy—it’s the secret to giving these cookies their tender bite.
Step 3: Adding Egg Yolks, Vanilla & Milk
Next, slowly add in your egg yolks, vanilla extract, and milk while continuing to mix on medium speed. These ingredients add richness and help bind the dough together. Don’t forget to scrape down the sides of the bowl so everything combines perfectly.
Step 4: Mixing in Flours to Form Dough
Whisk together your all-purpose and cake flours in a separate bowl, then add them to your butter mixture in two batches. Mix on low speed just until there’s no visible flour left. If the dough feels too stiff to pipe, adding a tablespoon more milk softens it without sacrificing texture.
Step 5: Piping & Chilling the Cookies
Transfer your cookie dough into a piping bag fitted with a ½-inch open star tip. Pipe out 2-inch cookies in your favorite shapes—rosettes, circles, pretzels, even squares. Space them out evenly on the baking sheet and sprinkle with coarse sugar or festive sprinkles if you’re feeling fun. Now, here’s the golden rule: chill them in the fridge for 20 to 30 minutes before baking. This little timeout helps the cookies keep their flair and stops them from spreading too much.
Step 6: Baking to Perfection
Preheat your oven to 350°F and position the rack in the middle. Bake your chilled cookies for 10-15 minutes until the edges just start to turn a light golden brown. Keep a close eye here—overbaking dries them out, and they’re so much better with that slight softness in the center. Once baked, let them cool on the sheet for about 5 minutes, then transfer to a wire rack to finish cooling.
Pro Tips for Making Danish Butter Cookies Recipe
- Use Room Temperature Butter: Let your butter sit out about 45 minutes before baking. It should feel soft but not melty to touch—this helps create a smooth, creamy dough.
- Don’t Overmix Your Dough: Mixing too much develops gluten and toughens your cookies, so stop as soon as the flour disappears.
- Measure Flour Accurately: If you don’t have a kitchen scale, gently fluff your flour before spooning it into the cup—don’t pack it down!
- Watch Baking Time Closely: Depending on cookie size and oven, bake times can vary—aim for just golden edges to keep that perfect melt.
How to Serve Danish Butter Cookies Recipe
Garnishes
Whenever I serve these cookies, I like a light sprinkle of coarse sugar on top just before baking for that little sparkle and crunch. Sometimes, a thin drizzle of melted dark chocolate or a tiny pinch of sea salt right after baking takes them from lovely to unforgettable. Fresh strawberry slices or a dollop of whipped cream on the side work beautifully if you want to get fancy.
Side Dishes
These butter cookies are fantastic on their own but also pair well with a cup of strong black coffee or a smooth cup of Earl Grey tea. For festive gatherings, I love offering them alongside a cheese board with mild cheeses and fruit preserves. You’ll enjoy how the buttery sweetness contrasts with savory and tangy flavors.
Creative Ways to Present
One of my favorite things to do is stack these cookies in a pretty tin lined with parchment, tied with a festive ribbon for gifts. For holiday parties, arrange them on a tiered cake stand mixed with dipped and sprinkled varieties. Or try piping the dough into themed shapes—think stars or hearts—and present them on a decorative platter sprinkled with edible gold dust for extra wow factor.
Make Ahead and Storage
Storing Leftovers
I store leftover Danish Butter Cookies in an airtight container at room temperature, and they usually stay fresh and crisp for up to 5 days. If you notice any softness, a brief re-crisp in the oven brings them right back to life. Keeping them away from humidity is key—so no open jars of jam or steaming cups right next to them!
Freezing
One of the best things about this recipe: you can freeze the unbaked, shaped dough for up to 2-3 months! I just lay the piped cookies on a baking sheet, freeze until solid, then transfer to a freezer-safe bag. When ready to bake, no need to thaw—just pop them into the oven and extend your baking time by a couple of minutes. Frozen baked cookies do well too, sealed airtight for up to 3 months.
Reheating
If your cookies lose their crispness, pop them in a preheated 300°F oven for 5 minutes. This little reheating trick refreshes their buttery crunch without drying them out. Just keep a close eye so they don’t darken too much.
FAQs
-
Can I use unsalted butter instead of salted?
Yes! If using unsalted butter, add an additional ¼ teaspoon of kosher salt to your dough. This keeps the balance of flavors intact.
-
Why do you use both all-purpose and cake flour?
The combination gives you cookies that are crisp but still tender and melt-in-your-mouth—cake flour lightens up the texture. If unavailable, feel free to use only all-purpose flour (about 260 grams), but expect a slightly different crumb.
-
How important is chilling the dough before baking?
Chilling is super important for this recipe; it helps the cookies hold their shape and prevents them from spreading too thin in the oven. I never skip this step—it makes a huge difference.
-
Can I substitute the egg yolks?
Egg yolks add richness and help with dough structure, but if you need to substitute, try using a flax egg or a commercial egg replacer designed for baking. Texture might be slightly different but still tasty.
Final Thoughts
Making this Danish Butter Cookies Recipe has been one of my favorite kitchen rituals—there’s something so comforting about turning simple, quality ingredients into buttery, melt-in-your-mouth cookies that everyone loves. I hope you’ll enjoy baking and sharing them as much as I do. Whether it’s for a holiday gift, a cozy afternoon treat, or a fancy tea accompaniment, these cookies are sure to be a crowd-pleaser. Give them a try, and I promise you’ll be hooked!
Print
Danish Butter Cookies Recipe
- Prep Time: 15 minutes
- Cook Time: 15 minutes
- Total Time: 1 hour 30 minutes
- Yield: 24 cookies
- Category: Dessert
- Method: Baking
- Cuisine: Danish
- Diet: Vegetarian
Description
These Danish Butter Cookies melt in your mouth with a perfect crisp yet tender texture. Made with a blend of all-purpose and cake flour, European salted butter, and vanilla, they are piped into charming shapes and baked to a delicate golden finish. Ideal for festive occasions or everyday treats, these cookies are rich, buttery, and irresistibly delightful.
Ingredients
Butter Mixture
- 1 cup (227 g) European salted butter, room temperature
- ½ cup (100 g) granulated sugar
- ⅛ teaspoon salt
Wet Ingredients
- 2 egg yolks
- 2 teaspoons (10 g) vanilla extract
- 1 tablespoon (15 g) whole milk, or more to soften
Dry Ingredients
- 2 cups (220 g) all-purpose flour
- ½ cup (50 g) cake flour
Decoration
- Coarse sugar for decorating
Instructions
- Prepare Refrigerator and Baking Mats: Clear space in your refrigerator to chill the shaped cookies and line two baking sheets with parchment paper or silicone mats. This chilling step prevents the cookies from spreading too much while baking.
- Cream Butter, Sugar, and Salt: Using a stand mixer with a paddle attachment, cream the European salted butter on medium speed until smooth. Gradually add granulated sugar and salt on low speed, then increase to medium speed and mix until the mixture is light and fluffy.
- Add Egg Yolks, Vanilla, and Milk: While mixing on medium speed, add the egg yolks, vanilla extract, and whole milk. Continue mixing until fully combined, scraping down the sides of the bowl for even incorporation.
- Incorporate the Flours: In a separate bowl, whisk together the all-purpose flour and cake flour. Add the flour mixture to the mixer in two additions on low speed. Mix until combined and no visible flour remains. If the dough feels too thick to pipe, add an additional tablespoon of milk to soften it.
- Pipe the Cookies: Transfer the cookie dough into a large piping bag fitted with a ½-inch open star tip. Pipe 2-inch shapes such as rosettes, pretzels, circles, or squares onto the prepared baking sheets, spacing each cookie at least 2 inches apart. Optionally, sprinkle with coarse sugar or festive sprinkles. Chill the piped cookies in the refrigerator for 20-30 minutes before baking.
- Preheat Oven: Place a rack in the middle of the oven and preheat to 350°F (175°C).
- Bake Cookies: Bake the chilled cookies for 15 minutes or until the edges are just lightly golden brown. Allow the cookies to cool on the baking sheets for 5 minutes before transferring to a wire rack to cool completely.
Notes
- Use room temperature butter (about 67°F or 19°C) to ensure easy mixing and smooth dough texture.
- Bring eggs to room temperature by placing them in warm water for 5 minutes to avoid uneven baking.
- Avoid over mixing the dough to prevent gluten development, which can make cookies tough.
- Monitor the cookies during baking closely as times may vary by shape and size.
- You can substitute all-purpose flour alone (260 g) if cake flour is unavailable, but the texture will be slightly different.
- Measure flour accurately, ideally with a kitchen scale, to prevent dry or tough dough.
- If using unsalted butter, add ¼ teaspoon kosher salt to the dough.
- Store cookies in an airtight container at room temperature for up to 5 days or freeze for up to 3 months.
- Chilled shaped dough can be kept in the fridge for up to 2 days covered, or frozen for 2-3 months; bake frozen dough a few minutes longer without thawing.
Nutrition
- Serving Size: 1 cookie
- Calories: 120 kcal
- Sugar: 6 g
- Sodium: 50 mg
- Fat: 8 g
- Saturated Fat: 5 g
- Unsaturated Fat: 3 g
- Trans Fat: 0 g
- Carbohydrates: 12 g
- Fiber: 0.3 g
- Protein: 1.2 g
- Cholesterol: 30 mg

