

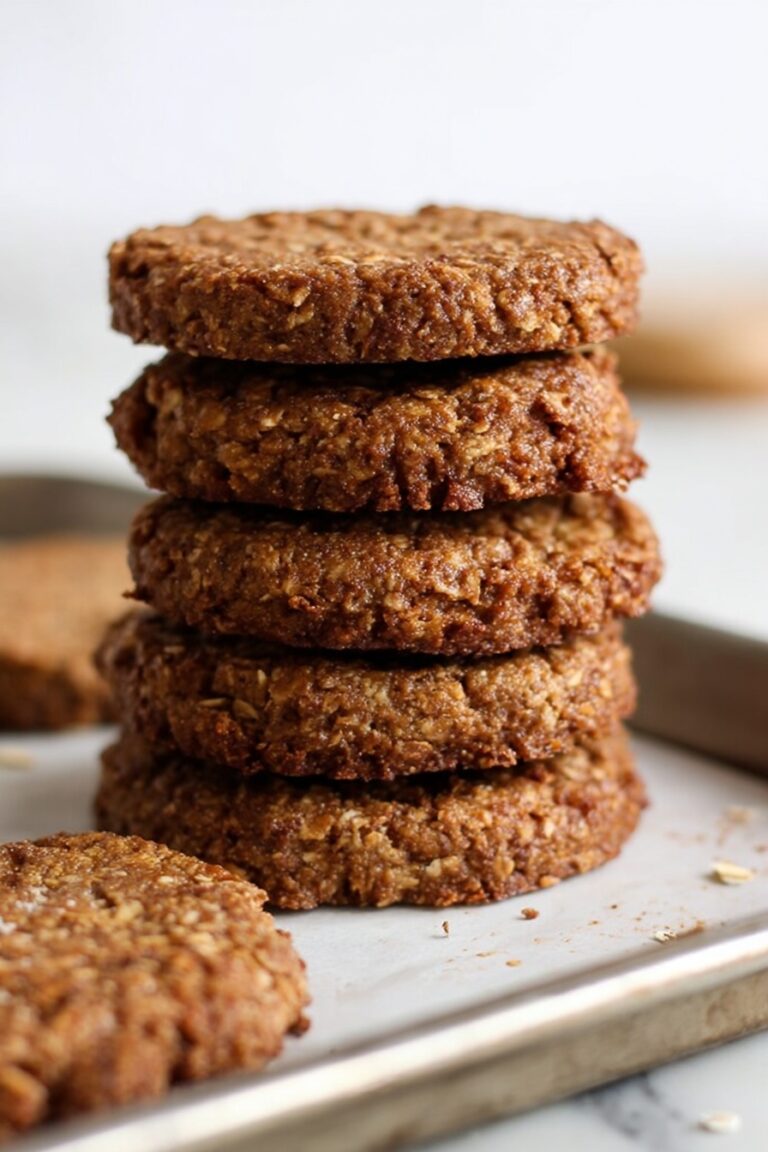
Costco Copycat Marshmallow Rice Krispie Cookies Recipe
If you’re anything like me, you know there’s just something magical about that perfect chewy, buttery cookie packed with melty marshmallows and a satisfyingly crispy crunch. That’s exactly why I had to recreate the Costco Copycat Marshmallow Rice Krispie Cookies Recipe for you. Trust me, these cookies are fan-freaking-tastic! They hit all the right spots: sweet, salty, soft, and crispy, all at once. Plus, making them at home means you get to enjoy them fresh, warm, and exactly how you like them—no trips to the store required. Stick with me, and I’ll share everything to help you master these irresistibly delicious treats.
Why This Recipe Works
- Brown Butter Magic: Browning the butter adds that nutty, rich depth that takes these cookies beyond ordinary.
- Perfect Texture Blend: The combo of chewy cookie base, crispy rice cereal, and gooey marshmallows delivers a multi-textural delight.
- Salted Sweetness: A sprinkle of flaked sea salt at the end perfectly balances the sweetness and enhances flavors.
- Simple Ingredients, Big Flavor: No fancy additions, just thoughtful techniques that bring out the best in everyday ingredients.

Ingredients & Why They Work
Each ingredient plays a starring role here, creating the ideal chewiness and crispy pockets you crave. From my experience, using quality butter and marshmallows really makes a difference—and don’t rush that browned butter step—it’s where the magic begins.
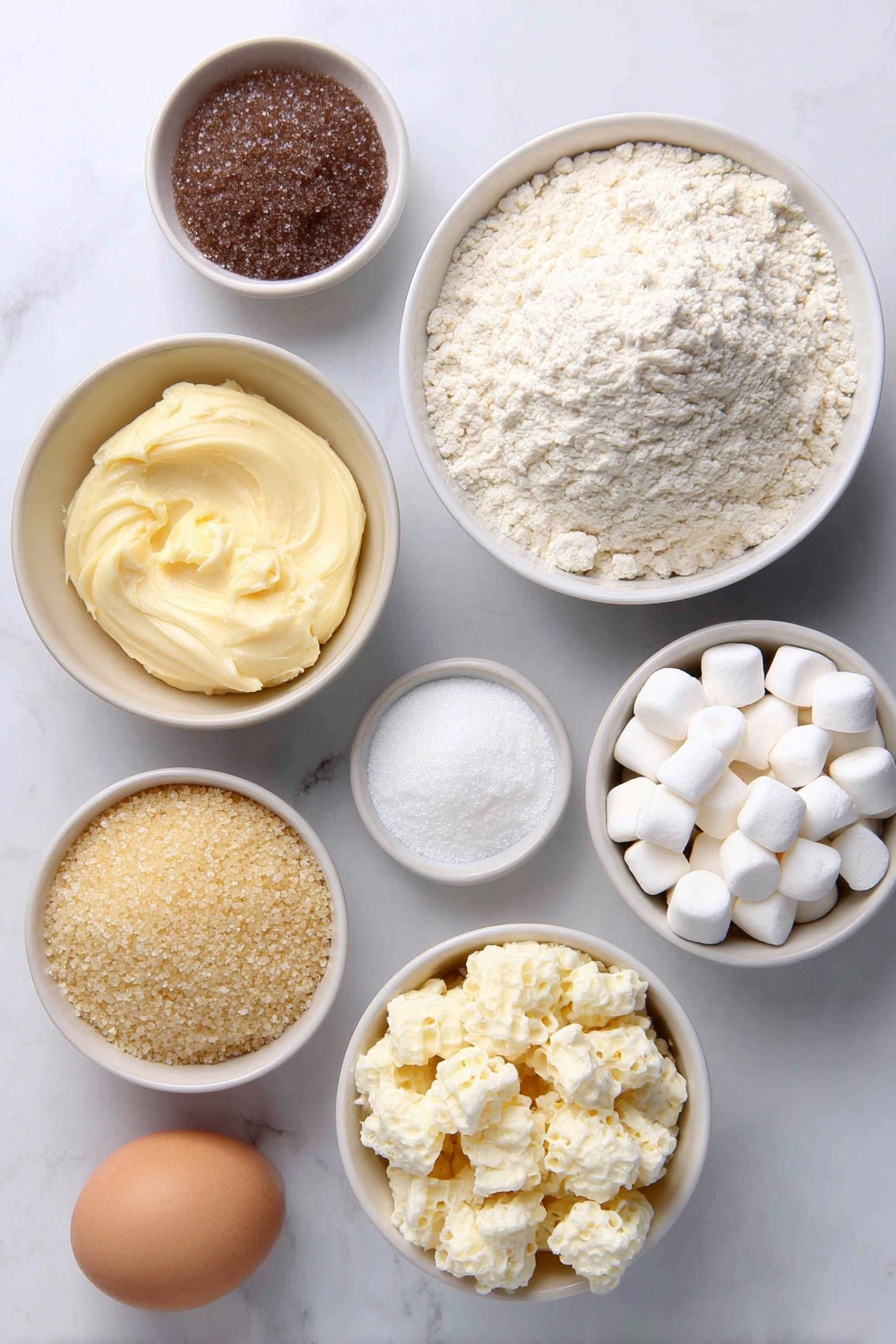
- Salted Butter: Browning it adds a toasty, caramel-like flavor that’s key to this copycat.
- Brown Sugar: Brings moisture and chewiness with a hint of molasses depth.
- Granulated Sugar: Balances sweetness and helps with the slight crisp on the cookie edges.
- Egg (Room Temperature): Aids binding and adds tenderness; warming it just a bit helps with smooth mixing.
- Vanilla (Paste or Extract): Enhances flavor complexity—vanilla paste is a beautiful upgrade if you have it handy.
- Baking Soda: Gives a little lift and spread without over-rising the cookies.
- Salt: A must for flavor balance, especially when you finish with flaked salt on top.
- All-Purpose Flour: Forms the base structure but don’t overpack it; light and fluffy yields the best texture.
- Rice Krispie Cereal: Provides that signature crispy crunch that contrasts the soft cookie.
- Mini Marshmallows: These melt inside the cookie to give gooey pockets of sweetness you’ll adore.
- Flaked Salt (For Topping): A final sprinkle to brighten the flavors and accentuate the buttery-sweet notes.
Tweak to Your Taste
One of the best things about this Costco Copycat Marshmallow Rice Krispie Cookies Recipe is how you can make it truly your own. I’ve found a few easy tweaks to suit different preferences or occasions.
- Thicker Cookies: I personally love adding an extra couple tablespoons of flour to get a chunkier, chewier cookie—perfect if you’re a fan of a more substantial bite.
- Extra Marshmallow Goo: Toss in a handful more mini marshmallows for the times you want those gooey pockets to be even more indulgent.
- Dietary Swaps: If you need gluten-free, you can use a 1:1 gluten-free flour blend. I haven’t tried it myself but lots of readers report good results!
- Chocolate Lover’s Touch: A few mini chocolate chips folded in will absolutely satisfy that chocolate craving without overwhelm.
Step-by-Step: How I Make Costco Copycat Marshmallow Rice Krispie Cookies Recipe
Step 1: Brown the Butter Like a Pro
This is hands down the most important step. Melt your salted butter in a medium saucepan over medium heat and watch carefully—it’ll foam up, then the foam will start to subside, and you’ll see golden brown bits form at the bottom. The smell will shift to a delicious nutty aroma—that’s your cue to remove it from the heat. Pour it into a bowl and chill it in the fridge or freezer for about 10 minutes to cool but not harden. This step transforms your cookies from good to unforgettable.
Step 2: Mix Sugars and Browned Butter
Once your butter has cooled slightly, stir in the brown sugar and granulated sugar until combined. Then add the egg and vanilla and mix on low speed just until smooth—about 30 seconds is perfect. Overmixing here can be tempting because it looks smooth, but go slow to keep the texture light.
Step 3: Add Dry Ingredients Carefully
Next, gently fold in your salt, baking soda, and flour. I like to add the flour slowly and mix just until fully combined to avoid tough cookies. You want everything incorporated but don’t overwork the dough.
Step 4: Fold in the Crunch and Gooey Goodness
This is the heart of the recipe: fold in the rice krispie cereal first, then the mini marshmallows. This way, your marshmallows stay soft and don’t melt too much in the dough, giving those pockets of gooeyness once baked. Be gentle here to keep the cereal from crushing.
Step 5: Scoop and Bake
Using a 3-tablespoon scoop (or a large ice cream scoop), form dough balls and place 4-5 per lined baking sheet with ample space for spreading. Bake at 350°F (175°C) for 10-13 minutes until the cookies are lightly golden around the edges but still soft in the centers. Sprinkling flaked salt right after they come out of the oven amps up flavor.
Pro Tips for Making Costco Copycat Marshmallow Rice Krispie Cookies Recipe
- Watch Your Butter Browning: Stay close! Butter can go from perfectly browned to burnt within seconds, so stir constantly once it foams.
- Don’t Skip Cooling the Butter: Adding hot brown butter to eggs can scramble them—cool it first for a smooth batter.
- Scoop Large and Space Well: These cookies spread thin, so give them room on your baking sheet for optimal shape.
- Salt is Your Friend: Adding flaked salt after baking creates a perfect sweet-salty combo and brings out all the flavors.
How to Serve Costco Copycat Marshmallow Rice Krispie Cookies Recipe
Garnishes
I usually keep it simple with a sprinkle of flaked sea salt right from the oven—it adds that elevated, gourmet touch that makes these cookies feel special. Sometimes, I drizzle a bit of melted white or dark chocolate over the top for gift-giving occasions. If you’re feeling festive, colored sprinkles just before baking are a fun way to jazz them up for holidays.
Side Dishes
These cookies pair wonderfully with a cold glass of milk (classic, right?). I’ve also enjoyed them alongside a scoop of vanilla ice cream for a decadent dessert or with a hot latte during cozy afternoons. For parties, they’re a hit when served on a platter with fresh fruit and nuts for a balanced snack spread.
Creative Ways to Present
For birthdays or gatherings, stacking these cookies tied with a rustic ribbon makes a beautiful, handmade gift. I’ve also pressed a few mini marshmallows and chocolate chips on top of the dough balls before baking to create a pretty, inviting look. If you want to take it up a notch, layering broken cookie chunks between whipped cream can serve as a quick and crowd-pleasing dessert parfait.
Make Ahead and Storage
Storing Leftovers
I store any leftover cookies in an airtight container at room temperature. They keep their chewy texture best for 3-4 days. If you want to extend that, placing a slice of bread in the container helps maintain softness—I learned that one from a fellow cookie lover, and it really works!
Freezing
These cookies freeze well baked or as dough balls. Just wrap them tightly and pop them in a freezer-safe bag or container. When I’m craving fresh cookies, I thaw dough balls overnight in the fridge and bake the next day—fresh, warm, and just as delicious.
Reheating
To reheat, I pop the cookies in a 300°F oven for 5 minutes. This warm-up refreshes their chewiness and brings back that just-baked vibe. Microwaving works in a pinch, but the oven method keeps the cookie texture spot on.
FAQs
-
Can I use regular marshmallows instead of mini marshmallows?
Mini marshmallows work best because they distribute evenly and melt nicely inside the cookie, creating those gooey pockets. If you only have regular-sized marshmallows, chop them into smaller pieces before folding them in to avoid giant marshmallow blobs.
-
What if I don’t have rice krispie cereal—can I use something else?
Rice Krispies provide a specific light crunch that’s key here. You could experiment with other puffed rice cereals, but something like cornflakes or granola will change the texture and flavor quite a bit. I recommend sticking close to the original for best results.
-
Why is browning the butter necessary?
Brown butter brings a rich nutty flavor and a deeper complexity that plain melted butter can’t match. It dramatically elevates the taste of this cookie, giving it that signature “homemade gourmet” feel that keeps you coming back for more.
-
How do I prevent my cookies from spreading too thin?
Make sure to chill the brown butter before mixing with the sugars and egg. Also, measure your flour carefully—too little flour can cause over-spreading. If you want thicker cookies, add 2 tablespoons more flour. Using a large scoop and spacing them well on the tray helps maintain shape too.
-
Can I make these cookies vegan?
This recipe relies on butter, egg, and marshmallows, which typically aren’t vegan. However, you can try vegan butter, an egg replacer, and vegan marshmallows, though I haven’t tested this combo myself. Let me know if you try it—I’d love to hear how it goes!
Final Thoughts
Honestly, I can’t recommend this Costco Copycat Marshmallow Rice Krispie Cookies Recipe enough. Making them at home has become my go-to way to satisfy my cookie craving, and I know you’ll love the layers of flavor and texture as much as I do. Plus, the joy of biting into a warm cookie still melty with marshmallows? Priceless. Give this recipe a try—you might find it becoming your new favorite sweet treat to bake and share.
Print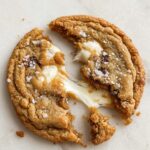
Costco Copycat Marshmallow Rice Krispie Cookies Recipe
- Prep Time: 25 minutes
- Cook Time: 13 minutes
- Total Time: 38 minutes
- Yield: 13 servings
- Category: Dessert
- Method: Baking
- Cuisine: American
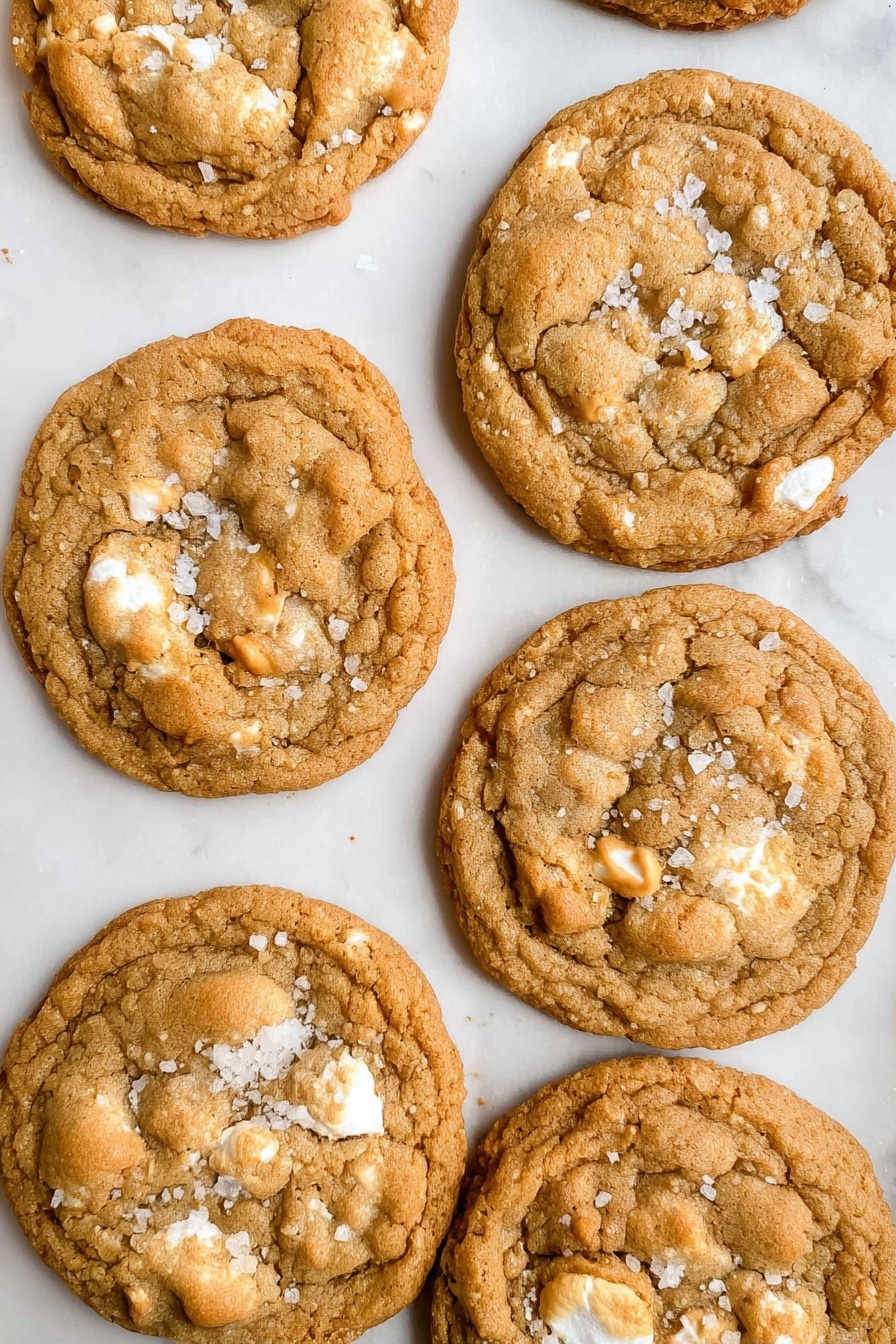
Description
Deliciously thin and buttery Marshmallow Crispy Cookies inspired by Costco’s famous treat. These cookies feature browned butter for a rich, nutty flavor, crispy rice cereal for crunch, and mini marshmallows for a gooey texture, topped with a sprinkle of flaked salt for the perfect balance.
Ingredients
Cookies
- 1/2 cup (113.5 g) salted butter
- 3/4 cup (165 g) brown sugar
- 1/2 cup (100 g) granulated sugar
- 1 large egg, room temperature
- 1 teaspoon vanilla (preferably vanilla paste)
- 1/2 teaspoon baking soda
- 3/4 teaspoon salt
- 1 cup (158 g) + 2 tablespoon all-purpose flour
- 1 1/2 cups (43 g) rice krispie cereal
- 2/3 cup (30 g) mini marshmallows
- Flaked salt for topping
Instructions
- Preheat Oven: Preheat your oven to 350 F and line a baking sheet with parchment paper to prepare for baking.
- Brown the Butter: Melt ½ cup of butter in a medium saucepan over medium heat. Continue cooking past the boiling point until the butter turns a golden brown color and emits a nutty aroma, stirring frequently to prevent burning. Pour browned butter into a bowl and chill in the fridge or freezer for about 10 minutes to cool.
- Mix Sugars and Brown Butter: In a medium mixing bowl, combine the cooled browned butter with both brown sugar and granulated sugar. Add the egg and vanilla, mixing on low speed until smooth, about 30 seconds.
- Add Dry Ingredients: Gradually mix in the salt, baking soda, and flour, being careful not to over mix to maintain the cookie’s texture.
- Fold in Crunch and Marshmallows: Gently fold in the rice krispies cereal followed by the mini marshmallows to evenly distribute them throughout the dough.
- Scoop Dough: Use a 3 tablespoon cookie scoop to portion large balls of dough onto the prepared baking sheets, spacing 4-5 cookies per sheet to allow for spreading.
- Bake Cookies: Bake for 13 minutes until the edges turn a light golden brown. Avoid overbaking to keep a chewy center. After baking, sprinkle the cookies with flaked salt to enhance flavor.
Notes
- For thicker cookies, add an extra 2 tablespoons of flour to the dough.
- Use a kitchen scale to measure flour accurately; if unavailable, spoon flour lightly into the measuring cup without packing.
- Browned butter adds a rich nutty flavor, so watch carefully during browning to avoid burning.
- Space cookies well on the baking sheet as the dough spreads thin during baking.
- Do not overbake to preserve the chewy texture in the center of the cookies.
Nutrition
- Serving Size: 1 cookie
- Calories: 180 kcal
- Sugar: 12 g
- Sodium: 110 mg
- Fat: 8 g
- Saturated Fat: 5 g
- Unsaturated Fat: 3 g
- Trans Fat: 0 g
- Carbohydrates: 24 g
- Fiber: 1 g
- Protein: 2 g
- Cholesterol: 30 mg

