
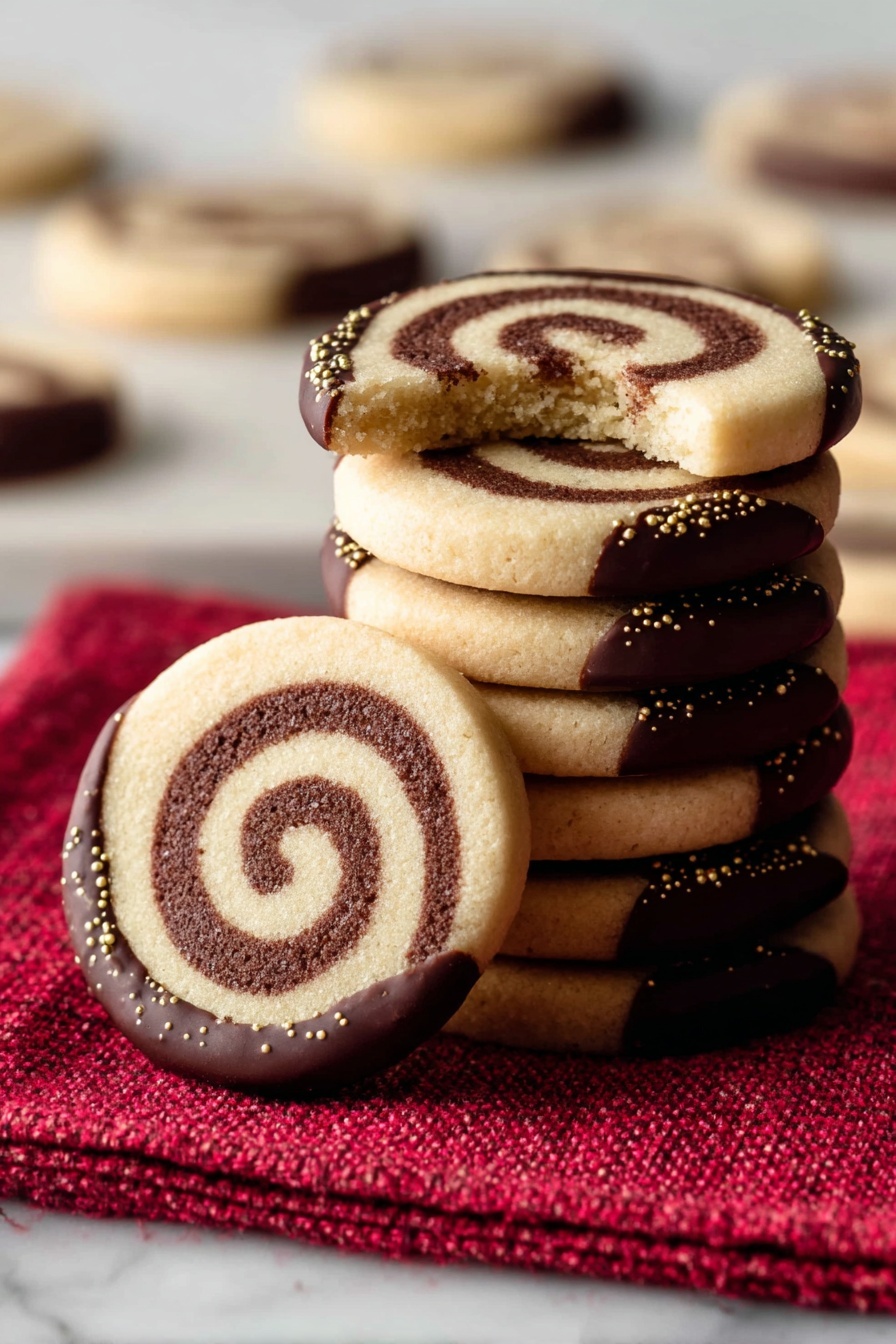
Chocolate Pinwheel Cookies Recipe
If you’re looking for a cookie that’s as fun to make as it is to eat, you’re going to love this Chocolate Pinwheel Cookies Recipe. These cookies are a delightful swirl of buttery vanilla dough and rich chocolate dough rolled into a stunning spiral that feels fancy but is actually super straightforward. I remember the first time I made them—I was blown away by how impressive they looked, but even more by how tender and flavorful they tasted. Stick with me here, and I’ll walk you through every step to ensure your pinwheel cookies come out perfect every time!
Why This Recipe Works
- Perfect Balance of Flavors: The vanilla dough is buttery and sweet, perfectly complemented by the subtly bitter, rich chocolate layer for a harmonious taste.
- Simple Yet Stunning Presentation: The rolled pinwheel shape creates an eye-catching spiral that makes these cookies a showstopper at any gathering.
- Texture That Delights: These cookies bake up tender but sturdy enough to hold their shape, with a slight crisp around the edges that’s irresistible.
- Flexible and Friendly Dough: The dough is forgiving and easy to work with, making these pinwheels a great project even if you’re not a baking pro.

Ingredients & Why They Work
This Chocolate Pinwheel Cookies Recipe uses wholesome, simple ingredients that come together beautifully. Each element plays a specific role, and I love how easy it is to find quality basics at any grocery store. Here’s a quick peek at why these ingredients make magic:
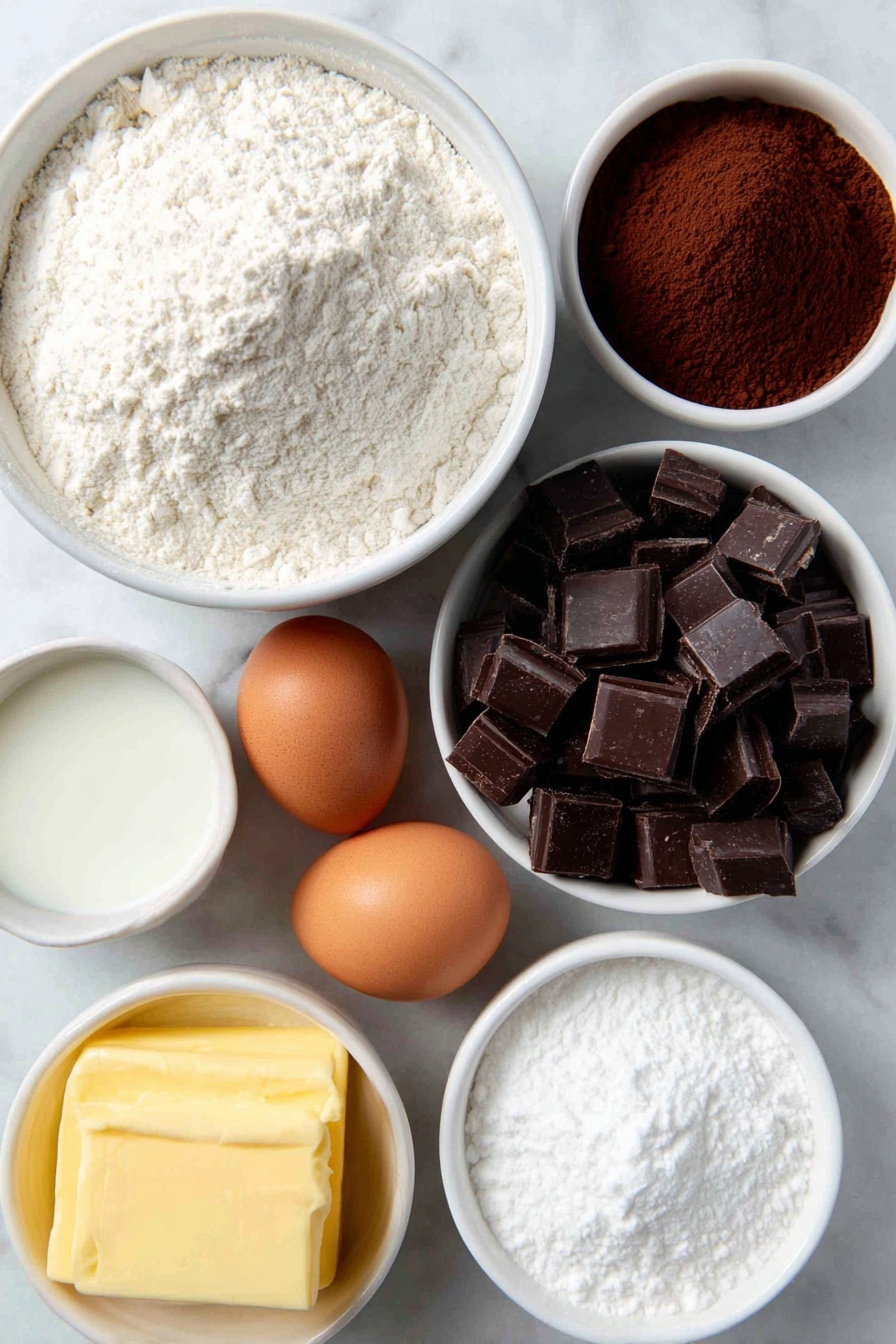
- All-purpose flour: This is the foundation for the dough, giving structure and that classic cookie crumb we all adore.
- Baking powder: Just enough to add a little lift without puffing them up like a cake.
- Salt: Balances the sweetness and enhances flavor depth.
- Unsalted butter: Key for a tender texture and rich buttery flavor; make sure it’s softened, not melted, for perfect creaming.
- Granulated sugar: Sweetens and helps create a slight crisp edge when baked.
- Egg and egg yolk: Provide moisture, structure, and richness.
- Pure vanilla extract: Brings warmth and aroma that enhance both vanilla and chocolate parts.
- Cocoa powder: Adds that deep chocolate flavor and beautiful dark hue for the pinwheel contrast.
- Milk: Just enough to soften the chocolate dough for easy rolling and blending.
- Espresso powder (optional): If you have it, it really intensifies the chocolate without tasting like coffee.
- Chocolate for dipping (optional): Melts into a luscious coating that elevates the cookies to a next-level treat.
- Sprinkles (optional): Adds fun color and texture if you’re feeling festive.
Tweak to Your Taste
One of the best parts about this Chocolate Pinwheel Cookies Recipe is how customizable it is. I encourage you to make this your own, whether that’s by altering flavors, colors, or even how you present them. I love experimenting with tweaks because it keeps the baking fun and personal.
- Flavor Swap: I’ve tried swapping vanilla for peppermint extract in the lighter dough for a festive twist—totally yum! Just add about 1/2 teaspoon with the vanilla extract and chill as usual.
- Color Fun: Adding gel food coloring to the vanilla dough can make these perfect for holidays or themed parties. Red and green pinwheels around Christmas? Yes, please.
- Sprinkle Roll: Rolling the logs in sprinkles or coarse sugar before slicing gives an extra crunch and a pop of color—perfect for birthdays or kids!
- Flour-Free Version: For those avoiding gluten, I haven’t tested a direct swap yet, but replacing the flour with a strong gluten-free blend can work—just chill the dough longer to firm it up for easier rolling.
Step-by-Step: How I Make Chocolate Pinwheel Cookies Recipe
Step 1: Cream Butter and Sugar to Fluffy Perfection
Start by beating your softened butter and sugar together until the mixture is light and fluffy—this usually takes about 3 minutes on medium-high speed with a hand or stand mixer. I like to stop and scrape the bowl sides down a couple of times so everything is evenly mixed. This step is key for achieving that tender cookie texture, so don’t rush it!
Step 2: Combine Eggs and Vanilla for Flavor Depth
Next, add in your egg, egg yolk, and vanilla extract. Beat on high speed until everything comes together smoothly—about a minute or so. This mix gives the dough richness and a lovely aroma that’ll fill your kitchen and make your mouth water.
Step 3: Fold in Dry Ingredients Carefully
Whisk your flour, baking powder, and salt separately, then add this dry mixture to the wet ingredients. Mix on low speed just until combined—you want the dough thick and a bit sticky but homogeneously mixed with no flour pockets. Resist the urge to overmix here, which can toughen your cookies.
Step 4: Divide and Color Your Dough
Divide the dough roughly in half. One half stays plain vanilla, the other becomes the chocolate dough. For the chocolate portion, beat in cocoa powder, milk, and espresso powder if using, to create that luscious dark dough. Don’t worry if it seems sticky—that’s normal and makes rolling easier later.
Step 5: Shape and Chill Both Doughs
Lightly flour your workspace—cocoa powder works wonders for the chocolate dough—and gently press each half into rectangle blocks about 4×5 inches, about 1 inch thick. Wrap well and refrigerate for 60 to 90 minutes. This chilling step transforms the dough to a firmer but pliable consistency, your best friend for rolling without cracking.
Step 6: Roll Out Dough Rectangles
Roll the vanilla dough on a lightly floured parchment sheet to an 8×14-inch rectangle, flipping the dough occasionally so it doesn’t stick. Place this in the fridge while you repeat the process with the chocolate dough (dust with cocoa powder instead of flour). Make sure the chocolate rectangle is just slightly smaller so no raw vanilla edges peek out.
Step 7: Layer and Start Your Pinwheel
Carefully lift the chocolate rectangle and place it on top of the vanilla dough. Smooth out any air bubbles or tears by gently patting with your hands. Trim uneven edges with a pizza cutter or sharp knife to keep the layers tidy—your spiral will thank you!
Step 8: Roll Into a Tight Log
Using the parchment under the vanilla dough, roll the layered dough starting from the long edge into a tight log. Go slow and steady, patching any bare spots with your fingers. This part takes a little patience, but it’s so worth it. Once rolled, cut the log into two equal halves and wrap them tightly for chilling.
Step 9: Chill the Dough Logs for 2+ Hours
Pop the wrapped logs into the fridge for at least 2 hours, or up to 4 days if you want to prep ahead. The longer chilling firms the dough so you get nice clean slices instead of squished cookies.
Step 10: Slice, Bake & Cool
Preheat your oven to 350°F (177°C) and line baking sheets. Slice the chilled logs into 1/2-inch thick cookies. Arrange them on sheets about 2 inches apart to allow for spreading. If your dough feels soft, a quick 10-minute chill on the baking sheet helps maintain shape. Bake for 14-15 minutes until edges are just lightly browned. Let them cool 5 minutes on the sheet before transferring to a wire rack.
Step 11: Optional Chocolate Dip & Decorate
If you’re feeling fancy, melt your chopped chocolate in a double boiler or microwave, dip half of each cooled cookie, and add sprinkles before the chocolate hardens. This extra step turns your cookies into dessert masterpieces perfect for gifting or parties.
Pro Tips for Making Chocolate Pinwheel Cookies Recipe
- Soft Butter, Firm Dough: Use room temp butter for creaming but chill your dough long enough so it’s firm enough to slice neatly.
- Parchment Paper Savior: Always roll dough on parchment so it lifts easily—lifting dough directly from your countertop almost always ends in tears.
- Be Gentle When Rolling: Don’t rush the pinwheel roll; a slow, steady approach helps avoid cracks and maintains the beautiful spiral pattern.
- Freeze Dough Logs: I’ve frozen these dough logs wrapped tightly for up to 3 months and baked straight from the fridge after thawing overnight—works perfectly!
How to Serve Chocolate Pinwheel Cookies Recipe
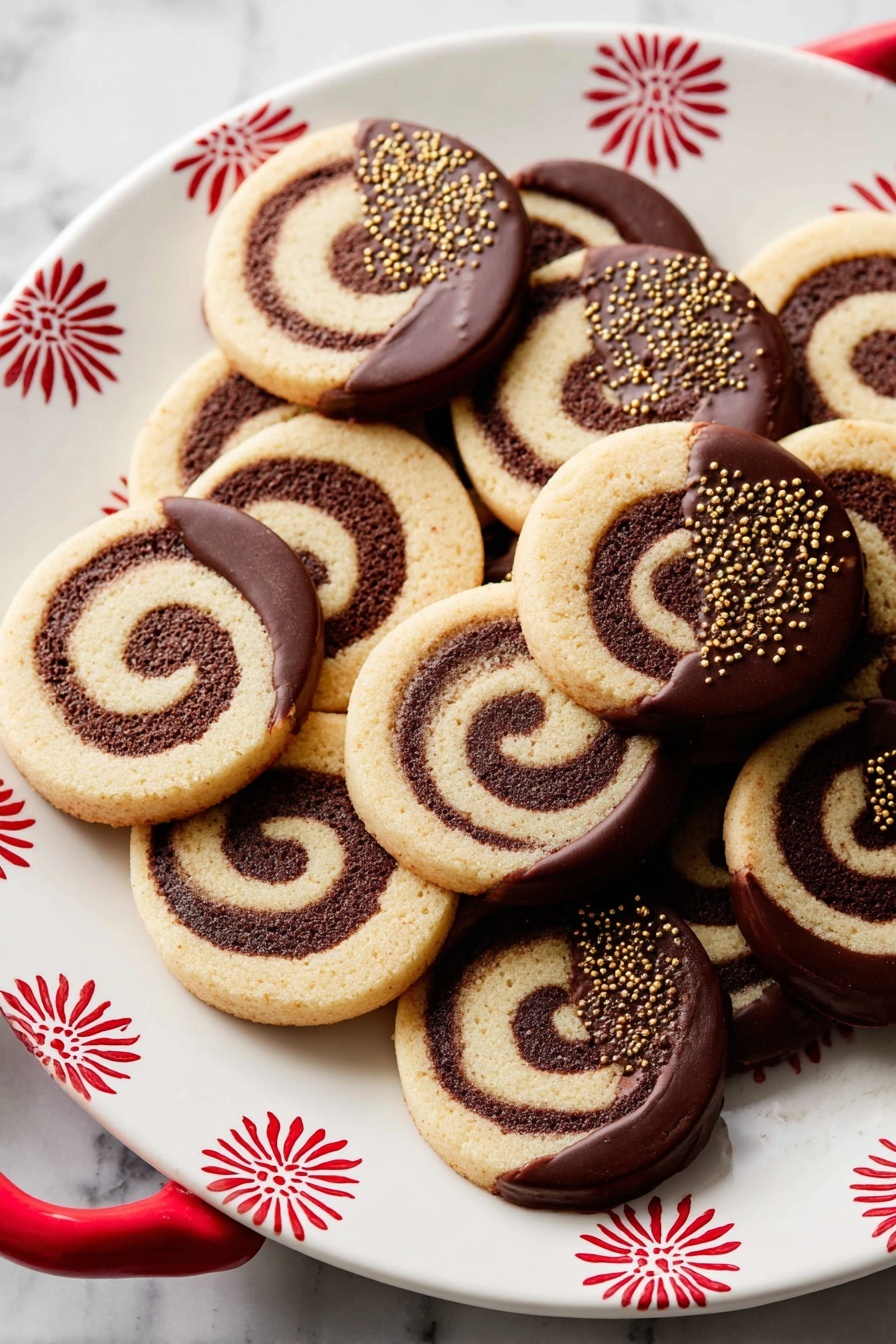
Garnishes
I usually keep it simple with these cookies, but here’s what I’ve loved: a dusting of powdered sugar after baking if I want a snowy look, or a light drizzle of extra melted white chocolate. For parties, colorful sprinkles on the dipped chocolate half add a playful touch that kids and adults alike adore!
Side Dishes
These cookies pair so well with a classic glass of cold milk, but I’ve also served them alongside coffee or hot chocolate for cozy winter gatherings. They’re a lovely sweet side for tea time, too! If you want to go all out, I’ve placed them on dessert boards with fresh berries and nuts, which elevates presentation beautifully.
Creative Ways to Present
For holidays, I like slicing the logs thinner for mini pinwheel cookies that can be stacked into towers or tin layers. Wrapping individual cookies in cellophane with a ribbon makes charming gifts. Another idea is arranging cookies in a circular pattern on a platter to highlight the swirl effect—it always gets compliments!
Make Ahead and Storage
Storing Leftovers
I store leftover cookies in an airtight container at room temperature, and they stay fresh and soft for up to a week. If dipped in chocolate, I recommend refrigeration after a few days to keep the chocolate from melting. Just bring them back to room temperature before serving for perfect softness.
Freezing
If you want to prep ahead, these cookie logs freeze beautifully for up to 3 months. I wrap them tightly in plastic and foil, thaw overnight in the fridge, then slice and bake as usual. You can also freeze baked cookies—just thaw at room temp or warm gently in the oven.
Reheating
To refresh cookies from freezer or fridge, pop them in a warm oven at 300°F (150°C) for 5-7 minutes. This softens the texture a little, bringing back that fresh-baked feel without drying out the cookies.
FAQs
-
Can I make this Chocolate Pinwheel Cookies Recipe without espresso powder?
Absolutely! The espresso powder is optional and just enhances the chocolate flavor subtly—it won’t make the cookies taste like coffee. If you don’t have it on hand, just skip it and your cookies will still be delicious and chocolatey.
-
How do I prevent my pinwheel cookies from cracking when rolling?
Chilling the dough until firm but pliable is key. If it’s too cold and hard, it cracks; too warm and it’s sticky and hard to handle. Rolling slowly and patching cracks gently with your fingers as you go also helps maintain that smooth spiral.
-
Can I color the vanilla dough for a different look?
Yes! Adding gel food coloring to the vanilla dough after dividing makes for fun, festive pinwheels. You can try pastel shades for spring or bold reds and greens for holidays. Just mix in a few drops evenly before chilling.
-
Do these cookies stay fresh, or are they best eaten right away?
They’re great fresh from the oven but also keep well stored at room temperature for about a week. If you dip them in chocolate, refrigerate after a few days. You can also freeze them baked or as dough logs for longer storage.
Final Thoughts
This Chocolate Pinwheel Cookies Recipe holds a special place in my kitchen because it’s both approachable and impressive. I love pulling them out for friends and family because they look like I spent hours on fancy baking, yet they come together with simple ingredients and straightforward steps. Whether you’re a cookie novice or a seasoned baker, I promise you’ll enjoy making and sharing these treats as much as you do eating them. Now, let’s get rolling—your next batch of pinwheel cookies awaits!
Print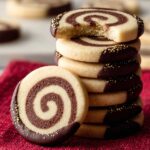
Chocolate Pinwheel Cookies Recipe
- Prep Time: 4 hours 15 minutes
- Cook Time: 15 minutes
- Total Time: 4 hours 30 minutes
- Yield: 28 cookies
- Category: Dessert
- Method: Baking
- Cuisine: American
Description
These classic Pinwheel Cookies feature a beautiful swirl of vanilla and chocolate dough, creating a delightful treat that’s perfect for any occasion. Made from scratch with a tender, buttery base, these cookies are chilled and rolled to perfection, then baked until lightly golden. Optionally dip them in rich melted chocolate and sprinkles for an extra special touch.
Ingredients
Base Cookie Dough
- 2 and 2/3 cups (333g) all-purpose flour (spooned & leveled)
- 3/4 teaspoon baking powder
- 1/2 teaspoon salt
- 1 cup (16 Tbsp; 226g) unsalted butter, softened to room temperature
- 1 cup (200g) granulated sugar
- 1 large egg + 1 egg yolk, at room temperature
- 1 and 1/2 teaspoons pure vanilla extract
Chocolate Dough
- 2 Tablespoons (10g) unsweetened natural or dutch-process cocoa powder
- 1 Tablespoon (15ml) milk
- optional: 1/2 teaspoon espresso powder
Optional for Dipping
- 6 ounces (170g) white, semi-sweet, or dark chocolate, finely chopped
- optional: sprinkles
Instructions
- Make the dough: Whisk the flour, baking powder, and salt together in a medium bowl and set aside. In a large bowl, beat the softened butter and granulated sugar together on medium-high speed until creamed, about 3 minutes, scraping down the sides as needed. Add the egg, egg yolk, and vanilla extract, then beat on high speed until combined, about 1 minute. Scrape down the bowl again.
- Combine dough: Add the flour mixture to the wet ingredients and mix on low speed until dough forms, thick and sticky. Remove dough from the bowl.
- Divide dough: Split the dough into two halves, roughly 800–900g total. Place one half back into the mixing bowl for the chocolate dough.
- Make chocolate dough: To the dough half in the bowl, add cocoa powder, milk, and espresso powder if using. Beat on low speed until well combined.
- Shape and chill: On a lightly floured surface, shape each dough half into a 1-inch-thick rectangle approximately 4×5 inches. Wrap both separately in plastic wrap or parchment, then refrigerate for 60–90 minutes until less sticky but still pliable.
- Roll out doughs: Roll the vanilla dough to an 8×14-inch rectangle on lightly floured parchment; refrigerate it while rolling out the chocolate dough to a slightly smaller 8×14-inch rectangle. Carefully layer the chocolate dough over the vanilla dough, patting gently to remove air bubbles and fix torn edges.
- Roll into a log: Starting from a long edge, tightly roll the layered doughs together using the parchment paper to help. Patch any cracks with fingers. Cut the roll into two 7-inch logs.
- Chill the logs: Wrap each dough log in plastic wrap or foil and refrigerate for 2 hours, up to 4 days.
- Prepare to bake: Preheat oven to 350°F (177°C). Line 2 baking sheets with parchment paper or silicone mats.
- Slice and bake: Slice each log into 14 cookies about 1/2-inch thick. Arrange cookies 2 inches apart on baking sheets. If dough softens, chill cookies on sheets for 10 minutes before baking. Bake for 15 minutes or until edges are lightly browned.
- Cool: Let cookies cool on baking sheets for 5 minutes, then transfer to wire racks to cool completely.
- Optional chocolate dipping: Chop chocolate and melt in a double boiler or microwave, stirring every 20 seconds until smooth. Dip half of each cooled cookie into melted chocolate and add sprinkles if desired. Let chocolate set at room temperature or refrigerate.
Notes
- Baked cookies freeze well up to 3 months. Thaw overnight in the refrigerator and bring to room temperature before serving.
- You can prepare the dough logs and freeze them up to 3 months before slicing and baking. Thaw overnight and continue as directed.
- You may tint the vanilla dough with gel food coloring after dividing to create colorful pinwheels.
- For non-chocolate variations, tint one half of the dough and optionally add different flavor extracts.
- To add sprinkles or coarse sugar, roll chilled logs in them before slicing. Use a pastry brush with water to help sprinkles adhere.
- Use baking chocolate bars (e.g., Bakers or Ghirardelli) for dipping, not chocolate chips, as chips contain stabilizers that prevent proper melting.
Nutrition
- Serving Size: 1 cookie
- Calories: 140 kcal
- Sugar: 10 g
- Sodium: 60 mg
- Fat: 7 g
- Saturated Fat: 4 g
- Unsaturated Fat: 3 g
- Trans Fat: 0 g
- Carbohydrates: 18 g
- Fiber: 1 g
- Protein: 2 g
- Cholesterol: 25 mg


