
Cheesy Garlic Butter Pull Apart Rolls Recipe
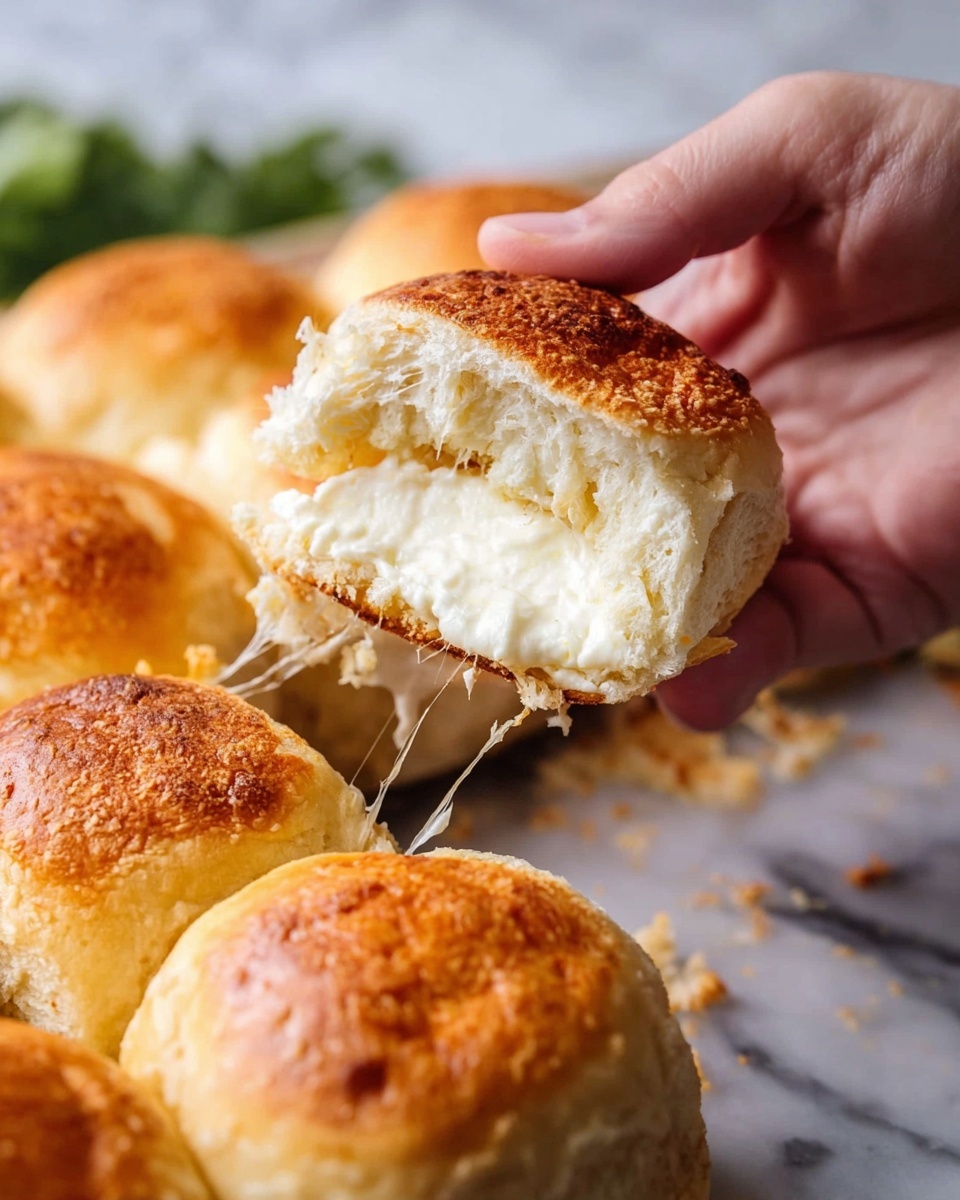
If you’re anything like me, comfort food that doubles as a fun, interactive experience in the kitchen always wins. That’s why I’m so excited to share this Cheesy Garlic Butter Pull Apart Rolls Recipe with you. Soft, buttery, garlicky, and loaded with gooey mozzarella, these rolls are pure magic fresh from the oven and perfect for pulling apart at any gathering or cozy night in. Trust me, once you try this recipe, it’ll become a staple in your baking rotation.
Why This Recipe Works
- Perfect Dough Texture: The dough is soft and tacky but not sticky, making it easy to work with while keeping the rolls tender and fluffy after baking.
- Balanced Garlic Butter Blend: Melted butter mixed with minced garlic and parmesan adds rich flavor layers that soak into every bite.
- Cheese-Stuffed Surprise: Each roll gets a cheesy center and a gooey mozzarella pull-apart effect that makes this recipe extra special.
- Easy to Customize: Simple tweaks let you personalize the flavors, so you always end up with your perfect version.

Ingredients & Why They Work
These ingredients come together beautifully to create a dough that rises well and bakes into soft rolls bursting with a mix of garlic, butter, and cheese flavors. Shopping tip? Opt for fresh garlic and good-quality shredded mozzarella for the best melty results.
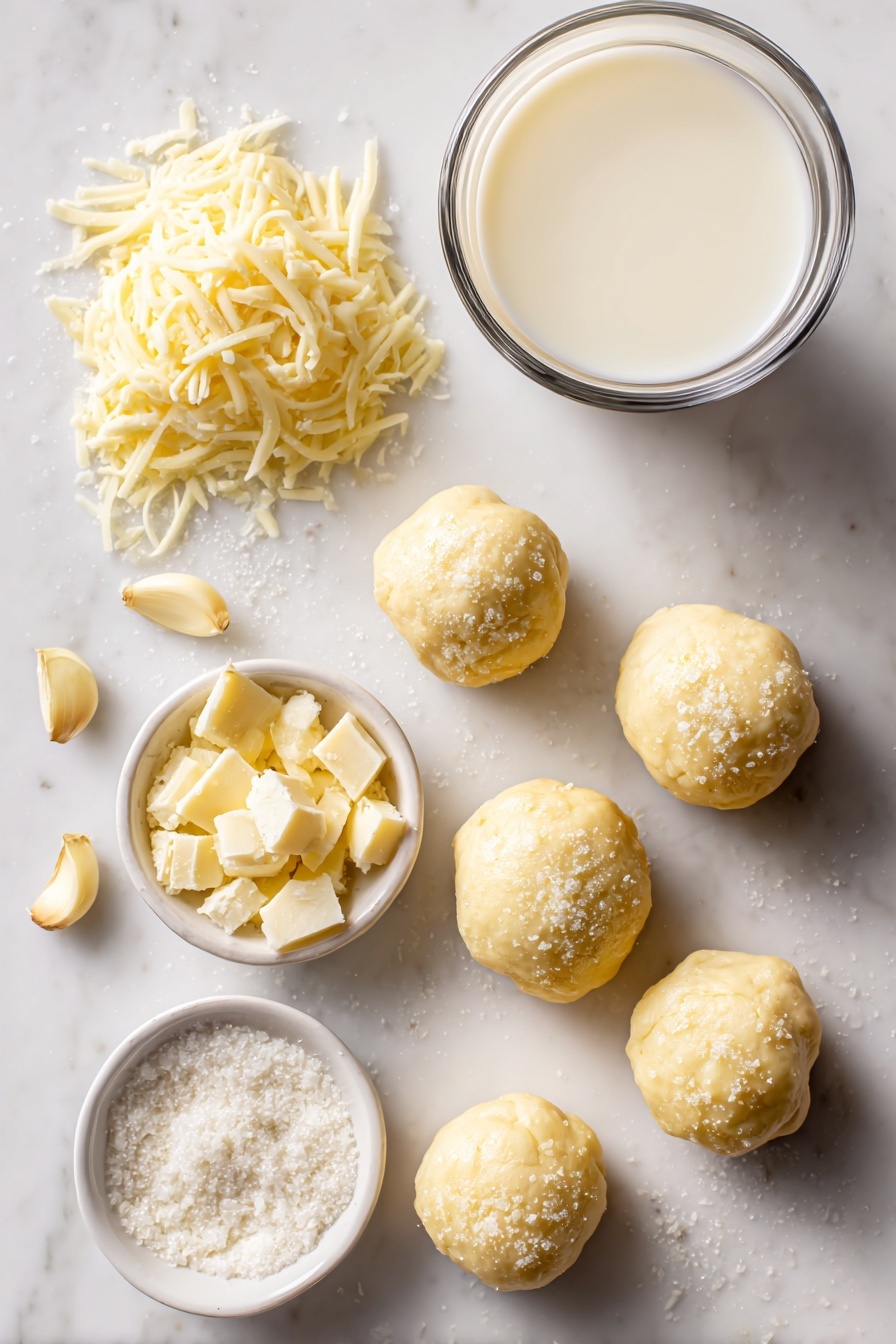
- Milk: Warm milk helps activate the yeast, making your rolls rise perfectly light and fluffy.
- Instant dry yeast: It’s quick-acting and reliable, so your dough proofs nicely without fuss.
- Granulated sugar: Just enough to feed the yeast and add a touch of sweetness balancing the savory flavors.
- Salt: Enhances flavor and controls yeast activity for good dough structure.
- Salted butter: Adds richness to the dough and the garlic butter coating, giving that classic buttery taste.
- Egg: Helps bind ingredients and enrich the dough’s texture.
- All-purpose flour: Provides structure to the dough while keeping it tender.
- Shredded mozzarella cheese: The star of the show—melts into ooey-gooey layers inside and between the rolls.
- Minced garlic: Fresh garlic ensures bold aroma and flavor in the garlic butter.
- Grated parmesan cheese: Adds a sharp, nutty kick that complements the mozzarella and garlic beautifully.
Tweak to Your Taste
I love making this recipe my own by swapping cheeses or adding fresh herbs right into the dough or on top of the rolls before baking. Don’t be shy — tweaking it to suit your flavor cravings is part of the fun!
- Herb-Infused: I often add chopped fresh rosemary or parsley into the garlic butter for a fragrant, fresh twist that pairs amazingly well with the cheesy rolls.
- Spicy Kick: One time I sprinkled a little crushed red pepper flakes on top before baking — you’ll love the subtle heat balanced with buttery garlic flavor.
- Cheese Swap: Experimenting with sharp cheddar or gouda instead of mozzarella gave me a deliciously different melt and taste.
- Less Butter: If you want slightly lighter rolls, try using half the butter in the garlic mixture or swapping salted butter for unsalted and controlling salt separately.
Step-by-Step: How I Make Cheesy Garlic Butter Pull Apart Rolls Recipe
Step 1: Prep the Yeast Dough
Start by warming your milk until it’s just about 100–110°F — warm enough to activate the yeast but not so hot it kills it. I usually nuke in 30-second bursts, checking each time with a kitchen thermometer. Then, combine the warm milk with yeast, sugar, salt, butter, egg, and part of your flour in a mixer bowl or large mixing bowl. Mix on low at first, then medium once the flour begins to incorporate. Add the flour gradually until the dough pulls away from the sides but stays tacky and soft. It took me a few tries to master the feel of the dough, but once I got it, shaping got so much easier!
Step 2: Let It Rise — Patience Pays Off
Place your dough ball in a greased bowl and cover with a towel or plastic wrap. Let it rise in a warm spot until it doubles in size — about 90 minutes. This rise is crucial — don’t rush it or your rolls won’t be fluffy inside.
Step 3: Shape Your Rolls & Prepare Garlic Butter
After your dough has puffed up, melt your butter and set it aside to cool slightly while you get rolling. Then, divide the dough into roughly 12 equal pieces. Roll each piece into a smooth ball, then gently press your thumb into the center to create a little pouch. Pop a pinch of mozzarella inside and pinch it closed — it’s like a cheesy little package waiting to ooze out later! Mix your minced garlic and parmesan into the melted butter, then dunk each roll in that garlicky goodness before placing it neatly in your greased pan. For that extra cheesy pull-apart magic, tuck extra mozzarella between rolls before their second rise.
Step 4: The Final Rise & Bake
Cover your rolls once more and let them rise for another hour, getting nice and puffy again. Preheat your oven to 375°F (190°C) while you wait. Then pop the rolls in and bake for 18 to 20 minutes until they’re golden brown on top and smell irresistible. The smell alone is worth the wait!
Pro Tips for Making Cheesy Garlic Butter Pull Apart Rolls Recipe
- Gauge Dough Texture: The dough should be tacky but not sticky; if it sticks to your fingers, dust flour sparingly to avoid tough rolls.
- Even Roll Sizes: Use a kitchen scale or measuring cup to portion dough evenly so all rolls bake uniformly.
- Don’t Skip the Second Rise: It may seem long, but this ensures irresistibly fluffy rolls with an airy crumb structure.
- Manage Garlic Intensity: If you prefer milder garlic flavor, reduce minced garlic to 2-3 teaspoons or toast it slightly before adding to butter.
How to Serve Cheesy Garlic Butter Pull Apart Rolls Recipe

Garnishes
I like to sprinkle a little fresh chopped parsley or finely chopped chives on top after baking to add color and a fresh, herbaceous note. Sometimes, a dusting of extra parmesan on top right after baking adds a nice salty crunch. Plus, it’s pretty!
Side Dishes
These rolls pair beautifully with soups like creamy tomato bisque or hearty chicken noodle, as well as with crisp green salads. They also make fantastic accompaniments to pasta dishes or grilled meats — basically, they’re the perfect sidekick for any meal needing a buttery, cheesy partner.
Creative Ways to Present
For a party or special family dinner, I’ve tried arranging these rolls in a wreath shape on a parchment-lined baking sheet for a festive look. You can even drizzle a little extra garlic butter and sprinkle herbs over the top before baking for an eye-catching centerpiece that screams homemade love.
Make Ahead and Storage
Storing Leftovers
Once cooled completely, I store leftover rolls in a large resealable plastic bag at room temperature. They stay soft for 3 to 4 days — just make sure to press out the air to maintain freshness. I’ve found reheating in a microwave for 15-20 seconds works well for a fast snack.
Freezing
If you want to keep them longer, these rolls freeze excellently. I wrap them tightly in plastic wrap, then place them in a freezer-safe bag or container. When ready, thaw overnight in the fridge and warm in a 350°F oven for 10 minutes to refresh their softness and melty cheese goodness.
Reheating
Reheat leftover rolls in a microwave briefly or for a more satisfying texture, reheat in a 350°F oven for about 8-10 minutes wrapped in foil to keep them moist. You can brush a bit of extra garlic butter on top before warming for an extra indulgent touch.
FAQs
-
Can I make Cheesy Garlic Butter Pull Apart Rolls Recipe without a stand mixer?
Absolutely! You can mix the ingredients with a sturdy spoon or spatula until it gets tough to stir. Then turn the dough onto a floured surface and knead it by hand until smooth and elastic. Just remember to add flour gradually and avoid adding too much to keep your rolls soft and fluffy.
-
How do I know when the dough has risen enough?
When the dough has doubled in size compared to its original volume, it’s ready. You can do the “poke test”—gently press your finger into the dough; if the indentation springs back slowly, the dough has risen perfectly.
-
Can I use other cheeses instead of mozzarella?
Yes! Mozzarella is ideal for its melting quality, but feel free to experiment with cheddar, gouda, or even a mix of Italian cheeses. Just keep in mind that stronger cheeses may alter the flavor profile, which can be a tasty surprise!
-
Is it possible to make these rolls dairy-free?
You can adapt this recipe by using dairy-free butter and a plant-based milk alternative. Use a vegan mozzarella to keep that cheesy pull-apart effect. The rise and texture might vary slightly, so keep an eye on the dough’s feel as you knead and rise it.
Final Thoughts
These Cheesy Garlic Butter Pull Apart Rolls have been a game changer in my kitchen — they bring everyone together to pull, share, and savor every melty, garlicky bite. I hope you find them as comforting and fun to make as I do, whether you’re baking for family dinners or bringing an easy crowd-pleaser to the table. Go ahead, dive in, and enjoy the warm, cheesy goodness. You’ve got this!
Print
Cheesy Garlic Butter Pull Apart Rolls Recipe
- Prep Time: 20 minutes
- Cook Time: 20 minutes
- Total Time: 3 hours 10 minutes
- Yield: 12 rolls
- Category: Side Dish
- Method: Baking
- Cuisine: American
- Diet: Vegetarian
Description
Delicious chewy pull-apart rolls filled with gooey mozzarella cheese and coated in flavorful garlic butter and parmesan. These cheesy garlic butter pull-apart rolls are perfect as a side dish or snack and come together with a soft, elastic dough that rises beautifully for a light and fluffy texture.
Ingredients
For the Rolls
- 1 cup milk (whole or 2%)
- 1 tablespoon instant dry yeast
- 2 tablespoons granulated sugar
- 1 teaspoon salt
- 3 tablespoons salted butter, softened
- 1 large egg
- 3 to 3 1/2 cups all-purpose flour
- 2 cups shredded mozzarella cheese
For the Garlic Butter
- 1/2 cup salted butter, melted
- 4 teaspoons minced garlic (about 4 cloves)
- 1/2 cup grated parmesan cheese
Instructions
- Warm the milk: Microwave 1 cup milk in 30-second increments until it reaches 100℉ to 110℉, or warm in a small saucepan on the stove over medium-low heat.
- Mix the dough: In a large mixing bowl or stand mixer fitted with a dough hook, combine the warm milk, 1 tablespoon instant dry yeast, 2 tablespoons granulated sugar, 1 teaspoon salt, 3 tablespoons salted butter, 1 large egg, and 2 1/2 cups of the flour. Mix on low speed, then increase to medium once flour starts to incorporate. Slowly add more flour, a little at a time, until the dough pulls away from the sides of the bowl. The dough should be soft, elastic, and tacky but not sticky.
- First rise: Transfer the dough to a large lightly greased bowl. Cover with a towel or plastic wrap and set aside to rise until doubled in size, about 90 minutes.
- Prepare garlic butter: In a small microwave safe bowl, melt 1/2 cup salted butter. Set aside to cool while you shape your rolls.
- Shape the rolls: Lightly grease a 9×13 pan or 12-inch cast iron skillet with nonstick cooking spray. Divide the dough into about 12 equal pieces and shape into balls by rolling on the counter. Use your thumbs to gently press open the center, add a pinch of shredded mozzarella, then pinch the dough closed to seal.
- Coat rolls and assemble: Stir 4 teaspoons minced garlic and 1/2 cup grated parmesan cheese into the melted butter. Dip each roll into the garlic butter to coat and place into the prepared pan. Tuck extra shredded mozzarella between each roll for extra cheesiness. Spoon any remaining garlic butter over the tops.
- Second rise: Cover again and set aside to rise until doubled in size, about 1 hour.
- Bake: Preheat the oven to 375°F (190°C). Bake the rolls for 20 minutes or until lightly browned.
- Serve and store: Serve warm or allow to cool completely. Store cooled rolls in a plastic bag for 3 to 4 days.
Notes
- No mixer? Stir ingredients with a spoon until too thick to stir, then knead dough with hands on a floured surface until soft and smooth, tacky but not sticky.
- To shape rolls, cup your hand and roll dough ball between your palm and countertop for 15 to 30 seconds to form smooth balls.
- Ensure milk is warmed to the correct temperature to activate yeast without killing it (100℉ to 110℉).
- Tuck extra shredded mozzarella between rolls for a gooey pull-apart texture.
- Use a well-greased pan or cast iron skillet to prevent sticking during baking.
Nutrition
- Serving Size: 1 roll
- Calories: 280 kcal
- Sugar: 4 g
- Sodium: 320 mg
- Fat: 14 g
- Saturated Fat: 8 g
- Unsaturated Fat: 5 g
- Trans Fat: 0 g
- Carbohydrates: 28 g
- Fiber: 1 g
- Protein: 8 g
- Cholesterol: 45 mg
